Posted on

How to Grow Areca Catechu from Seeds

Betel nuts are the stimulating seed of the areca catechu palm tree. A single betel tree can provide a nice supply of nuts, and getting them fresh is much easier than dealing with rock-hard dried nuts you are likely to find if you do not have your own tree. Growing betel nuts from seed does require a bit of time and effort, but it can be a rewarding experience several years down the line.

Most of the dried nuts you probably get for herbal use will be too old to sprout. Ideally, you want to get freshly harvested betel nuts in the husk. The nuts inside may look like the dried nuts you see for herbal use. They do not need to be green for germinating, so simply looking at the seed will not tell you if it is viable. A recently dried betel nut inside the husk will sprout. But they should be no more than a month from harvest for best results. July through early August is a good time to start looking for fresh areca catechu nuts for growing. There may be other parts of the world where these seeds mature at different times of the year. But we have had good results with seed from India that was obtained in late July.

Your fresh betel seeds will be in a fibrous husk similar to a dried coconut.  The first step is to peel this away to remove the nut. This can take a bit of effort, especially if you are planting a bunch of betel nuts. If you’ve ever pulled a coconut out of its husk, it is not quite that difficult due to the size. But the fibers are very similar. The process itself is self-explanatory. You start at the top and pry away the husk down both sides.

Betel seeds can take several months to germinate, so we recommend using a soilless growing media.  Perlite is ideal for this in order to minimize your chances of rot. Perlite, lacking nutrients,  does not support mold growth on its own, and perlite will hold water inside, releasing it as the media dried out. You certainly want to make sure you’ve removed all traces of the husk. The next step is to soak your seeds for several days in water. This will help the betel nuts soak in enough water for germination without having a sopping wet soil media. Starting with warm water will also help get slightly better absorption if you’re inclined to do so.  Be sure to change the water your seeds will be soaking in daily to keep everything clean. You may opt to sanitize your betel seeds in a mild hydrogen peroxide solution or bleach solution to remove any mold spores after this.

After several days of soaking, you should moisten your perlite. If you have a sprayer on your sink, this will help get an even dispersion. You can use a hand sprayer instead, but it will take a lot longer. You want the perlite to be fully wet without it dripping or allowing water to collect in the bottom of your container. An easy way to do this is to wet the perlite in a strainer. Let any residual water that really wants to come out drain, and then put it in your pot.

A wide pot is ideal if you’re planting multiple seeds in one container because they will need to be spaced about two inches at the very least. This is just for the germination period.  More space will be needed for the final growing location as these do produce full-sized tree if allowed to thrive. You should plant your betel nuts at least a full inch below the perlite surface.  So to be clear, the top of the seed should be an inch below the surface. That should put the bottom of the seed at about 2” .  This means you will also need a fairly deep pot to germinate your betel nuts.  At a 1” depth, they should remain moist most of the time,  even if the top dries out. Perlite will dry out faster than soil. So just try to replace any lost moisture every few days. It is ok if the top dries out a little bit. But you want to try to return the moisture to about what you started at. Germination can take several months.  Just be patient, try too keep the perlite from really drying out at all, and start checking your seeds after about 2.5 months to see if any are putting out roots.

As your areca catechu seeds develop nice roots, you can begin to think about planting each in their own pot or even putting them in the ground outside if you are in a tropical location. Sources indicate they are hardy in zones 11-12. They are not frost hardy, which means that established trees would probably only tolerate temperatures around 40-45 degrees Fahrenheit. Outdoors, betel trees can reach up to about 50 feet in height with a width about half of that. But like most plants, you can trim your trees to maintain a certain size, or you can container grow them to limit their size and be able to move them in the even of unfavorable weather.

Betel nuts require a well-draining, but moist soil with a ph around 6. Betel trees can tolerate saline soils and semi shade. Betel also prefers lower elevations, but they will tolerate some higher elevations. Betel trees can begin producing seeds in as little as 6 years, and they will continue to do so for up to 60 years. The fruits mature in about 6-8 months.

Posted on

Untangling Vines of the Amazon: A guide to Yage Vines

World Seed Supply has become known for offering a wide selection of yage vine seeds.  There is a wide array of different aya vines that grow throughout the Amazon. In this article, we will refer to the name yage or caapi to refer to all different vines, not just banisteriopsis caapi.  Originally, all of these were considered to be different strains of banisteriopsis caapi. But there are a variety of different strains and clones of “caapi” vine in addition to many different species that are not even caapi, or not even in the genus, banisteriopsis. These vines have been known only to natives until relatively recently, and the natives themselves tend to be familiar only with the vines that grow in their native regions.  So perhaps for the first time historically, we’re collecting these plants together and trying to draw on different information to sort out the differences between these plants.

We’re constantly being approached by customers who are confused. They want to know the differences between all these names. Are these just different names for the same vines?  In consulting with other experienced collectors and ethnobotanists, it appears the confusion extends even to them.  Some things are clear cut, while others are debated.  We’ve learned a lot over the past several years in dealing with the seeds, plants and vines of many aya vines. This is by no means the definitive guide on yage vines.  We still have some questions. But the following information is a summary of many of the different forms of yage vine out there, and we hope this guide will help clear up some of the confusion.

Caapi vine is often divided into different colors, namely red, black white and yellow. Yellow caapi vine typically refers to the traditional banisteriopsis caapi. The wood of banisteriopsis caapi is brownish yellow. Caapi seeds start out green but change to yellow with age. Banisteriopsis caapi has the most established traditional history of the yage vines and is what most people expect when they refer to caapi or yage. Banisteriopsis caapi is apparently divided into two distinct groups: Caupuri and Tunkunaca (also spelled Tuncunaca).  The basis for the distinction here is regarding the stems. This is a scientific basis for classification. Cauprui Caapi is characterized by especially knotty stems. Tunkunaca caapi, on the other h and, has smooth stems.  Based on that distinction, it’s reasonable to then assume that the other known strains are simply different strains or clones of either Tunkunaca or Caupuri.  Meanwhile, any Caupuri or Tunkunaca would be examples of yellow by color.

Caapi strain or clone names can derive in a variety of different ways. It could be possible for a strain to be named and passed on from a native population as it comes to the U.S.  It seems that Cielo caapi is an example of this phenomenon that traces back to Iquitos, Peru. Cielo is reportedly one of several types of yage that natives in Peru recognize …along with others that seem to be different species.  Cielo caapi was one of the original strains brought to the U.S. from Peru by Terrence Mckenna.  Cielo is now a commonly traded and sold variety in the U.S. that we can seemingly classify as, a strain of a yellow caapi  that derives specifically from natives in Peru.  There must be other strains named indigenously, although we are not aware of any other examples that are commonly found in the U.S. at this time.

Most often you find different caapi plants or seeds classified by the country or region they come from.  For example, Peruvian yellow caapi is a yellow caapi type that originates in Peru.  Brazilian Tunkunaca is a Tunkunaca strain (which makes it a yellow caapi) that is from Brazil. This type of naming is applied by non-native people to distinguish the vines by locations similar to how kratom strains are often distinguished by region.  Ourinhos is another common caapi strain. Although it may sound like something exotic made up by natives, Ourinhos is a municipality in the capital of Brazil, so it is likely that this name is just another example of a strain being named after the origin of that strain.   There is also caapi vine grown in regions where it is not native, such as Hawaiian caapi. This says nothing about the origin of the genetics.

A number of caapi strains are also distinguished by color. Perhaps the most confusing of the colors is white yage. There are apparently two plants that fall under the name “white yage”. One type of white caapi actually appears to be a form of banisteriopsis caapi. The leaves of the plant are the same as that of other banisteriopsis caapi plants, so we can at least say that it is a banisteriopsis species that is most likely banisteriopsis caapi.  But there is also another white yage vine. The leaves have some resemblance to banisteriopsis caapi leaves, but the two plants can easily be distinguished when compared side by side. Most notably, the leaves do not come off the stem in even pairs as they do with banisteriopsis caapi. The leaves on this white yage alternate, and they tend to be shinier with a slightly velvety underside.  The seeds of these two white yage varieties look nothing alike.  Judging by the seeds, it is appears this plant is not even in the genus, banisteriopsis.  The dark brown (almost black) seeds have a papery layer on both sides, and the entire structure has the shape of a spade if you consider the stem. As of yet, we have been unable to find anyone who can identify the exact taxonomy of this plant. It comes from Peru named simply as white yage. Most people are not aware that there are two plants under the same common name. But that just goes to show how taxonomy translation can be difficult and perhaps misleading when you have plants that are originally only known to native cultures by common names and then you try to fit that into a scientific system. Perhaps it also points out why scientific labelling is useful.

“White yage” is not the only yage vine that falls into a totally different genus than banisteriopsis.  Black caapi is botanically classified as alicia anisopetala. There seems to be one or more species of alicia that could have been yage vines.  In the U.S., black caapi is sometimes labelled as banisteriopsis caapi, but this appears to be a misclassification that began when black yage first appeared in the U.S. Again, this may go back to the notion of literally trying to translate common names into scientific names. When one says black caapi or black yage, there is a tendency to classify it as a black variety of what we know yage to be, which happens to be banisteriopsis caapi in this case.  So many ven dors began listing it this way. With little other information out there, people based their knowledge on this, which has led to a rather widespread confusion in the ethnobotanical community.  To date, we have not found any black yage that is actually banisteriopsis caapi, so it appears we do not have to worry about distinguishing two types of black caapi as we do with the white caapi vine.

Alicia anisopetala has black wood, with a lighter cross section. Looking at the dried vine on the outside, it may be easy to think that black yage is just a variety of b. caapi. But if you look at the cross section of black caapi (Alicia anisopetala), you can see the shape and color is different than that of yellow caapi.  This cross section is one feature we have used to determine that there is no black banisteriopsis caapi.  The leaves of the plant are also very different, tending to be more slender, especially when the plant is young. Alicia anisopetala seeds are also unmistakably different than those of any banisteriopsis seed. This is an easy feature to confirm that black yage is not even a species of banisteriopsis. Alicia anisopetla seeds have papery wings, and the entire seed structure makes the seeds look a lot like black papery butterflies.

Black yage is also known as “Trueno” caapi, which translates to Thunder in Spanish. Trueno appears to be another example of a strain or clone name that was given by natives. So when you see the name Trueno caapi, it is the native name for what we would call black caapi or what would scientifically be known as alicia anisopetala. These are all the same vine.

Red caapi is another primary variety of yage vine. As the name suggests, red yage wood ( and seeds) are both red.  Red caapi is actually in the genus banisteriopsis, but it is a different species.  Known botanically as banisteriopsis muricata, you can also distinguish red yage by its seed structure. Red yage seeds feature the typical banisteriopsis wing. However, red yage seeds tend to be smaller and lack the dimple on the seed end that banisteriopsis caapi has. As mentioned, red yage seeds are red in color. But it is more of a red brown. Nonetheless, it is easy to distinguish them by color if you know what banisteriopsis caapi seeds look like. Since the two plants are closely related, it may be difficult to tell the plants apart without looking at the wood. Banisteriopsis muricata has leaves that look pretty much identical to those of banisteriopsis caapi to the average person.

There is misinformation about red yage to be aware of. Red yage is sometimes listed online as Trueno, but it is important to realize that this is a falsehood. As mentioned previously, Trueno refers to black yage (Alicia anisopetala). This is a simple reversal of the facts.

There is also a specific clone of red yage known as McKenna Red. The Mckenna Red clone should be the exact clone from Dennis Mckenna’s farm in Hawaii. It is unclear whether there is any physical or alkaloidal difference with this specific clone.  One would imagine that it is a good example of the strain.  But it could be the result of one or multiple different specimens that happened to make it back from the Amazon into Mckenna’s collection. Regardless, there is a certain “collectable” value to having this strain because it is tied to Terence and Dennis Mckenna.  As a buyer, it is important to beware when sourcing this strain if you intend to specifically have Mckenna Red.  Considering the confusion in general with naming caapi, it is likely that ven dors and people have accidentally assumed this is a general nickname for all red yage. In some cases, they may have labelled different red caapi as Mckenna Red. It may not mean much in the end.  But as a collector, if you intend to have this particular strain you might want to focus on dealing with sources that have knowledge of the full lineage of their plants, so they can be assured it came from the Mckenna farm at one point.

Aside from the yage varieties that are named for their colors, two others worth mentioning are sky blue and boa yage. We have very little experience with boa yage, but it is a Peruvian vine that seems to be quite windy in tight coils.  Boa seems to be more of an admixture plant. It is almost certainly not banisteriopsis caapi, and it appears to be a plant is a different genus.

Sky blue yage DOES appear to be in the banisteriopsis genus. However, the seed structure indicates it is not banisteriopsis caapi or muricata. The seeds do have the characteristic banisteriopsis wing. But sky blue yage seeds have a much more rounded tip than either banisteriopsis caapi or muricata. Sky blue seeds are also smaller than those of banisteriopsis caapi, and they come in groups of 3 connected at the edges of their wings all the way down to the seed tip. Sky Blue yage seeds somewhat resemble lawn darts when they’re still connected in groups.  It seems some people wonder if sky blue caapi was the same as cielo, but it is not. You know now that the two are not even the same species.  With sky blue yage seeds now in the U.S. for the 2015-2016 season, we look forward to gaining more information and experimenting with this particular variety.

Although this is certainly not a complete list of all the yage vines known in the Amazon, it covers the most significant ones, and those which are likely to be available in the U.S. There are several widespread misconceptions that we’ve addressed, and hopefully this helps avoid confusion in the future. Having dealt with these seeds and plants in a business capacity, we are able to offer a bit of perspective. Our perspective incorporates not just what we’ve read, but our own experiences dealing with the seeds, live plants and dried vine as well as those shared with us by our suppliers and customers.  It is a cumulative vantage point. We still have much to know about the secrets of the Amazon’s plants. This is a learning process. But we hope to be able to add and revise as we learn so we can all see things a little more clearly.

Posted on

Germinating Erythroxylum Novagranatense Seeds

Erythroxylum Novagranatense is one of the most coveted plants among those who collect  entheogenic plants. Erythroxylum novagranatense  seeds and live plants are extremely hard to find, and they can be quite expensive in comparison to other seeds. The seeds are recalcitrant, meaning they cannot be dried and stored like most seeds, so that makes it especially crucial to be successful when you finally get your hands on some. The following guide is a tutorial on how to successfully raise erythroxylum novagranatense  seeds from berries to mature seedlings.

Depending on your source, erythroxylum novagranatense seeds may come to you as woody colored seeds or as red berries. If you’ve already gotten them as seeds, you can skip this part and move on to the next.  Consider yourself lucky, as this step can be a bit time-consuming. If you got erythroxylum novagrantese  berries, then you will need to properly remove the fruit and prepare them for germination. The first step is to put the seeds in a clear plastic zip seal bag and let them sit. Let the fruit turn mushy. It is ok if the fruit develops some mold. It does not mean you’ve failed. After all, in nature, this would be typical. But you must also remember that a plant in nature puts out hundreds of berries, hoping some may be successful. You want to maximize your chances, to hopefully get 100%  success, by cleaning the fruit off well.  So if you do get some mold, your job is to catch it before it goes past the fruit to begin infecting the seed itself. Ideally, you want to catch the seed when the fruit is mushy but right before mold develops. This is the key to getting the fruit off easily while also letting the seed develop naturally.

One way of getting the fruit off the seeds is to literally mush them around in your fingers. Then take a kitchen strainer and use the spray nozzle on your sink to wash the fruit through the strainer. If you don’t have a spray nozzle, then do the best you can. You can then wipe them with dry paper towel to help remove more of the fruit. You will probably still have some fruit trapped in the ridges of the seed, which you will want to get off. So take a tooth brush and brush your seeds. With a little more washing and dry paper towel, you should be able to end up with seeds that are totally pulp-free.

When your seeds are pulp-free, you’ve removed much of the mold threat. But you’re not out of the woods. Increase your odds by soaking the seeds in some water with dish soap overnight.  Just make sure the water is reasonably sudsy as you would use to wash dishes.  The next day, soak your seeds for another 15 minutes in H202 (household peroxide).  Peroxide helps to kill any undeveloped mold spores. At this point, your seeds are fully sanitized for the germination process.

The best medium for germinating erythroxylum novagranatense seeds is long fiber (whole) spaghnum moss. It is important not to confuse this with the ground peat moss you use in soil mixtures. Ground peat looks like dirt. You want the long fiber spaghnum moss used for venus fly traps or hanging baskets, which is essentially the dried, whole moss plant. If you got your erythroxylum novagrantese as cleaned seed, they may have actually shipped them in this.  Then you need to do nothing but wait for sprouts. If not, you’ll want to take a spray bottle with a mix of water and about 1/3-1/4 H202. Use that to hydrate the spaghnum moss. You want to hydrate the moss enough so that a few drops will come out when it is squeezed, but you don’t want it sopping wet. If you had to imagine a perfect middle ground between sopping wet and dry, that’s where you want to be. If you’re familiar with mycology, then hydrate to field capacity. The H202 in the water will give an added layer of protection from pathogens. Then simply fill a plastic zip seal bag with the moss and your seeds. Then wait.

Check back on your sown seeds about every week. They will sprout fine at room temperature.  It will usually take about 1-2 weeks for the erythroxylum novagranatense sprouts to begin from berry.  Even if you leave the seeds in there sprouted for a week or two, they will still be ok. So you really do not need to check every day. Once you see sprouts, let the tap roots come out at least a half inch. You can leave them in there for quite a while. They do really well in the moss and can last for several weeks without being planted.  You can move the seeds to soil at any point after they sprout, but you maximize your chances by waiting until they are big enough that the seed won’t have to be buried under the soil.

Now you’re ready to sow your erythroxylum novagrantese seeds in soil. Ideally, you want to use a premium brand of potting soil, such as Fox Farm. It is important to avoid garden soil or any type of soil mix for outdoor use. Avoid Miracle Grow potting soil as we’ve frequently found that it contains gnats. Sowing your sprouted seeds should be fairly straightforward beyond that. You want to bury the tap root and leave the seed head above ground.  But save that spaghnum moss from the last step. You will want to use the spaghnum moss as a mulch layer. Spread your moistened moss over the top of the soil so that it fully covers the soil surface. You may need to use some extra moss besides what was in the plastic bag with your seeds.  Use your H202 solution to hydrate any new moss you use. This moss layer will help with hydrating the soil below, but it will also help keep any seed heads in contact with it hydrated. This type of hydration allows the seed coats to fall off more easily as the seedlings develop. This single step may make a difference in the success of at least some of your seedlings that would have otherwise died.

Erythroxylum novagranatense  seedlings enjoy light, so you should use the best light you can give them. LED is the cheapest to run, but a good system does require some investment. LED is often the best option for the serious homegrower. We recommend these lights if you are looking for something that will really produce well indoors. Fluorescent lighting works very well, and if you can afford to do so, put them under two T5 tubes. These are the really thin tubes, which have the best spectrum for growing plants.  If you’re on a budget, you may use one or two CFL bulbs.Place the light source directly above your seedlings.  If you plan to grow outdoors, keep the seedlings inside until they are developed into plants. You’ll then need to properly acclimate them to the outdoors as well.

Most people stop here with their setup, but a fan is essential to indoor growth and proper seedling development.  Erythroxylum novagranatense stems tend to be very thin, and they will lean without proper support. By having a fan blow on the seedlings just enough to keep them rocking back and forth, you train the stems to be strong, and they can ultimately support more foliage. The increase in airflow also increases the plants’ supply of c02.   You can even add additional c02 to your plants by mixing yeast, water and sugar and letting the fermentation process continually provide Co2 in your grow area. You will need to regularly feed the yeast with sugar and dilute the solution with water. But his can essentially be maintained for the life of your plants.

Many people do not ever reach the seedling stage when growing erythroxylum novagranatense, so we hope this guide will help many of you to have a high success rate. But we also talk to many people who end up killing their mature plants after a year or two of growing. Erythroxylum novagranatense is one of those plants that requires good conditions to be constantly maintained. Drying out once can be detrimental. So we would like to leave you off by recommending that you always make sure your plants are hydrated, but not over-watered.  Always make sure your plants are in big enough pots. That will also help keep them from drying out.  If you’re planning to be away for any length of time, check out the guide in our Cultivation Database on setting up your plants when you’re leaving on vacation.  We look forward to your success stories and pictures.


Posted on

Misc. Articles / Guides – World Seed Supply

Visit the links below to read our miscellaneous grow guides or articles:

Untangling Vines of the Amazon: A Guide to Yage Vines

Choosing Cacti for a Beautiful Garden

How to Set up your Plants before a Vacation

Treating Pests on Houseplants: A Complete Regimen

Unpacking Plants and Preparing them for Growth After Shipping

Vermiculite vs Perlite: What is the difference?

When Should I Plant Flower Seeds?

Why Mulch?

(Back to Main Table of Contents)

(Shop Live Plants) (Shop Seeds)

Posted on

Germination Guides – World Seed Supply

Visit the links below to read our various grow guides on seed germination:

Growing Psychotria Viridis from Seed and Cuttings

Germinating Hard-shelled Seeds Such as Mimosa, Acacia and Bundleflower: The Hot Water Technique

Germination Instructions for Ginkgo Biloba

Germination of Anadenanthera Colubrina and Anadenanthera Peregrina Seeds

Germination of Cacti Such as San Pedro Cactus, Peruvian Torch and Other Spiny Friends

Germination of Theobroma Cacao (Cocoa/ Chocolate)

How to Germinate Banisteriopsis Caapi Seeds

How to Germinate Coffee Seeds with World Seed Supply’s Rinsing Cycle 

How to Germinate Hawaiian Baby Woodrose Seeds (HBWR)

How to Germinate Lotus Flower (Nelumbo Nucifera) Seeds

How to Grow Calea Zacatechichi from Seeds and Cuttings

How to Grow Klip Dagga (Leonotis Nepetifolia)

How to Grow Tobacco; From Seed to Harvest

Propagation and Cloning of Phalaris Grass

World Seed Supply’s Easy Guide to Morning Glory Growing

World Seed Supply’s Guide to Growing Heimia Salicifolia & Myrtifolia

World Seed Supply’s Guide to Perfect Poppies

World Seed Supply’s Mandrake Germination Guide

World Seed Supply’s Voacanga Africana Grow Guide

Germinating Erythroxylum Novagranatense Seeds

(Back to Main Table of Contents)

(Shop Live Plants) (Shop Seeds)


Posted on

General Plant Grow Guides – World Seed Supply

 Visit the links below to read our various grow guides on plant cultivation:

Growing Kratom Indoors: How to Grow the Easy Way

Growing Psychotria Viridis from Seed and Cuttings

How to Grow Calea Zacatechichi from Seeds and Cuttings

How to Grow Klip Dagga (Leonotis Nepetifolia)

How to Grow Tobacco; From Seed to Harvest

How to Set up your Plants before a Vacation

Propagation and Cloning of Phalaris Grass

Salvia Divinorum Cultivation Explained

Treating Pests on Houseplants: A Complete Regimen

Unpacking Plants and Preparing them for Growth After Shipping

World Seed Supply’s Complete Pepper Growing Guide

World Seed Supply’s Easy Guide to Morning Glory Growing

World Seed Supply’s Guide to Growing Heimia Salicifolia & Myrtifolia

World Seed Supply’s Guide to Perfect Poppies

World Seed Supply’s Mandrake Germination Guide

World Seed Supply’s Voacanga Africana Grow Guide

(Back to Main Table of Contents)

(Shop Live Plants) (Shop Seeds)


Posted on

Cactus Grow Guides – World Seed Supply

Visit the links below to read our various grow guides on cactus cultivation:

Acclimating Indoor Cacti to the Outdoors

Cacti Seedling Care: World Seed Supply’s Venting Technique

Choosing Cacti for a Beautiful Garden

Germination of Cacti Such as San Pedro Cactus, Peruvian Torch and Other Spiny Friends

How to Root a Cactus Cuttting

How to Transplant a Cactus Seedling

Preparing Fast-growing Columnar Cacti for Winter Dormancy

(Back to Main Table of Contents)

(Shop Live Plants) (Shop Seeds)

Posted on

How to Transplant a Cactus Seedling

Cacti are generally very resilient, but they can be susceptible to issues in the seedling stage. when transplanting a cactus seedling, here are some tips. At World Seed Supply, we usually send cacti seedlings bare root to save on shipping. This means the cactus seedling will be shipped without soil, something that is fairly common when it comes to cacti. Cacti will have no problem lasting without soil or water during a trip in the mail. Even seedlings, can survive weeks without water. Larger cacti can go months, even over a year without any water. The following guide is intended to help you transplant columnar cacti seedlings.

When you get your cactus seedling, you will need a pot and soil. Any commercial cactus soil will work, such as Miracle grow or (we prefer) Schultz’s. You can find these in most garden centers year-round with the rest of the bagged soil. You can use anything as a pot, but you are best off using a smaller pot than something big that the plant will grow into. A bigger pot with more soil seems to increase the chances of rot. A 3″ seedling can do well in a standard 8oz. foam coffee cup or similar size pot. Something smaller will suffice too. . Although clay pots are common for cacti because they suck out excess moisture from the soil, we do not like to use them. We prefer exercising more control over the watering by just giving the plant the proper moisture.
The most important thing in transplanting a cactus seedling is to make sure the base of the cactus seedling stem is well-supported. If the cactus stem is leaning, that puts internal pressure on the vascular system of the cactus seedling, and that pressure seems to cause rot in many cases. This scenario is like cutting of circulation to your extremities. It can eventually cause them to die. So you want to ensure you bury the cactus seedling enough that it will stand on its own. Secondly, you want to make sure the soil is packed firmly enough to keep the plant standing. But if the plant has a tendency to lean, the pressure of the plant’s weight can displace the soil over time and let the plant fall. So we often recommend staking the cactus seedling on both sides.
You can use a wooden skewer or some unfolded paper clips to make supports on either side of the cactus stem. Twisty ties, such as those used to tie bread bags, are a great way to secure the plant to the two supports. They are much easier to undo than string, and you can mold them into a spiral pattern that leaves virtually no pressure on the stem. It is vital that you do not secure the cactus too tightly. You’re just looking to help prop it up until the roots grow deeper and the stem strengthens.

“When to water” and “How much?” are perhaps the most pressing questions new growers have when transplanting cacti seedlings. You must consider that when being transplanted the roots have been damaged to some degree when the cactus seedling was uprooted from its former location. Cacti have the ability to root from a cutting without any roots, so losing some roots should not prevent the plant from being transplanted. But the damage can  be a place where pathogens can enter the plant. So it is a good idea to give the plant at least a week or two to heal before you water. It can help to dip the roots lightly in rooting hormone powder before you transplant your cactus seedling. When you eventually do water, you want to spray deep into the soil. Try to keep moisture off the cactus seedling stem. This will keep the potential for rot down and encourage the roots to grow outward. Once the cactus seedling has been growing stable for a while, it is a good idea to water from below the pot and let it draw up moisture or spray between the soil and the pot so that the water pools down below. Your overall moisture needed is dependent upon things like light, temperature and whether your plant is in active growth. There’s not set amount to water because it depends on how fast the water is evaporating and how much water your cactus is using at the current rate of growth.  But initially, you just want to water enough that the plant will not totally dry out. Generally, this requires less water than you expect.
Success in transplanting a cactus seedling is dependent upon it getting back into growing mode. You can do this with proper lighting. NEVER, put a cactus seedling directly outside. You think of cacti as being able to handle harsh sun, but this is sure to fry a cactus seedling. We usually recommend starting your cacti seedlings under fluorescent lights. T5, which are the skinny tubes, are the best. But you can always use a simple CFL bulb in a desk lamp.
Window light is usually not enough to keep a cactus seedling growing well. it will often grow fast and skinny. The fast growth is not ideal. The plant will not fatten up. Cacti and other plants do this to get an advantage on other plants they perceive to be blocking out their light. They grow tall to reach up over where light may be, but it creates a lack of support for future growth. If you see this, you need more light. If you see the stems turning red, they are sunburning. A harsh sunburn will cause the cactus stem to scar.  You may get some reddening if your plant is too close to a fluorescent bulb, but it will usually not scar if you are careful. So this that is why these lights are recommended. Only attempt transplanting your cactus outside when it is past the seedling stage. And even then, you must acclimate it slowly.
Aside from this, it is a good idea to keep a fan blowing on your seedlings. You do not want the fan blowing your cactus seedling over. Just keep enough air flowing to circulate it. That will give the plant the carbon dioxide it needs to keep healthy, and it will keep enough oxygen in the area to limit the growth of other pathogens.
Cactus seedlings are live organisms, so transplanting always puts them at some risk. But knowing the proper techniques you can do to support seedling growth is always helpful. If you keep all the techniques in the guide in mind, it will give your cacti seedlings the best chances of a successful transplantation, and you will go on to raise happy healthy cacti from seedlings.


Posted on

How to Germinate Coffee Seeds with World Seed Supply’s Rinsing Cycle

Coffee makes an excellent houseplant that is very easy to care for.  Coffee plants can even be grown indoors in relatively low light conditions. But growing from seed can be challenging for growers.  The following guide is intended to show you one method for growing coffee seeds. This guide can be applied to any coffea species, including arabica, catura, canephora, racemossa and kona.

Coffee seeds present two primary challenges to growers: They take a long time to sprout, and they are prone to rotting. This is exacerbated by the fact that coffee seeds grow inside a fruit. Any remnants of this fruit material, even if you think it has been cleaned off,  is an absolute magnet for bacteria and mold. So the first step is to remove the papery outer layer covering the seed. The innermost seed should be a very light color. Sometimes this layer will already be peeling off a little.  Make your best effort to remove it entirely.

We ran a side-by-side comparison growing coffea arabica seeds with and without the papery outer coating.  The batch with the seed coat had about double the amount of seeds to start with, simply because it was more work to peel them. But this extra step up front appeared to be worthwhile. The coffee seeds that had the seed coats removed not only needed less intervention to combat mold growth, they actually seemed to germinate quicker.  The smaller batch without the seed coats had two sprouts emerge before the other batch had any. Another advantage of the seed coats being removed is that you can see the taproots inside the seed before they actually emerge because of the lighter color. So you have a much better idea of when they are about to pop through.

In the past, we’ve sprouted our coffee seeds in soil. This is certainly the normal way to germinate the seeds. You can pre-soak the seeds for a day, then bury them in soil and come back to check on them after a few weeks. But we’ve applied a soil-less germination method that we like to use for other seeds that have a long germination period and a high propensity for mold growth to coffee seeds.  This is what we like to call The Rinsing Cycle. The ability to treat the mold and check on the seeds without disturbing them is much preferred. The method is actually quite simple.

Once you’ve pulled off the paper coat, soak the seeds in water for 24 hours. After that, drain the water and rinse them through a strainer under a faucet or sink sprayer in order to wash off any dead material or germs. Place the wet seeds in the bottom of a bowl or tupperware and cover the container with a plate in order to keep moisture in and mold spores out. Your ultimate goal from this point on is just to keep the seeds moist until they sprout without mold getting any foothold. We accomplish this by letting them sit a day or two in the covered container after they’ve been soaked and rinsed. Every day or two, cover the seeds with some hydrogen peroxide to kill whatever may have started growing.  If you see them fizzing a lot, then the peroxide is killing off a lot of harmful organisms. If not, then you’ve probably kept your seeds relatively sanitary.  But in any event, once you’ve let them fizz for a while in the h202,  rinse them through the strainer again. Let the water drain. Then place the seeds back in your container and cover it back up with the plate. By repeating this cycle, you should ensure that the seeds never dry out, and they should avoid mold.  You’ll be able to see them sprout, and you can move them to soil when they’re ready.

Once your seeds have sprouted, you want to let the tap roots get to be about 1/4 inch before moving to soil. Keep them in the rinsing cycle until this point. Then simply stick the seeds in the soil with the tap root facing down. The seed should be pushed about halfway into the soil with the other half sticking out.  The taproot will be fully buried at this point. Use a rich fertile soil.  You may add 1/3 concentration of vermiculite to your soil for extra water retention.

It is vital to make sure the coffee seeds stay moist after germination in order for the leaves to emerge. If the seeds dry out, you may end up with a seed on a stem that never opens up.  Even though you have a stem, the leaves can be entombed in the hard seed, never able to break out. You can spray the seeds themselves on a daily basis to make sure they remain moist and soft.  Keeping the air generally humid will help with this. We’ve even experimented with covering each seed with a tiny piece of moist paper towel, and this worked. It may also be beneficial to use a moist layer of whole spaghnum moss above the soil. This is another way to keep moisture in contact with the seeds after they’ve risen up and out of the soil. Any effort you can make to keep them soft will improve your chances of success.

Once you’ve got coffee leaves showing, you’re past the hard part. Coffee seedlings are usually very easy to grow. You can transplant your coffee seedlings to individual cups or cells and keep them under a small light or in a sunny window. Coffee is a forgiving plant. It tolerates most indoor light conditions and does well at room temperature. Coffee prefers moderate water.  But as long as you don’t let the soil get bone dry, it should not die. If you’re aiming to move your coffee plants outside, make sure to wait until they are at least 6-12 inches and you must make sure to harden them off properly.

 SHOP OUR STORE FOR COFEE SEEDS & LIVE COFFEE SEEDLINGS

Posted on

World Seed Supply’s All-Natural Hot Cocoa Recipe

Here’s a quick and easy recipe to enjoy this winter.  This tasty recipe offers a healthy alternative to sugary hot cocoa packets with just about the same effort involved.


Ingredients:

1 Cup unsweetened vanilla almond or soy milk (may substitute with skim/regular milk)

2 Tablespoons Raw Cacao Powder

2 Tablespoons honey

Pinch of stevia extract

Dash of cinnamon powder

In a small sauce pan, pour your cup of soy, almond or cow’s milk and turn the stove on a medium to low heat. Add in your cocoa powder, honey and stevia extract all at once. Sprinkle on a little cinnamon powder. Then, with a fork, beat the mixture as it heats until all the clumps disappear. Once the clumps are gone and the mixture begins to simmer, it is ready to drink.  In the same time it would take your water to boil to make your instant cocoa, you can have a natural and healthy version.  This cocoa is sweetened by stevia, just like it traditionally was.  We add honey to this because some people may not be used to the taste of stevia. The honey adds a more familiar version of sweetness for most people.  You will find this to be more bitter than your standard cocoa, but it’s something most people can come to appreciate. If not, then you can always add more sweetener.

Posted on

How to Germinate Hawaiian Baby Woodrose Seeds (HBWR)

Germinating Hawaiian Baby Woodrose seeds can be tricky for some growers. Two factors that make Hawaiian Baby Woodrose somewhat difficult to work with is their hard seed coat that does not allow moisture to easily penetrate and a tendency to rot easily. This guide will assist you in overcoming both of these factors so that you can successfully germinate your seeds.

When beginning germination, the first thing you must do is prepare the seeds to receive moisture from the outside so that they embryos can wake up. To do this, you want to file the hard seed coat thoroughly. This process is called scarification and can be accomplished using either a file or some large grit sandpaper. You want to file the seed coat away from the little circle on the seed (the germ eye) and towards the pointy end of the seed. This is because the root of the seed will come from the end with the germ eye, and you do not want to damage it with your filing.

Next, you want to load the seeds up with moisture so that they can germinate quickly. If you were to leave them in the soil without soaking, it would be difficult for them to absorb enough moisture, especially because most of the moisture would have to enter through the nick you made by filing. Soaking will also soften up the seed coat to allow the root to emerge through the other end. Simply submerge your seeds entirely in plain water and let them sit for 24 hours. After 24-hours you will notice that they are swollen, which means they have taken up the water they need to sprout.

The point where germination usually fails is after soaking. The soaked seeds tend to rot easily, especially in soil. Therefore, it is advised to use an inert medium such as a paper towel. Wet a paper towel in pure hydrogen peroxide so that it is moist but not soaking. The paper towel should not leave excess moisture on the surface of a table if it has the proper moisture content. You are using hydrogen peroxide instead of water because peroxide has the ability to resist mold and bacteria better than water. Before you place your seeds in the moist paper towel, blot them dry with a dry paper towel. This will remove any dissolved material on the outside of the seed that pathogens can breed on.

Fold your seeds up in the peroxide paper towel and place them in a plastic zip seal baggie. Do not seal the baggie though because you want some airflow. Check the seeds each day for germination and to make sure the paper towel is not drying out. If it is, you can add some additional peroxide. Once you notice sprouts and the roots are about ¼” long, it is time to transplant them into soil.

Hawaiian Baby Woodrose likes a soil that is rich, well-draining and has good airflow. Plant your seeds with the root facing down at a depth of about ¾”. Keep the soil consistently moist (not wet) at room temperature. From this point on, your seedlings should be easy to grow. Established plants enjoy plenty of sunlight but will survive indoors (without flowering) as well.

This is a picture of the seeds prior to the germination process on 12/19/10

The picture shows the scarification of the seed coat.  In this case a file is used. Sandpaper will also work. The seeds are being filed away from the germ eye toward the point of the seed.

Next, the seeds are soaked for 24 hours in plain tap water

As yyou can see, after a 24-hour soak, the seeds on the left are considerably swollen compared to the non-soaked seeds on the right.

The soaked seeds are put into a paper towel soaked with hydrogen peroxide and placed into an unsealed zipper baggie. These are the seeds on 12/22/10 (3 days after the initial process began)

Next, the seeds will be put into soil to begin growing. For reference, here is a picture of last year’s seeds after they began emerging from the soil.

Argyreia nervosa is best grown outdoors. If you are doing indoor growing, you will need a system with significant output if you want to have any chance of flowering. We recommend Electric Sky LED Grow Lights.  They have a home model and a more professional model.  Fluorescent lights may not have enough output, and other forms such as high pressure sodium and metal halide are expensive to run and can get very hot. There are other types of LED lights, but not all of them are that great. We can say from experience that the Electric Sky does the job, and they even offer a 90-day guarantee.

Posted on

Germination of Anadenanthera Colubrina and Anadenanthera Peregrina Seeds

The following guide outlines a procedure for germinating anadenanthera colubrina and anadenanthera peregrina seeds. Known commonly as cebil, anadenanthera colubrina is the predominant species on the market. Although yopo seems to be a more prolific common name for seeds of this type, almost all peregrina seeds on the market are actually seeds of anadenanthera colubrina. The problem is most likely born out of ignorance rather than deceit. Looking at the seeds alone is not enough to distinguish the two species, and the trees themselves are quite similar. The problem is exacerbated because each species has multiple types, and the seeds of colubrina range in appearance from small, thick, nearly black seeds to big fat reddish seeds.  Many mistake the different forms of colubrina for being peregrina. But having had both species at one time or another, we can confirm that the seeds cannot be told apart by simple observation. Fortunately, for the purpose of this guide it does not matter. With the seeds being nearly the same, they can be grown the same way, which ultimately means they can be combined into one guide. 

Anadenanthera seeds typically do not have issues sprouting. They can be stored for at least several months to a year without going bad. Even seeds that you might expect to be immature can sprout. The more pressing issue with anadenathera seed germination seems to be mold and rot.  For a tropical plant, it is staggering how little moisture is needed for these seeds to rot. The outer seed coat is just a papery thin layer that is shed as the embryo develops.  This tends to be a good host for unwanted invaders.

It is important that you choose a well-draining soil rich in hummus.  Potting soils with a high peat moss content are not usually ideal. Avoid seed starting soil mixes.  Compost is good if it has not been outside. Commercial cactus potting soil is ok too. Sterilizing the soil may be beneficial, but it is not required.

For a number of years we planted anadenanthera seeds on their side so that the bottom rim of the seed was pressed down into the soil until the top rim was even with the soil line and just visible if you looked down at the soil. Usually the goal that way would be to guess the fine line between too much and too little soil moisture. Most often, too much moisture was the issue. The soil might look dry, but the swollen seed would be covered with cottony mold. Success did happen, but it was usually a numbers game.

More recently, we tried another method, which follows the natural way seeds would be dispersed. When the seed pods dry, the right and left sides snap apart from the bottom, spilling the seeds on the ground. As you’d imagine, the seeds land flat on the ground. So that is how they should be sown. It is common for small seeds to be surface sown, but the general rule in sowing is to bury seeds at a depth proportionate to their thickness. So you hardly see big seeds germinated in this manner. Anadenanthera seeds are the exception to this rule. This way minimizes contact with the moisture that causes rot. There was a question as to whether they would get enough moisture to sprout this way. But it seems these seeds are especially adept at drawing in moisture. That explains why they have such a tendency to rot in the soil, even when it is rather dry. Even this way, there are no guarantees, but it should offer significant improvement over the alternative methods.

Surface sowing offers three main advantages that seem to contribute to the better success we’ve experienced by using this method. As anadenanthera seeds germinate this way, they will send a tap root out the back of the seed downward into the soil. As the embryo matures a bit, the seed will quickly rise up off the soil floor where the pathogens concentrate. That is to say it rises out of the soil quicker than when it is buried. If we are to associate the soil with pathogens themselves,  these are three advantages. The seed will be out of the soil much quicker this way. So it also minimizes the time it remains in contact with pathogens.  It will only contact the soil, on one side. So it minimizes the amount of contact with pathogens. It also limits the ways in which the plant can overdraw water from the soil. So it limits the factors that can cause pathogens to flourish.

Although you may get to the seedling stage fine, young seedlings can still rot rather easily. The leaves are extremely delicate, and a plant that is not happy will almost certainly die or become stunted. Be sure to keep the soil from getting too moist before the seedling has matured.  You do not want the roots or lower stem to rot. It is better to use less water but to water more frequently at this stage of growth. As long as the lower soil (below the surface) has some moisture, that’s what you want.  Standing water breeds pathogens. Spraying the soil is good because it allows you to add a small bit of moisture that will be used up or evaporate without standing.  But make sure that you don’t focus so much on shallow spraying that your lower soil dried out. The soil below the roots needs to be moist to encourage root expansion.

Watering will also be proportionate to the amount of light and heat you give the plant. Once the seedlings sprout, we recommend putting them under direct artificial lighting. This will encourage them to grow thicker, quicker and stronger. The sooner that happens, the less likely you are to fail. Use a small fan just to get them to gently rock. Surely, you do not want to blow off the delicate leaflets. But the rocking motion will increase the strength of the stem.  Air will also help keep the soil fresh, and it will increase the gas exchange that is necessary for photosynthesis.

SHOP OUR STORE FOR ANADENANTHERA SEEDS

Posted on

How to Root a Cactus Cuttting

Supplies:
 1 Cactus Cutting
Cactus Soil
Perlite
Large Plant Pot
2-3 Stakes
A few feet of rope or string
Like other plants, columnar cacti such as San Pedro Cactus and Peruvian Torch can be reproduced as cuttings. Many columnar cacti have adapted to be able to grow roots from just about anywhere on the plant in the event that a piece would break off. We tend to think of rooted cuttings standing upright, but that is not how it would happen in nature. Most likely, a cactus arm or tip would break off and land on its side. Many people do not realize it, but a broken cactus arm can actually root on its side and send up one or multiple growing tips. But for the purpose of this guide, we will talk about how to root cactus cuttings in the upright position.Rooting cuttings is very simple and actually does not require much effort at all. After all, a cutting that roots in nature has no human help at all. The same idea should be kept in mind when rooting at home. Rooting really does not involve you other than to set up your cactus cutting in the position you want the cactus to grow in. Many people stress themselves out over what they can do or might be doing wrong to get the cactus cutting to root. But the truth is that the cutting will root on its own when it is ready. The amount of time it takes for a cactus cutting to begin rooting can be anywhere from a few months to several months. As long as the cutting does not rot, it will root. So your job in rooting the cactus is simply to set up the cactus, prevent conditions that could lead to rot and have patience.One of the conditions that is helpful for preventing rot on your cactus cutting is providing airflow to the buried tip of your cactus cutting. That means you want to have a soil that is not compact. Perlite is the best way to avoid compaction and provide aeration in your soil. Perlite is a type of highly porous volcanic glass that resembles pumice. Perlite appears as small, round, non-uniform, white particles. Some people mistake perlite in potting soil mixtures for Styrofoam balls. Even if you are using a commercial cactus potting soil, we at World Seed Supply recommend adding at least 50% perlite to your soil. This may seem like a lot, but it will keep the airflow constant so you can avoid rot.Aside from limited airflow, the other condition for rot is moisture. So it is important that your soil is dry before you use it. Unlike rooting plant cuttings where moisture is imperative for the cutting to survive, cactus cuttings already store the moisture they will need until they root. The cactus flesh does not absorb water well on its own and is prone to infection. It is believed that when the cactus becomes thirsty, it will actually trigger rooting. So aside from rot, it is counterintuitive to the rooting process itself.Once you have your soil mixture you want to fill up a large pot. You want to use a good-sized pot if you have the room. For a 12” cactus cutting, a pot that is about 10” in diameter and 10” deep is ideal. Sometimes pots can be expensive, so even a bucket or similar large container you might find at the dollar store will work if you drill holes in the bottom. This will give your cactus the room it needs to grow once the roots begin growing. If you want nice thick growth, a good root system is essential.

Before you root any cutting it is essential to make sure that it is well-calloused. Just like a scab over a cut, a wound, in this case a slice, on a cutting will scab over. A well-calloused cutting will be dry rough and hard. If there is any moisture present on the cut, leave it in a dry place to finish healing. If you not follow this advice you will almost certainly have to deal with rot.

We usually position the cactus upright, burying the bottom 3” of the cutting underneath the soil. If your cactus cutting is not a tip, it does not matter which side is up or down. At a 3” depth the cutting should be able to stand up on its own. If not, go a little deeper. This is a suitable depth for helping the cactus stand up. But it also gives enough flesh below the soil for roots to come from. You can even bury the cutting a little deeper if you do not mind it starting out shorter. With a good root system, it may just give you a taller cactus in the long run.

If you are rooting indoors, your cactus cutting can probably get away without being staked. But if you want to be on the safe side or you have pets or are rooting outside, then you can use stakes to hold the cutting upright. You can use two to three stakes place around the cactus to hold it up. Stick them deep into the soil so they can gain a good foothold so that they offer maximum support. Wrap a length of rope or string around your stakes and the cactus cutting at the point where they all meet. You can use several wraps to help secure everything together. Then tie it off. Leave the cutting at room temperature, and the roots will form when the cactus is ready. And most important of all, do not water.

SHOP OUR STORE FOR A WIDE RANGE OF TRICHOCEREUS CACTI CUTTINGS & MORE
Posted on

How to Germinate Lotus Flower (Nelumbo Nucifera) Seeds

Lotus (nelumbo nucifera) is one of the most iconic flowers in history, and its presence can really improve the look of ponds and fountains on your property.  But lotus seeds have an extremely thick seed coat that will keep water out unless you give it some help.  The act of wearing down the seed coat to facilitate germination is called scarification.  In the case of the lotus seed, the scarification must be rather intense.  This impermeable barrier allows the lotus seed to remain viable for years, but it means a little extra work for the grower. This guide will show you just what to do and how far to scarify your seeds to give them the best chance of success.

While you can scarify many seeds on sandpaper and with other abrasive materials, it is best to use a metal file to scarify lotus flowers seeds due to the especially hard coat.  Even with a file, scarification can take a little bit of elbow grease.  We recommend scarification on the side of the seed.  It is best to place the file on a table and press the seed into the file as you rub it back and forth so you can have gravity work with you.  By trying to hold the file and the seed, it will take a lot more effort.

You will notice that the lotus seed has essentially three layers.  There is an outer shiny layer, which ends where you see the white ring on the seed in the photo.  Then there is another dark layer that comprises most of the seed coat and which will account for most of your effort when filing. There is then a yellowish layer inside the seed, which you will see once you file through the seed coat.  As you start to file, you will see a ring form.  You want to keep going until the inner part of that ring begins to turn a light tan color as you approach the yellow inside.  The seed in the picture has just broken through the seed coat and into the yellow layer.  We usually aim to stop right before this actually breaks through because it increases the chance that an infection can take hold. But if you keep the conditions clean, it will usually not affect the seed.  With that said, you do not want to file into the yellow layer if you can help it

Now that you have filed down the hard shell, water can penetrate into the embryo to begin germination.  Your next step is to toss the seeds directly into a glass or bowl or water.  Any amount of water that will fully cover the seeds is fine.  The seeds will start to swell initially. You will continue the soak until the seeds actually sprout.  This will usually take about a week, but it can sometimes take longer, especially if you did not scarify enough.  You will notice that the water can get cloudy pretty quickly. Therefore, you will want to be sure to change the water daily to reduce the risk of infection.

When the lotus seeds finally sprout, they will split open and a stem will pop out. The lotus is unique in the sense because most seeds will sprout with a taproot emerging first. In the case of the lotus, the foliage emerges first. This stem actually contains an immature leaf that will later develop. When the stem becomes about 2-3 inches it will form an angled bend, which will then straighten out. You can plant the seed at this point or choose to wait until roots form. The roots will form out of the base of the stem. It is best to sow the sprouts directly into your pond, but you can choose to sow in 8” pots and transplant later. In the case of a fountain or a manmade pond that does not have a soil bottom you can plant the seeds in large containers that you will submerge.

OFFERING LOTUS SEEDS IN SEVERAL COLORS 

Posted on

How to Grow Tobacco; From Seed to Harvest

Growing tobacco from seed is easier than you might think. If you can grow tomatoes, then you should be fine with growing tobacco. After all, tobacco and tomatoes are in the same family (Solanaceae). The truth is that growing your own tobacco is cheaper, and while it is not necessarily healthier, it may in fact help you avoid a lot of artificial chemicals that you really don’t need.

The first decision you need to make is the soil type. Tobacco is notorious for requiring lots of nutrients, so a very fertile soil is absolutely essential. We have found that using pure compost for growing tobacco works very well with very minimal organic fertilization needed afterwards. In fact, if you’re going to be doing any serious amount of gardening, it might be worth starting your own compost pile or getting a truckload of compost delivered for the season. In our area, you can get anywhere from one to several yards delivered for $100-$200. You can use it to spruce up existing beds and gardens. Plus, depending on your needs, it is likely to save you over the cost of buying multiple bags of commercially made soil.

You will notice that tobacco seeds are very small. Even the largest tobacco seeds are still considerably smaller than even a poppy seed. The general rule when dealing with seeds that small is to sow them on the surface of the soil. In nature, small seed, such as tobacco seed, tends to be produced in large amounts. These thousands of small seeds tend to be scattered over the top of the soil and washed into various crevices in the soil where they can eventually take hold. Since small seeds are so easily washed away by wind or rain, we recommend using trofts to start your tobacco seeds rather than direct seeding. We have also found that aluminum roasting pans with drainage holes made in the bottoms work well for starting small seeds.

Since water is likely to carry your tobacco seeds and clump them together in areas where the water pools most easily, we’ve found that it is best to engineer this process ourselves. By using a stick or finger to make rows in the soil, you can determine where your tobacco seeds might end up if pooling occurs. Another option is to make poke marks over the entire surface of the soil so that you end up with a series of small holes. You’ll eventually be separating your tobacco seedlings anyway, but this will help a little with spacing beforehand.

It is safe to sow tobacco seeds outside once any danger of frost has passed. We like to keep our trofts in partial sun to start off. This is to ensure that the tobacco seedlings will not have a chance to dry out if we are not completely on top of our watering. Sometimes a hot spell will catch you off guard and dry out your young tobacco crop before it even gets off the ground, so by keeping the seedlings a bit shaded, it will give you more of a buffer. Seedlings in nature often tend to be shaded by larger plants anyway, so you are essentially recreating this experience. As for watering during the seedling stage, we like to keep the soil continuously moist. If there is a forecast of a strong storm, take measures to protect your tobacco seedlings from the direct force of rain so that the seeds will not be washed away. Usually putting your tofts or trays under a deck, an awning or even a lawn chair will help in such instances.

In our experiences, we have found tobacco seedlings to transplant very well. For instance, we have separated fully crowded tobacco seedlings at less than an inch in diameter (from leaf to leaf) and put them into the ground with nearly 100% success. The key is to use a fork to carefully separate roots, disturbing them as little as possible. Ideally, you should wait until plants are about 2” in diameter if you were initially able to provide that much space for them to get that big in your troft. Upon transplanting, you want to preserve as much of a rootball as there might be without taking it apart. Press a little hole in the soil about the same size as the rootball, lay it in and fill in around the edges nicely. Tobacco plants average about 2 feet in width, so a spacing of around 3 feet between plants and 5 feet between rows is the minimum you want to allow. If growing nicotiana rustica, a closer spacing may be used. The other key to successful transplanting is to provide plenty of moisture around the newly transplanted tobacco seedling. If you keep the tobacco transplants consistently well-watered, there should be no problems with them taking hold. Pay special attention to your newly transplanted tobacco until you’re sure the plants are putting on new growth.

As mentioned earlier, tobacco is known to use up a lot of nutrients. Compost is extremely nutrient-rich. But we usually will supplement the compost with a dose of bloodmeal about every two weeks. Simply scratch out the soil about an inch deep over an area several inches around the stem of the tobacco plant so that the bloodmeal will penetrate the surface of the soil. Add your bloodmeal and then smooth the soil back out so that the bloodmeal is mixed in. Be sure to remove and competing weeds as you do this.

Once tobacco starts flowering, most of the energy of the plant goes into that process. Some growers will choose to harvest their tobacco leaves before flowering begins to end up with the highest quality tobacco. But most growers choose just to top the plants. By removing the flowering tops, it will allow more energy to go back into leaf production and increase overall tobacco harvest. Once the leaf tips begin turning yellow, the plants should be harvested. Harvesting should be done in the morning after the dew has dried from the leaves.

There are numerous ways of curing tobacco, and it is a science that can be pretty involved. At the most basic level, the entire tobacco plant can be cut at the base and hung upside down to dry. Leaves can also be removed from the stalk and bundled at the stems in small bundles for drying. But beware that bundles tobacco leaves leaves tend to stick together, so leaves used for cigar wrappers should not be dried in this manner. Curing is typically done in a tobacco curing barn. But a well-ventilated, dark shed or even a garage can suffice. Air curing tends to produce tobacco that is high in nicotine but low in sugars. It is normally used for cigar and Burley tobacco. Allow 8 weeks for the tobacco to fully cure.

 OVER 20 TYPES OF TOBACCO SEED and More!!

Posted on

Growing Psychotria Viridis from Seed and Cuttings

Although we will be talking about psychotria viridis, the same techniques that are used for viridis can also be used for related species like p. alba, p. nervosa and p. carthagenensis. Psychotria viridis can be propagated by both seeds and cuttings. While stem cuttings work well, psychotria species are unique in that they can even be cloned from a single leaf. This allows plants to be multiplied much more rapidly. While leaf cuttings are generally the preferred method of propagation, we will discuss the various ways to start new psychotria plants.

Psychotria viridis and its relatives are notoriously hard to grow from seed. The seeds are generally only viable for a few months, and germination tends to be very slow. With such a long germination period and the presence of fruit around the seeds, psychotira viridis seeds are prone to rot. For the sake of freshness, it is ideal to have seeds in the berry, although seeds that have been removed are fine too. If you are starting out with your psychotria seeds in the fruit, you will want to remove all of the fruit from the outside of the seed.

Each psychotria berry should contain two seeds. If you allow the seeds to dry in the berry, they tend to stick together to form what looks like one round seed. If this is the case, you will want to separate the seeds. You can sometimes accomplish this by squeezing the seed pair until they split. Otherwise, you may need to locate the seam between the two with your thumbnail and press in. The dried fruit will be black on the outside and may flake off easily once the seeds are separated. If not, you should scrape off as much as you can because it will provide more of a foothold for bacterias and molds.

One you have clean psychotria seeds, you will want to soak them in a mild bleach solution. A 10% solution should work fine without harming the seed. Again, the intention is to provide as much of a sterile starting point as possible. Soak your seeds for about 15 minutes.

Once the psychotria seeds have been soaked, they are ready for planting. Some growers find that it is advantageous to use a non-organic growing medium such as sand or rock wool. By using something like this, it deprives the environment of nutrients that molds and bacterias could enjoy. The seeds need only to be planted about 1/8? deep. Keep the soil moist and be patient. You can expect to wait one or more months before you see anything.

If you are not up for the challenge of growing phychotria viridis from seed or do not want any genetic diversity in your crop, you are better off using cuttings to reproduce. Of course, you would already need to have a phychotria viridis plant to do this. Technically, stem cuttings can be taken from any stem material. But it is ideal to use thinner stems that have new growth on them. It will also improve your success to remove larger leaves because they will sap the cutting of needed moisture. While you may use something like spaghnum moss, perlite or vermiculite to root cuttings in, simple water will do the trick. You may add a bit of rooting hormone if you have some, but it is not required. Keep your plant covered with some sort of clear plastic whether it be a plastic bag or a Chinese soup container.

Stem cuttings will give you a larger plant than the other methods, but they require more starting material. With that same stem cutting, you can probably make several leaf cuttings. Leaf cuttings are also the simplest cuttings to make. Some psychotria viridis grow guides suggest to remove the leaf so that you take off with it a piece of the stem’s skin. We have not found this entirely necessary. If you can manage, then do so. But if you fail, do not panic. Since the tip of the leaf is the first to lose water, it is common to cut off the tip.

Another optional trick is to snap the leaf’s center vein in one or more places. Just take the leaf between your thumbs as if the vein was a stick you were snapping. You want to segment the central vein without breaking the leaf apart. It is then possible for shoots to come from each of these segments. Once you have prepared the viridis leaf, all that is needed is to bury about half of it in any direction. In other words, you can place it upright or on its side. Just like with a stem cutting, you want to cover it with clear plastic and give it a few weeks. It will not be long before you have your own psychotria jungle.

SHOP OUR STORE FOR PSYCHOTRIA VIRIDIS SEEDS & PLANTS

Posted on

How to Set up your Plants before a Vacation

Depending on the size of your plant collection, leaving for a few days can turn out to be a burden. Aside from the personal attachment, you may have a considerable amount of money wrapped up in your collection. And while you might find someone to sit your child or pet, you might have a harder time finding an understanding plant sitter. But before you run to start a career in this new profession, there’s a solution for those previously rooted to their homes.

They sell these glass globes that hold water. The user sticks the tube end into the soil. As the soil dries, it draws it from the globe as needed so that a continuous supply of water is available. These are probably a viable option for those who have one or two plants. But what about the serious collector?

The solution lies in the topic of my fifth grade science project: transpiration. As a plant uses up water, it exits through its leaves and goes into the atmosphere. But if you can harness that moisture and recycle it, you can create a hydration system for each plant. Sounds high-tech huh? Well if a fifth-grader can do it, so can you.

Seriously, get a box of freezer bags. Put one over each plant and seal the bottom closed with a rubber band. You can use clear garbage bags for large plants. The moisture will collect on the top, drop back into the soil and keep the plant hydrated. This is called a humidity tent. Providing you’re not leaving on an Odyssey, this should keep you good for over a week. Unfortunately, this method inhibits airflow, which will eventually take its toll. It not only deprives the plant, but it creates an environment favorable to mold.

It is also true that not all of the moisture gets recycled back to the soil, meaning the plant will eventually dry out.

Additions to the process that can be useful include moving plants into lower light conditions, reducing temperature, cutting the tips off leaves or removing larger leaves. All of these will help the plant conserve water. While you don’t want to put the plant in a dark fridge, a small reduction in temperature or sun light will slow the plant down a bit as well as hinder the evaporation of moisture directly from the soil. It is important to note that certain plants would be more tolerant of this than others. Removing the tips or larger leaves would also help conserve water because these are the parts of the plant that tend to use more than they contribute. This is why you often see the larger leaves drop first. It is also why the tips tens to turn brown first.

One last addition to this technique, and this may even suffice as a technique on its own, is to place the pot in a dish or bowl of water. Water is allowed to draw up through the soil as it is needed. This is actually a good way to water plants. The drawback of using this for an extended leave is that the amount of water is critical. If the source water in the dish dries out before you return, the plant may still dry out. By adding a larger amount of water, you may be at risk of over-watering your plant. A result like root rot can be just as fatal as drying out.

It is essential to keep in mind that different plants have different needs. The humidity tent is quite versatile. But for some plants it may be best to employ a combination of these methods. But if you’ve found the solution to leaving your plants by themselves to be a mystification, I hope this will help.

Posted on

How to Root Plant Cuttings

Supplies Needed:

1 mother plant

1 pair of scissors

Rubbing alcohol (optional)

Rooting medium of your choice

Rooting hormone (optional)

1 quart-sized Chinese soup container or suitable replacement

1 clear plastic bag

1 rubber band

Rooting cuttings is a task that can range in difficulty depending on the species being rooted.  Some plants such as coleus or salvia divinorum are known to root quite readily.  They will form roots in a wide range of mediums while being exposed to a variety of conditions.  Other plants may either have a high tendency to rot too quickly or are stubborn to send out new roots.  Some cuttings can last months until the leaves eventually drop off and the plant dies.  This guide is geared towards those plants that will root in a straightforward manner without manipulation of factors specific to that type of plant’s rooting requirements.  In other words, this guide will help you learn to root plants that will root under general conditions.

In general, cuttings can be rooted in a variety of mediums.  Theoretically, anything that can deliver moisture to the cutting’s tip will work.  The better choices will also provide aeration, which may be necessary for some of the less willing plant species.  Among the most popular rooting mediums are plain water, perlite, vermiculite, plain soil (or sand) and rock wool.

Rock wool is a synthetic material with a spongy quality that is made of a dense network of fibers. It is used as insulation aside from its use in horticulture and hydroponics. Rock wool has a tendency to produce great root networks. However, the rockwool may have to remain attached to the stem when the cutting is moved to soil to avoid any risk of damaging the newly developed roots. This is especially true for plants with thin roots.

While some growers will choose to root their cuttings in plain soil, it is usually advised to use one of the other options because they are less likely to carry molds and bacteria that could lead to stem rot. But plain soil does have its place. It is generally the preferred medium for rooting cacti and succulents.

Sand tends to be a slightly better choice for most other plants because it lacks the organic material that can harbor pests. But sand can also be denser than some of the other options, which limits airflow and the movement of newly forming roots.

Vermiculite and perlite are both non-organic soil additives that are used to aerate the soil. As rooting mediums, they offer this same benefit. But vermiculite is known to retain more water and be less airy than perlite. For more information on the difference between perlite and vermiculite see our article Perlite vs. Vermiculite: How to Tell the Difference. These mediums are great for both hydration and aeration, and unlike rockwool, they are easier to separate from the root mass and will blend better into the soil once transplanting occurs.

Aside from these other mediums, many growers choose just to root cuttings in plain water. Using plain water will offer no better way of ensuring that the stem tip has a constant supply of water. But water does limit the amount of air that can get to the tip. Changing the water constantly will help increase oxygen content and reduce pathogens. A much more sophisticated way to increase oxygen content in water is to run a fish tank bubbler with an air stone at the end into your water. Some will even use this method with a combination of perlite and water, with the perlite giving something for the root to grow into. While this method may look pretty, it is probably not necessary for most species of plants.

Each of these different mediums has benefits and drawbacks, but when all is said and done, they should all be suitable for rooting a plant such as coleus or salvia. As you experiment, you will eventually come to learn what you prefer for each type of plant.

So once you have chosen your rooting medium, you will need a cutting to root. Choosing a piece to root is important not only to the cutting you’re rooting, but to the mother plant. Since new growth occurs at the nodes (where leaves connect to the stem), you want to make the cutting just above the node so that you leave an area suitable for new growth left at the tip of your branch. If the leaves are in pairs, there is one node on each side if the stem. When taking a cutting, you should keep in mind that snipping a growing tip will cause a plant to split into two growing points, one from each node. Keeping this in mind will give you an idea of how the plant will continue to grow after the cutting has been made. Although you will end up with two new growing points in place of the one, these new tips will be thinner. So you do not want to make too many cuttings in a row from the same tip. In some cases, it may be better to take a side shoot off the main branch if you can find one.

Making a cutting with your scissors is self-explanatory. However, you may want to take the extra step of sanitizing your scissors with rubbing alcohol before making the cut. This will help keep things clean and reduce the chances of infection.

It is also important to select the type of growth that will give you the best chance of success. New growth is the easiest to root. This is most likely because this type of growth is still full of growth hormones.  Woody growth tends to be difficult if not impossible (depending on the species) to root cuttings from.  So try to avoid it if possible.

The cutting you choose should not have an overabundance of leaves on it because this will just work against you by sapping water from the plant. If your cutting has a lot of leaves, it is a good idea to remove some. Your cutting can only draw in a limited amount of water without roots.  The more leaves a cutting must divide that water supply by, the more it will be stressed.  In fact, some of the more difficult species to root will only work if you remove all but the top leaves.  All too often, people focus on the way the cutting will look rather than if it will be well-established.  New leaves will always form, so don’t hesitate to get rid of the baggage before you begin the rooting process.

Once you have selected a cutting, what do you do?  Well, first you need to decide if you are going to use rooting hormones.  Rooting hormones are not necessary for many cuttings to form roots. However, a trial test (see here) with calea zacatechichi, a plant that is known for easy and quick rooting, has shown that rooting hormone is till effective.  Even with a plant that can root very effectively, the rooting hormone showed even quicker rooting and a much more established root network.  The most common rooting hormone, which can be found in most garden centers, is indole-3-butyric acid.  It is most often seen in powder form. But gel form is better if you can find it since it adheres and remains on the stem better and longer.  If you’re against the use of chemicals you can always look into using a tea of willow bark.  The alkaloids in willow bark are a natural rooting hormone, which we have used to root mitragyna speciosa (kratom).  Since you cannot apply the tea to the stem like you would with chemical rooting hormones, you just use the willow bark tea in place of water, either straight or to hydrate another growing medium.

So now you’re ready to root. Chinese food containers are just an example of a container you can use, but any jar or container that will keep the cutting upright will work.  Fill the bottom 2-3 inches of your container with your rooting medium of choice.  Thoroughly hydrate the medium.  There’s not a lot of technique to this. Just get it wet.  If you’re using perlite, you can let a little bit of water pool at the bottom. You want it fully wet.  Now, take your clean finger or a pencil and poke a hole in the medium.  If you’re using rockwool, you can use something like a BBQ skewer to get a good hole established.  Then stick your cutting in the hole you made.  If you’re using powdered rooting hormone, wet the cutting tip first before applying the rooting hormone.  Then, stick it in the hole.  Take your clear plastic bag and put it over the top of your container.  Seal the opening of the bag around your container by placing a rubber band over it.  This “humidity tent” will conserve moisture so that the cutting does not lose too much moisture from its leaves during the rooting process.

Once your cutting is set up, it is important to leave it in a place that is out of intense light or heat since these conditions have a tendency to stress the plant.  Aim for a neutral setting.  Some species do have temperature parameters for rooting.  But as a general rule, room temperature is fine.  To avoid stagnant air, open the top of your tent every few days to let fresh air in.  Leave your plant in its rooting chamber until you see a well-developed root network.  It is best off in the long run to be patient and wait for a good root system to guarantee a smooth transition into soil.  Congratulations, you’re now able clone plants!

SHOP OUR STORE FOR AN AWESOME COLLECTION OF LIVE PLANTS


Posted on

Vermiculite vs Perlite: What is the difference?

Several years ago, I had an experience where I specifically needed perlite for a gardening project. When I got to the gardening section of this store, I discovered that they were out of perlite. I asked a store employee for help, and he confirmed that perlite was indeed out of stock everywhere in the store. Instead, the employee tried to sell me vermiculite, insisting they were basically the same thing. While this is true in one respect, this mistake could also ruin your project. While working for the same purpose in one respect, perlite and vermiculite are completely opposite in another. So it is important to know the difference between perlite and vermiculite so that you are never influenced to do something that could ruin your gardening projects by incompetent store employees.

Vermiculite and perlite are both non-organic soil additives that are used to aerate the soil. As rooting mediums, they offer this same benefit. Vermiculite is a spongy material made from mica whereas perlite is a type of highly porous volcanic glass that resembles pumice. Perlite appears as small, round, non-uniform, white particles. Some people mistake perlite in potting soil mixtures for Styrofoam balls. While both mediums are used for aeration, they cannot always be used interchangeably.

Both perlite and vermiculite are great at retaining water, but vermiculite retains much more water and offers a little less aeration than perlite. Vermiculite literally acts as a sponge that will retain water to the point of saturation. Perlite holds water by having a large amount of surface area within the nooks and crevices of its vast pores. But being porous and made of volcanic glass it allows excess water to drain much more readily than vermiculite.

In a case where you have especially thirsty plants and want the soil to hold extra water, vermiculite would be a better choice. You might find that perlite will dry out too quickly in this situation. But if you were growing cacti, you would eventually discover that the amount of water vermiculite holds would lead your plants to rot. Perlite, on the other hand, would be well-draining and suitable for your cacti mixture.

Vermiculite is also used in mycology to add moisture to the substrate that mushrooms will grow on. Perlite would fail miserably at this task. Perlite can also be used in mycology or horticulture to raise humidity levels. Because perlite has more surface area, it fosters higher humidity by evaporation off this extra surface area. Vermiculite would not work as well for this though because it would retain much more of that water.

So essentially, perlite and vermiculite are the same in that they can retain more water than many other things, and they can aerate soil. But vermiculite differs from perlite because it retains water and creates a soil mixture that retains water, whereas perlite fosters a well-draining soil mixture. Likewise, vermiculite’s tendency to retain water makes it a good additive to mushroom substrates but a bad candidate for increasing humidity. Perlite’s hard, porous nature makes it a great mechanism for increasing the humidity of a given area but disqualifies it as a candidate for creating a substrate that will retain moisture.

SHOP OUR STORE FOR PERLITE, VERMICULITE & OTHER GARDENING SUPPLIES

Posted on

When Should I Plant Flower Seeds?

The following question was posed on Yahoo answers, but the amount of space they allowed me to answer was not nearly what was needed for me to fully answer the question. In order to provide supplemental information and help others that may have similar questions, I am providing my full answer here:

The question of when to plant flower seeds is relative to your area and the type of seed being planted. In general, you want to think of the “time to plant flower seeds” as the time within the seasonal cycle of your area more so than the literal time of year.

Ideally, you want to start the seeds as early as possible so that you can maximize the amount of time you get to enjoy your blooms. But if you plant the seeds too early, it is possible to stunt growth of young seedlings or kill them altogether. The best thing to do is look on the packet or look up a grow guide for the individual species you are growing. This will give you an idea of the seasonal conditions that are optimal for the given species you are trying to grow.

But let’s talk about some general terms. If you are dealing with flowers such as poppies you actually want to start them very early in the season. I can say from experience that cosmos and leonotis nepetifolia (klip dagga) are not flower species that will be hurt from planting too early. You will see many packets or grow guides talking about starting the seeds as soon as the ground is workable. In this case, it means that once the ground has thawed enough that you can work in it, you can plant your seeds. Again, these are seeds that can tolerate and may even benefit from cold or frosty conditions. So when you talk about the time that this occurs, it goes back to being dependant on area.

It seems that the most common recommendation you will run into is plant the seeds after the danger of frost has passed. While the seeds themselves may be able to withstand frost, these are usually plants whose seedlings are frost tender. Many seeds in nature have mechanisms to prevent them from germinating all at once. Packaged seeds have a tendency to produce quicker and more regular germination to please the customer. But it removes the plants defense from the “irregular” nature of weather. So if you were to plant a species whose seedlings are frost tender too early, you may end up with a spout of nice weather that causes most of your seeds to germinate only to experience a period of frost that kills your seedlings. So if you pick a time in which you know the danger of frost has passed to plant your seedlings, you can avoid this problem. In many areas, May is suitable for this. But in other areas you might even wait til early June. On the other hand, you will be able to plant earlier than May down south.

But all of this speaks about planting outdoors. Many growers get a head start on the season by starting seeds indoors or in something like a greenhouse. Again, this will affect the question of what month you can plant. If you have suitable conditions, you can technically start plants or flowers in any month, and you can grow just about any species (even tropical) plants in your location. But the key to this is being able to provide suitable conditions. Indoor light simply cannot match the light outdoors. Even a well-lit window probably has less light than a shady area outdoors.

When you start your plants indoors you have to consider two things. The first is whether the conditions are suitable to maintain the plant long enough to get it outdoors. Seedlings tend to require lower light than established plants. This makes sense not just because seedlings are smaller and have less biomass to maintain. Seedlings often get their start beneath leaves, branches or under the shade of other plants. As they grow higher, they eventually find the light they need to maintain adult growth. It seems that nature understands this and has made seedlings adaptable. If your seedlings start out very tall and skinny, it is likely that your house lacks the light even to maintain seedling growth. For this, you would want to supplement the light with a grow bulb or compact fluorescent. But imagining you get past this, you do not want to start your seedlings so early that you pass the seedling stage before you can get them outdoors. So even indoors, the time of when to plant can be dependant on where you live and when the weather is warm enough outside. But it will give you a head start. As for determining when indoor planting is right, you can often look on the seed packet or in a grow guide for help. Of course, if you supplement the natural light in your house with something like fluorescent lights, you can often determine yourself when you want to plant because you will have sufficient light to keep the plants going beyond what natural light alone may offer.

The second thing you want to consider about starting seeds indoors is called hardening off. Essentially, this is the idea of getting your seedlings used to the harsh outdoor world. As mentioned before, the sun will be stronger outdoors. Just as people tend to get burned easily early in the season after lack of sun exposure, so do plants. To get your plants used to these conditions, you want to gradually expose them to the outdoors over a period of time while also increasing the amount of light you expose them to until they reach their final growing place.

Here is a basic plan for hardening off: Start them off in complete shade for a few hours a day. Over the next few days increase the time the plant it outside until it is outside all day. Monitor the plant for any signs of stress. Then eventually you want to gradually increase the light exposure until you find that your plant can tolerate its final growing place.

Some packets and grow guides will actually mention starting seeds indoors x number of weeks before the last frost. But they do not explain much of what I have just described. This will help you in such cases. Starting flowers from seed can be a bit more work than buying plants. But with seeds you will usually be able to get a lot more flowers and a lot more variety for the same price. Each year your skill will improve so that growing from seed will be second nature. But if you have any reservations about your ability when starting out, go for easy-to-grow varieties like Grandpa Ott’s Morning glory, cosmos, klip dagga, California poppy, Purple coneflower (echinacea) or sunflowers. You can find seeds for most of the locally, but we also carry them at World Seed Supply. Perennials such as echinacea will return each year while some like Grandpa Ott’s morning glory have a tendency to reseed. So you initial efforts will pay off in the long run. Don’t be discouraged. Happy planting!

SHOP OUR STORE FOR A HUGE SELECTION OF FLOWER SEEDS, INCLUDING MORNING GLORY, ECHINACEA & MORE

Posted on

Why Mulch?

Mulching your garden will improve your plants’ health and save you time in the garden. They say time equals money. Well, mulching equals more spare time for you. So, if you are not already doing it, here is some “valuable” information. Many of us might already be mulching our flower beds to control weeds. But the benefits of mulching are not just limited to weed control. Mulching allows the soil to retain moisture and heat longer. It can extend a growing season. It also provides an environment that houses beneficial insects and works to improve your soil over time. Mulching can even reduce infestation.

You may very well be familiar with mulching when it comes to landscaping and flower beds. Landscapers often use mulch to keep weeds from overtaking their projects. So why not do the same in your garden? If you haven’t been mulching, then you’ve probably been busy fighting with weeds that compete for light, moisture and root space with your plants. But in today’s world time is precious commodity. And gardening is supposed to be a hobby, not another chore. Any idea that saves time is usually a good one. You can use straw as an inexpensive alternative to traditional mulches. By putting a thick layer down, you block new weed seeds from reaching the soil below while starving seeds that are already below of the light they need to thrive. This is not to say that it will block every weed. After all, life has a way of adapting to just about any obstacle. But it will certainly free up more time to spend on the more enjoyable endeavors in your garden.

Another way mulching saves you time is watering. Just as the mulch creates a barrier to weeds, it does so with moisture. Mulch blocks the sun’s rays from directly beating on the soil. At the same time, mulch keeps soil moisture from evaporating right out into the air where it disappears. After leaving the soil, moisture can remain in the mulch itself where it is still of more use to your plants than if it had dissipated. By conserving water, it means that you will spend less time watering. This is beneficial to the environment and to your water bill. Just like time is money, water is money. So even if you have a sprinkler system so that watering time is not so much an issue, mulching will still help you save in other ways.

Mulching can also benefit you timewise by extending your growing season. Just like mulch will help maintain moisture, it acts as an insulator. In this way, it can insulate the roots of late-season crops so that you may be able to get some extra growing time out of them. In some cases, mulching the roots can even help perennial plants survive the winter in an area where it might otherwise just miss being able to do so, due to cold temperatures. It may not do much for the leaves and branches of the plant. But if the roots are preserved, the rest of the plant will regenerate much quicker and stronger than growing from seed. Or depending on the case, this may save you the time and space of having to bring plants indoors for the winter.

On the other side of the spectrum, mulching can buy you time in the early part of the season too. Mulching can help you get an early start on the season with seeds you are sowing in the ground by helping keep the soil a little warmer. A loose layer of straw will also work well to help shade new seedlings from the intense sun until they get on their own feet. By this, we mean having a layer of straw (or other mulch) that is not packed so that there are gaps in between the pieces where seedlings can grow. The shadows created by the pieces of the mulch will create shading for seedlings just getting off to their start in life. As the seedlings grow, just add more mulch until you have the thick layer of mulch you will need later in the season. This shading will keep them from being stressed while improving their moisture supply to ensure your seedlings get off to a better start. And getting back to the concept of time, a better start should mean quicker growth. So you may spend just a little less time waiting for your plants to start producing.

Along with these benefits, mulching will also improve your soil quality. Healthy soil is an entire ecosystem with the plants only being one part. Mulching helps provide a home for beneficial insects, fungi and micro-organisms. Insects like ladybugs, centipedes and spiders help by feeding on potential pests. Mulching also has a tendency to attract earthworms, which are often good indicators of soil health. Earthworm castings, which is a nice way of referring to the solid waste of the worm, have countless benefits to the soil. Castings act as a fertilizer and can increase a plant’s ability to absorb nutrients from the soil. The castings also contain bacterias and microorganisms that, just like the worms, help break down organic matter. As organisms break down the mulch, it will help provide additional nutrients to the soil. By working with nature’s natural chemistry you can forgo the monetary and health expenses of using chemical fertilizers.

Another good thing about mulch is that it allows you to foster that ecosystem in your garden in a way that it is partitioned. The microorganisms and insects that break down organic matter tend to lie primarily in the soil below the mulch. The mulch layer prevents splash up during watering that can introduce soil-borne diseases to the foliage of your plants. This mulch barrier also works out well for fruits like cucumbers and melons that may lie on the ground. While their roots can still partake in all the benefits of the mulch, the fruits can lay atop the mulch layer, keeping them away from excess moisture as well as many organisms that might invade the fruit. Instead, the fruits are left up above that layer with you, the one who will be doing all the eating.

At the start of this, you may have thought of mulching as just an extra thing to do in your gardening this year. But mulching is one of those extra steps that pays for itself. If you can take a single step that will save you time, money and at the same time increase productivity, then only poor planning should prevent that step from happening. We could go on further about the benefits of mulching, but this article is very much about saving time. And I think we’ve spent just enough to get the point across

Posted on

Choosing Cacti for a Beautiful Garden

Cacti are not just for the desert anymore. The hobby of cacti collecting has captivated a worldwide audience with many growers finding themselves engulfed in the quest to collect them all. But it is not just the typical spiny thing you’ve come to expect from your local Home Depot or Walmart. For the collector, the cactus is often a living work of art. Breeders mix and match these features, deserving the same praise as any artist. With ornate spinal patterns, zebra textures and wooly tufts, it is not hard for anyone to see the aesthetic appeal. So getting away from hardware stores and discount department stores, let us take a look at some ornamental options for your garden.

Perhaps the most ornamental genus of cacti is that of astrophytum. The root of the name astrophytum refers to the stars, as in the word “astronomy,” which reflects a somewhat star-shaped appearance of this cactus. There are various species of astrophytum such as astrophytum asterias, astrophytum ornatum, astrophytum capricorne and the quite popular astrophytum myriostigma, or Bishop’s Cap. Both astrophytum asterias and myriostigma are characterized by virtually spineless stems, which can make handling safe, particularly where there are children or pets present. Asterias is commonly referred to as sand dollar cactus and has a star-shaped pattern of cottony dots. Ornatum and capricorne, on the other hand, are prized for their ornamental spines. The name ornatum suggests its visual appeal while Capricorne refers to the ram, a reference to the way its spines curl.

Most of these species originate from Northern Mexico and Texas, although over-harvesting and habitat encroachment has led to endangerment in the wild. According to Adam Gottleib’s book, Peyote and Other Psychoactive Cacti, several species of astrophytum may have been considered sacred by the Tarahumara culture. Although astrophytum does not appear to contain psychoactive compounds, the historical and possible sacred significance will add to conversational value of your garden. Although the sad story of wild endangerment applies to a majority of the ornamental cacti, astrophytum is valued enough to ensure that it will at least remain preserved in cultivation.

When it comes to cultivation, the Japanese have become leaders in the art of breeding cacti. In particular, their variations of members of the astrophytum genus are unprecedented. One of the most popular of these gems is astrophytum asterias “super kabuto”. They have taken the already remarkable astrophytum asterias and improved upon it. Variations of this include changes in the texture and number of ribs as well as numerous hybrids. These are all options that will make your cacti garden stand above the rest, although it should be noted that some of the more marvelous specimens can be quite pricey. Many growers also resort to growing from seed which can be rewarding for both pride and finance.

Another genus that is filled with prime choices for a beautiful garden is ariocarpus. It has eight species. The most popular of these cacti is ariocarpus fissuratus, although ariocaprus retusus is nearly as popular. Like astrophytum, ariocarpus cacti remain short. Their rough texture has earned them the nickname, living rocks. However, it should be noted that this name refers to various other short cacti and succulents. Both lithops and pleiospilos nelii are examples. Ariocarpus fissuratus has variable features, but those with rougher skin are generally considered more valuable. From above, it looks like a stack of stars with a wooly tuft in the center. If you are lucky enough to be in a warm climate and have a cactus that is ten years or older, you may even get to witness the pink blooms.

Ariocarpus retusus has flowers that are usually white, sometimes with pink tips. It looks much like a small, chubby aloe. There is even a subspecies called ariocarpus agavoides, which is considered by some to be its own species. Retusus specimens vary mainly in the length and thickness of its tubercles. The tubercle is the nodule of flesh that sticks out from the body of the cactus. There is a well-known variety of ariocarpus retusus, called ‘furfuraceus‘, which has a significant amount of wool between the tubercles. Also, if you find aricocarpus retusus attractive, you will probably like obregonia denegrii or artichoke cactus.

All of the species mentioned thus far are button-like cacti that will remain small. A good cactus arrangement will usually benefit from some columnar cacti. Ideal choices of columnar cacti include myrtillocactus geometrizens (blue myrtle) and various species of the trichocereus genus. Trichocereus pachanoi, peruvianus, huasca and spachianus are all ideal choices. All of these columnar cacti are recommended because they are fast-growing and easy to maintain. Blue myrtle is a perfect choice because it has small spines and a bluish green body. Trichocereus peruvianus is a variable species with forms that have a similar, and sometimes frosty, color. It also has a number of different spine lengths to choose from, depending on genetics. On the other hand, the most common form of trichoereus pachanoi, which is known as the Backberg clone, has rather small spines. Another variety of pachanoi, the Tom Juul’s Giant, has even smaller spines. If you’re looking for spines with different coloration, those of spachianus are often golden with those of huascha ranging from reddish to golden. Furthermore, huascha can add appeal to your garden because of its tendency to clump at the base.

For experienced growers, trichocereus and myrtillocactus can be used to speed up the growth of their slower growing cacti or cacti seedlings by grafting. One of the most coveted grafting stocks in addition to these columnar species is pereskiopsis spathulata. Pereskiopsis is evolutionally on the border between cactus and succulent. It has both leaves and spines. Needless to say, pereskiopsis is quite unique on its own or with another species attached. By slicing and tapping into the vascular rings from a host cactus on the bottom, a separate specimen on the top will grow at an increased rate. It is also as way to save species whose roots have rotted because they will be able to benefit from the roots of their host plant. The combo of two cacti like this will certainly make your garden unique.

So your garden now has button-like, columnar and clumping cacti. But if you are still looking to add more variety to your collection there are more options. One more option is the lobed cacti, particularly opuntia. Opuntia are some of the most durable cacti in the world. Many of them can survive freezing temperatures, even if they are not rooted. Their spines range from long and sharp to barely visible hairs that will catch in your skin and irritate you. One of the best things about opuntia is that their blooms, often yellow or red, will be followed by edible fruits. The common prickly pear is the fruit of the opuntia ficus-indica. Opuntia pads are also eaten cooked or pickled and used to feed livestock. Opuntia are fast growers, and like previous mentions, they are sometimes used as grafting stock.

This final suggestion is somewhat surprising, but it is part of a growing trend. If you want to add that final degree of distinctiveness to your garden consider what is called a monstrose or crested cacti. These forms can be any species that exists. What makes it crested or monstrose is a mutation in the meristem (growing point) in the cactus. What were once outcasts have come to be known as genetic rarities, and like the Japanese cultivars, those of already rare species can carry quite a price tag. Mutations in these cacti result in a number of oddities. Crests tend to be rippled, wavy or fanlike, sometime resulting in brainlike shapes. Monstrose tends to have more of an outright deformed clumping effect. The most popular of the monstrose is probably that of cereus peruvianus. Crested trichocereus pachanoi and trichocereus thelogonus are also quite popular. However, when it comes to something that will surely catch your attention, there’s nothing like the trichocereus bridgesii monstrose, or more appropriately, the penis plant.

So now that I’ve finally got your attention, go back and narrow down some selections on your own. Our varied garden includes button-like, columnar, lobed, monstrose, crested and perhaps some grafted cacti. While everyone’s preferences will range, hopefully this article has given you some new options and a place to begin looking in the quest to beautify your cactus garden. I urge you to get into the growing hobby and become part of this worldwide hobby. As I said, look beyond your local department store or supermarket.

SHOP OUR STORE FOR CACTI SEEDS, CUTTINGS OR PLANTS

Posted on

Unpacking Plants and Preparing them for Growth After Shipping

Shipping can be a time of depravation and trauma for a plant in many senses. And above that, we really do not know what kind of environment the plant was used to before it came to us. Your environment may be better or worse, but that still does not negate the need for some tender loving care. Some plants are hardier than others and will bounce back from even the most stressful situations. But in getting a new plant, our goal should be to gradually adjust the plant to its new home. That takes place in both the unpacking and in the adjustment processes.

You may or may not realize it, but even a package that has “Fragile” written all over it is subject to being stacked and bounced in the most aggressive ways. The sad reality is that when people have a job to do, they are more focused on getting the job done quickly than getting it done in a way that might be most beneficial to the customer. And if the package is uninsured, most workers really see no special obligation to “handle with care” if it means that doing so will make their job any more difficult. At the end of the day there is not all that much accountability from couriers, and so shippers may go through what seems like ludicrous lengths to make sure the plant does not move inside the box. It is your job to take that effort to the next level by carefully unpacking your plant.

When sending a plant, the shipper’s goal is usually to minimize movement of any part of the plant, including the leaves. That may mean folding the leaves in a particular position that may ordinarily be awkward, but in a way that will keep them from moving around and potentially breaking during shipping. Leaves may be folded up to keep them protected, but they will usually go back to normal once the plant is back at ease To minimize movement, shippers will often use all sorts of taping and packing that will keep the plant in place. The best bet when unwrapping your plant is to cut away the tape rather than tear it. Always cut away the secure environment that the shipper has provided so that the plant will be able to handle the unpacking process. Tearing or ripping can cause sudden unwanted movements that can lead to the snapping of a branch or leaf. Losing a branch or leaf may not doom a plant, but if it can be helped, why not allow as much of the plant to remain in tact as possible. Sometimes the tape will have attached itself to a part of the plant, so it is vital to be alert for these situations and to have gentle hands.

Most plants will come in what is called a humidity tent or humidity dome. This is most often just a clear plastic bag that has been placed over the top of the plant to keep it from drying out. While this may limit airflow, plants can usually last quite a while in their humidity tents without breathing. In fact, we have seen plants last months in humidity tent as long s the soil didn’t dry out too much. It is more vital to the plant’s survival that it remains hydrated. After a period of a few days, the air in the tent may be minimal (especially if it is pressed tightly in a box), and there may be a tendency for the plant to cling to the bag. This is normal and acceptable. It is usually a good idea to have a new humidity tent on hand to replace the one that the plant came in. Food Storage bags or the bags that you get produce in from the supermarket are good choices for humidity tents. Often you will have to cut away some of the bottom to free the plant if it is taped to the container. If the original humidity tent is salvageable, then it can be reused. Many growers make the mistake of taking the plant right from this point and putting it into what they read or know to be ideal conditions for the plant. This will often stress the plant and cause wilting, which in some cases can prove fatal. As long as there is no rotting material in the bag, you have to assume that the plant has been used to high humidity for at least the past few days, and a sudden drop could cause the plant to lose moisture from it leaves suddenly.

Preferably, you want to remove any material that may be dead or dried out. These are havens for mold. Next, you want to restructure the humidity tent over the plant so that it has a new supply of air. Prior to now, the plant has been in a box with no light. Even though your eyes might enjoy a certain level of light, if you had been in a dark closet for three days, your eyes would experience strain if placed back into reality. Therefore, you do not want to rush to get the plant into a full sun condition simply because that is what it normally prefers according to grow guides. Start your plant out in ambient room lighting for about a day or so. You can gradually increase the light intensity to the plant’s desired light preference. The same is true for the humidity. Most people do not have humidity gauges in their homes, and even so you do not know exactly what the plant’s experience with humidity was like in the past. Just as you gradually increase the plant’s light exposure, slowly remove it from the humidity tent. This can be accomplished usually by first undoing any type of securing agent, such as a rubber band, from the plant after a few hours. If at any point you see the plant begin to wilt, go back to securing the humidity dome. You can go on to remove the humidity tent from the plant entirely when it shows that it is ready. In many cases, you will be able to do this fairly suddenly. However, some plants will require a more gradual adjustment. You will be able to read your plant’s needs based on how the leaves act. Drooping leaves are indicators of low moisture content. Throughout all of this, you may wish to water the plant if the soil is dry. But if the soil is already moist, your best bet is to control moisture through humidity. Adding too much moisture to the soil is not always a solution. It can cause root rot and molds to form, particularly when airflow is not high.

Another common mistake new plant owners make is repotting too quickly. While most plants are kept in small containers to minimize shipping cost, they could use a repot when they arrive at their new home. But it is important to realize that repotting itself can be stressful to the plant and must be done in a timely manner. You do not want to disrupt the root system and cause additional trauma until the plant has shown that it is stable on its own. Once the plant has fully adjusted to its environment, only then should you repot your plant into a container that will allow it to flourish. Use the type of soil and pot that is recommended for your species. Plants are often kept rootbound to maintain size for shipping, but a good repotting session will do wonders for getting your plants to put on quick growth. With that said, you should allow extra adjustment for plants to be placed outside. Outdoor light, even in a shady location, is often many times stronger than bright light indoors. And just like you can get an early season sunburn from being inside all winter, your plants can go from vibrant to morbid in a matter of hours. So, it is important to provide plants that are going outdoors with extra water and to shade them from the sun, even if they truly prefer full sun. This can be done by starting them in shady locations and gradually moving them to those with more light. You can also use objects such as lawn furniture as shading devices to block the sun in the more intense parts of the day. Or if you prefer to go the natural way, surround your vulnerable plants with taller plants that are already accustomed to the sun’s ferocity.

Usually when you buy a plant, it is a special experience. You are in charge of another life, even if you may not view it that way. You may have invested a good deal of money or better yet, you may have been fortunate enough to add a rare specimen to your collection. So while it may seem like a lot of extra effort, you have a duty to do what you can to safely transplant that new life from one area of the globe to another; and that applies even if you are simply moving your own plant from inside your house to the outdoors.

BUY HUNDREDS OF SEEDS , HERBS AND LIVE PLANTS


Posted on

Acclimating Indoor Cacti to the Outdoors

For those who do not have the luxury of keeping their cactus collection outdoors all year round, spring is usually the time when we put our plants outdoors.  We all want to take advantage of the growth spurt we get from the strong summer sun and heat.  The sun helps put on growth and wakes up the plant’s immune system.  And cacti will also benefit from the increased fresh air exchange that occurs outside.  But if you do not properly acclimate your cacti, it can ruin their aesthetic appeal.  And for serious collectors, that can potentially mean hundreds or even thousands of dollars in cacti damaged.

People commonly misconceive that cacti can handle the sun without issue. After all, they live in the desert where the strongest sun on earth occurs. How can springtime sun, when the sun is barely gaining strength, do any harm? Well, there are two things you’ll want to keep in mind. The first is that the sun outdoors, even in the shade, even in the spring or fall, is many times stronger than even bright lights. You might feel like you can see better in bright indoor light. However, the total output of energy is much greater outside. After all, we’re talking about the sun here. It powers the entire planet. So any move outdoors is a move to more light.

The other issue you want to keep in mind is that although cacti have an incredible ability to handle sun, it is a capability that has to be turned on. Wild cacti have been outside their entire lives, so the level of sun they are “tuned” to handle is pretty much the same all the time. They never reach the level of darkness that indoor cacti experience. There is variation between seasons, but the overall change is gradual. Wild cacti do scar, but not to the degree that will usually happen if you totally neglect acclimating your cacti before bringing them out.

When you have a cactus that has been indoors all winter, even if it was under bright artificial lights, it is like a person who has been indoors all winter. Did you ever notice how easy it is to get burned early in the summer? It’s not because the sun is stronger early on. It’s because your skin has not yet built up a tolerance to the sun. Cacti (and other plants) are the same way.

A cactus under too much sun can burn in only a matter of minutes. It will usually cause the cactus to quickly discolor. That discoloration will eventually dry out, shrivel and scar, leaving an unsightly rough texture where the nice cactus flesh color had been. Unlike human skin, these scars are permanent. So, how do we avoid this?

The concept of acclimation is very simple. You want to start out with a minimal exposure, both in time and intensity, and gradually increase it over time until your cacti reach their desired location. While conceptually it is simple, it can logistically be a big ordeal depending on the size of your cactus collection. If you have a lot of cacti, the best thing to do is put them in crates or bins so you can transport them more easily. Instead of moving back and forth with each plant, you can carry multiples at once.

t is best to start your acclimation early in the season when the sun is at a lower intensity. But you also want to make sure to do so after the nighttime temperatures are securely above freezing. Find a shady spot in your yard, preferably under a deck or bush. Keep an eye on your plants. If they start to lighten or change in color at all, bring them back indoors immediately. Sometimes it is already too late to prevent scarring once you notice any color change. Usually under a deck or bush will be dark enough that you do not have to keep moving them back and forth between indoors and outdoors. Keep the plants in that spot for about 2 weeks. Next, find another shady spot with slightly more light, and do the same thing. The more levels of shade you can graduate to before reaching your final spot, the better. Sometimes, even after the plants have been outside for a while, you can still do damage when you get to direct sun. So you cannot be too careful if you really want to avoid any harm.

If you lack the extreme shade of underneath a deck or bush, you may have to manipulate your sun exposure with time. In that case, start your cacti in the shadiest available spot for about an hour or so before moving it back inside. The following day, try two hours and continue to lengthen the time. There’s not a set formula in terms of how long to take to do this. It depends on a lot of factors. But the idea is to do it gradually enough for the plant to build up its immunity to the sun before the sun does its damage.

Another thing to consider when acclimating is rain. If your cacti have been in dormancy all winter, it is best for them to be “awake” before they are watered. If you know you are getting any substantial rain within the first week of acclimation, it might be a good idea to bring them in for those periods as well. Otherwise, try to find an overhang or somewhere they won’t get soaked. You might expect that they really need a drink at this point in the season. But let them wake up and get their immune systems in gear before you allow them to drink. Chances are they would still be fine. But you should always have a cautious mentality, especially if you have rare or expensive specimens. Anyone who’s experienced the loss of a few plants they love probably won’t find it hard to think that way. And if you can learn before you have to experience that, then you’re ahead of the game.

As you approach this process, think of it in terms of chemicals that have to build up in the skin of your cacti. It is ironic because you need the sun to activate the production of these chemicals. Yet, if you give them more sun then they are ready for, the very thing they need will harm them. But if you have patience and avoid shortcuts, the payoff will be that you will have the types of specimens that other collectors drool over.

SHOP OUR STORE FOR CACTUS CUTTINGS, LIVE CACTI & CACTI SEEDS!

Posted on

Growing Kratom Plants Indoors: The Easy Way

For the highest quality kratom powders visit https://buy-kratom.us/

It seems that some people make growing kratom plants seem harder than it really is. But don’t be scared off from getting one of these wonderful plants because the truth is that kratom plants are rather easy to grow and will put on growth rapidly compared to a lot of other plants. Some guides have made it seem like if you do not have an expensive lighting system or a special soil, your kratom plants are doomed. Well, we’ve had a bit of experience with growing kratom plants indoors over the years, in all sorts of environments, and we’ve come to realize that a lot of that information leads to a lot of unnecessary worrying.

At least one popular kratom grow guide suggests that commercial soils are unfit for growing kratom plants. But we have had nothing but success by growing kratom using plain Miracle Grow potting soil, a tip we saw being recommended in another guide and decided to test ourselves. We’ve also had similar success using our own soil mixtures to grow kratom. We’ve found that mixtures that are fertile and well-draining will generally work. But we have experienced firsthand how proper soil ph is also essential to growing kratom plants. It has been suggested that the ideal ph for growing kratom is between 5.5 and 6.5. Without the proper ph, kratom plants will not be able to take up the proper nutrients from the soil, and it will exhibit signs of nutrient deficiency. In one soil mixture, we used compost that proved to be on the acidic side. This caused a sudden change of yellow, blotchy leaves on the affected kratom plants.  You can use lime to adjust the ph to be more alkaline, and you can use sulphur to make it more acidic. You may also want to try adding epsom salt, which can help plants absorb nutrients form the soil.

We’ve also experienced soil ph changes in some other kratom plants due to water. After noticing similar changes in kratom leaf color as we did with those that were growing in the compost, we tested the ph of the water we were using. Despite that we were using distilled water, our tests showed that the ph of the water was extremely low. As distilled water interacts with the air, it can cause the ph to change significantly. In this case, the change was enough to damage our kratom plants. You can test your water if you happen to have a good ph meter on hand when growing kratom. Unfortunately, a good ph meter will usually run about $100 and cheaper meters are considered unreliable. Ph paper will work to test the water. Otherwise, you can periodically test your kratom’s soil using a soil test kit.

We recommend using a large pot for your kratom plant simply because more room can’t hurt. But we have also found that kratom does not become rootbound quite as easily as other plants. We’ve maintained some bushy kratom plants in what would be considered small containers, so they can survive. But larger containers will allow your kratom plants to spread out below the soil, take in more moisture and grow quicker. It will also mean that you can get away with watering your kratom less frequently because the pot will hold more moisture. Some kratom growers will water their kratom plants more frequently, but we recommend watering the plants well whenever the top of the soil starts to dry out. This seems to supply enough moisture for rapid growth without subjecting the plants to standing in water that could promote root rot and other types of disease.

When it comes to light, it might seem that you need a High Pressure Sodium system to grow kratom because kratom plants love light. Kratom does seem to greatly enjoy that type of light and will grow nice under such intensity. But it wastes way too much electricity. If you’re looking to pamper your kratom plants, HPS or LED is certainly the way to go. But LED is what many growers have switched to over the years as they’ve been improved. LED lights are the cheapest to run and will often pay for themselves over time. We recommend Electric Sky LED Grow Lights if you are looking for a good LED system. Electric Sky lights are lightweight, and they have outperformed cheaper LED lights in our tests and proved to be more cost–effective than other types of light. Electric Sky is specifically geared towards the spectrum plants need. So if you are at all serious about your growing, this is a great system, and it can be more economical as you factor in the savings on electricity. Kratom plants will also grow very well if placed directly under fluorescent lighting, which is much cheaper to run than HPS or Metal Halide and can be set up with significantly less initial cost. Even a single 18 watt (120 volt) compact fluorescent bulb has been proven to work for growing small kratom plants without the plants suffering any maladies. We have also found that a 100 watt (120 volt) full spectrum halogen bulb can support one or more kratom plants. But t5 fluorecent tubes, the thin ones, work better for growing plants indoors than the bulbs.

A 24-hour light cycle will work if you do not mind the extra electricity consumption. With that said, it seems that more light will in fact produce darker kratom leaves with redder veins, and this is likely where the emphasis on heavy lighting comes in. Kratom vendors seem to identify various strains of kratom by the redness of their veins. But, in fact, a kratom plant with very red veins can change to have purely green veins depending on the conditions. We suspect that this phenomenon is similar to human skin tanning under more sun exposure.

Another condition that kratom requires is high humidity. The average humidity of Bangkok, Thailand tends to be between 90% and 94% during the morning. But it can range between 53% and 70% in the pm hours depending on the time of year. This suggests that kratom has at least some natural exposure to medium range humidity. While you do not want your kratom plants to be in a dry environment, you can easily create suitable humidity without exhausting yourself. Humidifiers can be used to give your kratom plants a humidity boost, but they are expensive to buy and run. Plus, these devices use up unnecessary energy. Instead, there are other options for giving your kratom plants the proper humidity.

Kratom leaves are waxy, and so they hold onto moisture more easily than say salvia leaves. This seems to provide a bit more room for error when it comes to a short-term humidity drop killing a kratom leaf. You tend to have some extra time to notice visual clues that your kratom plant could use more humidity. A higher humidity will produce much nicer kratom leaves with more of the characteristic glossy shine whereas kratom leaves in lower humidity tend to be more roughly textured and perhaps a little discolored. Kratom also has a tendency to drop leaves when it is really unhappy. Kratom leaf drop can be sudden and unsettling for a grower, but it is important to remember that the stem is the important part. As long as the stem stays healthy, new kratom leaves can grow back, and they tend to be more suited for the environment they are born into.  So if your leaves drop from lower humidity, the newer leaves tend to grow a bit more suited to handle that.

You can use the leaf texture to determine when adjustments are needed before dropping takes place. If you can get your humidity to up around 90%, your kratom plants will probably never complain. But judging from the climate of Bangkok and our personal experience, you do not have to be alarmed if you see fluctuations in your humidity. It’s normal for humidity to fluctuate even within a self-contained growing environment, especially as temperatures fluctuate and cause more or less water to evaporate. But it should be easy enough to keep your average humidity up to a suitable 70, even where your external humidity is lower.

Since external humidity tends to fluctuate and may not reach 90%, even at a high point, it is best to keep your kratom plants in some type of contained environment. It is easier to control humidity in a container. For example, small kratom plants can easily be kept in a fish tank terrarium with a light placed directly overhead. Continual pruning will be needed to maintain size, but your kratom plants will probably be very happy inside. You can spray the sides of the terrarium every so often or even fill the bottom with an inch or two of moist perlite if you want to add additional humidity. We do not recommend direct misting as a substitute for true humidity because it is only a temporary solution and does not provide the same type of humidity as evaporated moisture. If you have a grow closet with a lot of plants, it is likely that there will be enough moisture in the air simply due to evaporation from the soil. But if ventilation or other factors keeps the air drier, adding an aluminum roasting tray of moist perlite to the vicinity will work in this case too. The idea is not to become overly focused on temporary humidity fluctuations but to try to maintain a high average humidity and pay attention to the visual clues.

Aside from humidity, temperature is rather important when it comes to growing kratom. The ideal temperature for growing kratom is between 75 and 90 degrees Fahrenheit. However, most households tend to keep temperatures around 68 degrees. This would be considered similar to low wintertime temperatures in Thailand, but we have found that kratom plants will still grow decently in this range. So you do not need to live in a tropical climate or roast yourself out of your house to grow kratom. Artificial lights will also add as much as 20 degrees depending on ventilation and the type of lighting. So you can easily maintain ideal temperatures in an average household. Anything below 65 degrees Fahrenheit, though, would start to noticeably slow your kratom’s growth.

We have exposed kratom plants to wintertime temperatures as low as 50 degrees. But as temperatures dropped into the 50’s, we had leaves that turned red in color and eventually dropped off. In our test, the kratom plants remained under these conditions for weeks before the leaves totally dropped. However, in some cases, dropped leaves may still be capable of growing back once temperatures rise again. On the other end of the thermometer, it has been suggested that growth slows significantly if kratom plants are exposed to temperatures above 90 degrees Fahrenheit. But we have experienced good growth even with steady temperatures as high as 96 degrees.

In retrospect, it seems that kratom does allow some leeway with regards to its conditions. It is not quite as demanding as many people believe as long as you take some time to provide an adequate setup. It is not exactly a plant that you can leave by your window, but neither is it a plant whose conditions are hard to meet with the proper planning. As a general outline, situate your kratom plant in a large pot with some Miracle Grow potting soil or a similarly textured mix with a ph between 5.5 and 6.5. Place the plant(s) in some type of contained growing environment such as an aquarium or a growing closet that will help maintain humidity and temperature levels. Provide some type of direct artificial light overhead, whether HPS, LED or fluorescent (preferably t5). Keep in mind that the stronger lights will provide nicer leaves, but the fluorescents will certainly provide sufficient light to maintain healthy growth.

When it comes to maintenance, aim to maintain temperatures between 75-90 degrees Fahrenheit, which your lighting and contained environment should help achieve. Monitor the humidity, adding moistened perlite to the environment if needed. Water your plants when the soil just starts to dry out. Fertilize with a liquid plant food according to the directions on the packaging. Watch the leaves for signs of drying out or nutrient deficiency. Periodically check the soil ph, especially if you notice discoloration. And don’t forget to take plenty of pictures to post online.

LIVE RIFAT & BUMBLEBEE KRATOM PLANTS AVAILABLE AT www.kratomcollection.com

Posted on

How to Grow Klip Dagga (Leonotis Nepetifolia)

Leonotis Nepetifolia, more commonly known as klip dagga, is one of the easiest enthobotanicals to grow. Leonotis Nepetifolia tends to get quite tall, but it is a great choice for beginning gardeners as long as they have the appropriate space. While smaller plants can be grown inside, klip dagga is more of an outdoor plant. Klip dagga is usually grown as an annual but can be kept perennially. This flowering stalk, which can reach 10 feet in height, is normally grown in the ground. But it will grow in large pots as well. We at World Seed Supply have grown full size klip dagga plants in pots that were approximately 11” deep and 11” in diameter. While these leonotis plants did not have any trouble reaching their full potential in pots that size, it is worth noting that the dagga plants had a tendency to fall over simply from getting too tall. Therefore, actions such as using a larger pot, tying the plant to some type of support, or cutting back growth might be suggested for growing klip dagga. Potted plants will also require more regular watering than those in the ground, especially in strong sun.

Leonotis Nepetifolia can grow in a wide variety of soils, even those that are somewhat infertile. But naturally, klip dagga plants will prefer soils that are rich and well-draining. As for many of our outdoor plants, we prefer to use pure compost for growing klip dagga. Compost seems to produce leonotis plants that are much healthier with larger leaves and thicker stems. It is normal to see plants with leaves that are 6 inches

or more in length (not including the stem). Despite being giants, leonotis nepetifolia plants have roots that are comparatively shallow. About eight inches of compost placed on top of ground that has been tilled will give the best results.

You can choose to start your plants directly in the ground, in a container outdoors or in a container indoors. Don’t become too focused on any of these as a requirement. Do what suits you best. Either way, you should still end up with skyscraping plants by the end of the season. Klip dagga seeds are not killed by freezing and will readily germinate from seed scattered by the year’s previous crop, even in the northern U.S. However, our experience has shown that seed started outdoors where the winters are cooler will sometimes be delayed in germination until favorable temperatures begin, usually in late May to June.

Leonotis nepetifolia seeds started indoors will give you a head start on the season, but they will need to be hardened off. By that, it means that the small klip dagga plants will need gradual exposure to the outdoors, during which time they are likely to lose leaves. Even so, it seems that leonotis nepetifola is one species that will benefit from being started indoors ahead of time, at least in the north, as long as the appropriate acclimation steps are taken.

On the other hand, if you are not confident that you will be able to properly acclimate your klip dagga plants or you do not feel like putting in the effort, it makes sense simply to wait until the weather warms a bit so you can start your leonotis seeds outdoors. At that point, you will either start seedlings in a separate container, which will allow you to select the best ones and transplant them in an organized manner into some kind of flower bed, or you will start them in the ground directly. Just be sure to choose a final location in full sun. An ideal transplantation size for leonotis nepetifolia plants is about 4”-5”.

You should sow your leonotis nepetifolia seeds at a depth of about 1/8”. For the most part, klip dagga seeds germinate easily and hold viability well. We have found klip dagga seedlings growing quite readily in different areas, including the soil of certain cacti pots where klip dagga seeds inadvertently landed. However, we have also encountered a few instances where growers had trouble getting klip dagga seeds to germinate. In some instances, the problem has been solved by increasing watering. One tip that should be minded when watering is that the soil must remain evenly moist for enough time that the seeds can absorb the water. This is a general watering tip that applies to growing many types of seeds (but not all). Sometimes, even a heavy dose of water can be counteracted by a strong sun or dry air that dries the soil too quickly. In that case, mulching the soil with some hay or moving a container to a slightly shadier spot might make a difference. Indoors, misting the soil surface deeper or more frequently could help. A steady, even soil moisture with considerable warmth should be your goal. In fact, we’ve had good results with starting leonotis seeds indoors using bottom heat. That coincides with our findings about outdoor germination increasing in the later months, which means a temperature increase could potentially benefit your dagga grow early on.

Once your leonotis plants are growing in their final locations, all you need to worry about is keeping them adequately watered. These tall plants will generally soak up as much as you can water them. We recommend watering leonotis plants deeply every one to three days. Fertilizing is optional, particularly if using compost, and can be done monthly with an organic fertilizer. Leaves and flower petals can be harvested throughout the growing season. Seed pods can be harvested in the fall by cutting the entire flowering stalks from the plant. Lastly, don’t forget to take pictures!

SHOP OUR STORE FOR KLIP DAGGA SEEDS, PLANTS, DRIED FLOWERS, EXTRACTS & MORE

Posted on

World Seed Supply’s Complete Pepper Growing Guide

Peppers are one of the most rewarding plants you can have in your garden. A single plant can give you an abundance of fruits that you can enjoy for months. But maximizing your harvest and heat depends on knowing exactly what to do to give your peppers everything they need.

Before you even begin growing hot peppers, the first thing you need to do is select the type of chili pepper you want to grow. There are countless types of chili peppers, coming in all shapes and sizes and ranging from completely mild to lava-gargling, surface-of-the-sun hot. The heat of hot peppers is measured on a scale, called the Scoville Heat Scale. The way this scale works is that it measures how much a hot pepper must be diluted before the mixture is no longer spicy. Since the test is based on human involvement, it is not an exact science, and this is why there tends to be arguments over which peppers are hotter than others. But it gives a general idea of what to expect from a given variety of chili. With that said, it should be noted that the heat of a pepper relies very heavily on the growing conditions. A normally excruciating pepper can end up being nearly mild if the right conditions are not met.

For those extreme tasters, we at World Seed Supply offer some of the world’s hottest, including the Naga Jalokia, The Red Savina Habanero and the Desert Tepin. We also offer visually appealing types like the Chocolate habanero, which is anything but sweet, and classic types, like jalapeno and cayenne.

Now let’s get into the garden. The first mistake many pepper growers make is in the soil selection. In World Seed Supply’s experience, we have NOT found average potting soil or seed starting soil to be a good choice for peppers. Never use topsoil for chili peppers either. You want a soil that is well-draining and very fertile with plenty of organic matter. There seems to be debate over whether to use or avoid peat for hot peppers, so we figured we would just clarify. A little peat will not hurt your hot peppers, but you should never choose a soil in which peat is a major component. Peat is added to many soil mixtures to help with water retention and to provide a light medium that roots can easily penetrate. But it does not provide adequate nutrition and tends to dry out in strong sun, and once that happens it can be difficult to re-hydrate. But a small amount of peat (or used coffee grounds) can be useful just to increase the acidity of a mix.

Germinating your chili peppers indoors in advance and sowing directly outdoors are choices that each offer benefits and drawbacks. This is why we at World Seed Supply usually do a little of both and then choose the best plants to work with. The germination rate of pepper seeds seems to be higher when started indoors because you have more control over moisture. The advantage of pepper seed started outdoors is that it does not need to be hardened off. Hardening off is the process of adjusting a plant to the intense sunlight of the outdoors. Even though you may think your house is very bright, it rarely compares to the sun’s power outdoors. So, just like some individuals will use a few days in the tanning booth at the beginning of the summer before they can safely sit outside without burning, indoor plants will need some type of gradual exposure. At World Seed Supply, we usually begin exposure in an extremely shady spot such as under a deck or in the shade under a lawn chair. Hardening off can result in an adjustment period where growth slows down. So if you do not have a good amount of light indoors you might find that pepper seeds started outdoors will outpace seed started indoors at an earlier date. So if you have the extra seed to spare, it is a good idea to try both methods.

When germinating pepper seeds indoors, we recommend a 50/50 mix of cactus soil and perlite. Perlite is a very light, very porous type of volcanic rock that is similar to pumice. It comes in bags of tiny round particles that resemble foam balls. This 50/50 mix is actually a common mixture that works well with most plants. You should be able to get a bag of each for under $10 total. We have found that Hoffman brand or Shultz’s cactus soil seems to have a good consistency and a nice black color. An ideal Ph for hot peppers is about 5-6. The only consideration with a cactus soil base is that cacti prefer alkaline soils, so this is where you may want to lower the ph by adding in something like a small amount of peat or coffee grounds. If you have an adequate light source, you can start peppers at any time of year. Just be sure to harden them off slowly when you eventually put them outside.

We at World Seed Supply also like to grow our peppers in compost, which we order by the truckload. Just to be clear, growing hot peppers does not require two types of soil. The 50/50 mix is suitable for your entire growing project if you want to leave it in that. We just prefer compost for all growing that takes place outdoors, especially if we’re putting pepper plants in the ground. But since compost tends to carry insects, we don’t use this to start pepper seeds indoors. We do start some pepper seeds outdoors directly in compost. But seeds started indoors will be started in the mix mentioned above and transplanted to compost once they are ready to go outside. Good compost is well-draining and does not compact. Yet, it holds moisture well. Younger compost may be more beneficial for growing peppers since it tends to be more acidic. If you do your own composting, you can also increase the acidity by composting more things like fruit or pine needles. Otherwise, if you find that your compost is a little on the alkaline side, you might then go ahead and add in just a little peat or some spent coffee grounds to lower the ph.

Another traditional soil amendment for hot peppers is epsom salt (magnesium sulphate), which adds magnesium and sulphur to the soil. While most soils do not lack in these minerals, many growers use this to help the fruits set. Epsom salt is also useful in clearing out soils that have other salt buildups. These buildups tend to occur in potted plants, especially if tap water is used. Some pepper growers will mix a small amount of epsom salt in with the soil in the beginning of the season, while others use it in the water or as a foliar spray (1 Tbs per gallon). Others will scratch the granules into the surface of the soil. Epsom salt treatment will help prevent yellowing leaves that many growers see later in the season as the result of magnesium deficiency. This can have an effect on growth and flavor.

When planting, it is a good idea to sow your pepper seeds with the point facing down. The seed’s point is where the root will emerge from, so having the root positioned in advance will ensure that it drives down into the soil where it belongs. The seed should be sown at a depth just deeper than the diameter of the seed, so that the upper rim of the seed lies just below the soil line. Take measures to avoid the soil being too compact around the seed. Compact soil can actually choke seeds that would have otherwise grown. Compact soil inhibits airflow and holds the seed down. By planting loosely with the pepper seed point down and the rim at the soil line, the seed is ready to start rising out of the soil as soon as it begins to sprout.

Once the pepper seeds have been planted, keep the soil lightly and evenly moist until germination. During and before germination, bottom heat is extremely beneficial, particularly for the more exotic peppers like the naga jalokia, which come from tropical climates. For these, you want a soil temperature that is no less than 65 degrees F. For more exotic varieties, you may not see results in temperatures below 80 degrees. You may get away with cooler temperatures for other pepper seeds. But you will find that a few degrees can make a difference for these varieties. Also keep in mind that the soil temperature is not always the same as the air temperature.

Indoor seeds need only be watered by misting the soil with a spray bottle. At no point should it get wet though. Too much moisture can cause the pepper seed embryo to rot. It can also cause the stems of new chili seedlings to do the same. The soil can be allowed to dry out slightly between watering. But it is also important not to let the soil dry out completely. This may be a particularly sensitive issue if bottom heat is applied, since the heat can dry things out pretty quickly. But it is important to keep on top of this because if the soil happens to get too dry just as the embryo is waking up it could kill the seedling before you even realize anything was going on. The result is that you will unwittingly be tending dead seeds, waiting for them to pop up.

You may be accustomed to seeing pepper seedlings after two weeks or so, but be prepared to wait a month or more with some varieties, especially if temperatures are not ideal throughout. It is also common to see new sprouts weeks after others have first emerged. After the seeds have sprouted, be sure to keep the seed coats moist so that they can easily fall off. Occasionally, seed coats of pepper seeds will have trouble falling off. Keeping the seed coats moist will keep them pliable so that the plants can break free. It is usually best to allow the seed coat to fall off the pepper seedling naturally due to the risk of snapping the stem during handling. But in some cases you may have to remove the seed coat manually. A utility knife, scissors and a pair of needle nose pliers may be useful in this case to help slice the seed coat and pull it apart without causing damage to the leaves.

Your seeds can be transplanted once they’ve grown about two sets of true leaves and are about 3-4”. We at World Seed Supply do not recommend transplanting seeds from indoors to the outdoors instantaneously. Going back to the subject of hardening off, you should take your entire tray or pot of pepper seedlings and give them a week or so to get used to the sun. If you are transplanting to pots, you will want to use a pot that is at least 12” in diameter and about 12” in height for each pepper seedling. If you are planting chili seedlings in the ground, you can plant most varieties about a foot apart in rows 24 inches apart. A foot is a close spacing, but it allows the pepper plants to lean together and support each other. You may also opt to space pepper plants up to 2 feet apart if you want to maximize sun exposure on all sized. It is also recommended to plant your pepper plants along with flowers such as California poppy, Joe Pye weed or monarda citriodora (bee balm) that will attract bees and other pollinators. These companion plants and the helpers they bring are likely to increase the yields of peppers and other fruiting plants as well.

As the plants grow, you will need to fertilizer them about every four weeks. To remain organic, you can use bonemeal and seaweed fertilizer. Bonemeal is a natural source of phosphorous that is known for boosting blooms and does well for peppers too. Bonemeal is essentially crushed bone, which slowly releases nutrients into the soil as the bones are digested by microbes in the soil. Bonemeal may not work with sterile soils, since it requires microbes to activate the nutrients in the bonemeal. If using compost, this is certainly not an issue. Most cactus soils should also be fine, but you can always sprinkle a bit of ground soil at the bottom or top of your pot just to be certain. Kelp fertilizers tend to be good sources of potassium. If you’re using a chemical fertilizer, just look for something that is geared toward increasing blooms. A tomato fertilizer should also suffice. A ratio of about 5-10-10 is good. Please note that compost already has a good supply of nutrients that will be released slowly and over a long period of time. Since chemical fertilizers can be quicker acting, it is important not to overdo them. Too much nitrogen can actually kill the heat of your peppers.

Aside from fertilization, watering is an obvious part of growing peppers. Your pepper plants should be kept well-watered, especially if they are in pots. Peppers, especially many of the hottest ones, are known for growing in hot climates. But you are likely to still see them wilt on a hot summer day. You can water your plants every day or two to keep them growing nicely. This is especially important while the plant is growing in size (before fruiting) because more branches will eventually mean more peppers. However, many growers find that stressing pepper plants during fruiting will help increase the heat of the peppers. Many people wonder how to make hot peppers hotter. If you are looking for the hottest pepper possible, and especially if you’re looking to impress people, this may be a good idea. But in that case, you may want to grow a few extra pepper plants because stressing can decrease the number of fruits you will get from each plant. It is also worth noting that watering the ground without wetting the leaves has been said to have a positive effect on potency. We at world Seed Supply do not typically practice this.

Along with decreasing water, you may be able to make your hot peppers hotter by giving them more sun during fruiting. If you have your chili pepper plants in pots, you can always look for an area with more sun. But if your plants are already in the ground, you might wonder how you can possibly give them more sun. Well, you can’t give the plants more sun. But you can give the peppers more sun. Cut off any of the larger leaves that seem to be shading your peppers. This will not only reduce the amount of diverted energy, it will allow more sun to reach the peppers directly.

Harvesting is the most rewarding part of growing peppers. It is important to harvest peppers regularly to keep the plant productive. It is widely believed that peppers that are left on the plant longer will be hotter and will have a better taste. If you have ten plants or so, you may find yourself with peppers to pick everyday once they start coming. This will last until the cold weather puts a damper on your season. We at World Seed Supply usually harvest peppers once they have turned from orange to red, but before they turn a deep red. A simple snip with a pair of scissors at the tip of the pepper stem is all that is needed. If you will be drying your peppers, you can string them up with a thread ran through the stem tips. A hot sun will work well to dry peppers. But a boiler room is usually preferable because rain is not a factor, and it can be used even going into the late fall when sun strength decreases. It is important that the area used for drying be very arid. You want the peppers to dry quickly because the moist chamber of a pepper is a great place for mold to develop. Cutting the tips off peppers may help the cause, but it is not a guarantee that mold will not form. In circumstances where an ideal drying environment is not available, it may be best to cut peppers into small pieces and lay them out to dry.

ALWAYS wear gloves when handling or cutting peppers. There should be no chemicals outside the skin, so picking can be done without gloves. But pepper oil can stay on the skin for days despite showers, intense washing, rubbing alcohol or whatever other attempts you make. In fact, a hot shower will only spread the capsaicin to all your most favorite areas, and while you may have a tolerance built up in your mouth that does not always extend to other areas.

When the season is about to draw close, it is beneficial to cut the growing tips off all branches unless there is a pepper there. By cutting the tips, the plant’s energy will divert from leaf growth into maturing the existing peppers. Many people also do not realize that peppers are perennial plants and can be saved for the following season. It is important to realize that bringing plants indoors can mean bringing pests indoors. Often an infestation will not expose itself for weeks or even months. We recommend quarantining the plant from any other indoor plant during this time. If window space is limited, this can be accomplished by covering the plant with a clear plastic bag and securing the bottom with a large rubber band or something of the sort. For more information on removing pests, please refer to our article, “Treating Pests on Houseplants: A Complete Regimen.”

Though you should easily be able to keep a pepper plant alive indoors over the winter, most indoor conditions do not offer enough light for fruiting. Flowers will usually form but will fall off before maturing. This is normal and should not be cause for concern. Some varieties can actually fruit indoors as well, especially if additional light is supplied. By keeping your plant alive for another year, it gives you a great head start on the season and is a very good way to increase your pepper yield the following season. You might even expect the peppers to be a little hotter than the previous year.

WE OFFER MANY OF THE WORLD’S HOTTEST PEPPERS!

Posted on

Germinating Hard-shelled Seeds Such as Mimosa, Acacia and Bundleflower: The Hot Water Technique

A lot of species have hard-shelled seed coats that need special treatment in order to allow moisture to penetrate and reach the embryo so that germination can begin. For many species, including Hawaiian Baby Woodrose (Argyreia nervosa) and Lotus (Nelumbo Nucifera), the process of scarification, which essentially involves wearing down the seed coat by abrasion, is sufficient. But for other plants such as Acacia Maidenii, Mimosa Hostilis, Mimosa PudicaDesmanthus Illinoensis, Desmodium Gyrans, Lespedeza Bicolor and a lot of related species, the seeds are best off being softened by hot water. The simple process of subjecting them to hot water is known among growers as “The Hot Water Tek”.

Some growers will actually choose to use a combination of scarification and The Hot Water Tek in order to maximize results. If that is what you choose to do, you’ll want to start out by sanding, filing or nicking the seed coat. We generally prefer sanding or filing over nicking because it creates a larger surface are where water can penetrate. The key with scarification is not to go too deeply so that you damage the embryo. You just want to rub through the very outer shell of the seed in one spot. Since you’ll be using hot water instead of room temperature water, you do not have to be as thorough.

Next, you want to bring enough water to cover the seeds to a boil. If you’re set on saving time, you could actually begin heating the water before scarifying the seeds so that it will be ready by the time you’re done. As soon as the water begins boiling you want to let it cool just slightly before putting the seeds in. You might think that this type of heat would surely kill the embryo, but that it not the case. The seeds should remain in the water until they sprout, so it is best to pour them into a container that you can set aside for a week or so. From this treatment, most of your seeds should sprout. If there are any that do not, you can repeat the process of heating and soaking. Often you will find that seeds that didn’t sprout the first time around will do so in subsequent efforts. Not every seed will germinate, but this will give you the opportunity to maximize success.

As mentioned before, you want to leave the seeds soaking until they sprout. Some growers plant them right away, but this will give them a better chance of absorbing all the water they need to germinate. It will also allow you to monitor them individually and avoid wasting soil space on seeds that do not end up germinating. It is also a good idea to change the water daily to prevent any bacteria or mold from growing in your water.

As you start seeing sprouts, you can begin plucking them out and planting them in soil with the taproot facing down. The top of the seed should be roughly at the soil line with the root going deeper. By planting the seeds like this instead of letting them sprout in the soil, it will ensure that they get a perfect start. From here, you should simply follow the growing procedures according to the species you are growing. And there you have it: The Hot Water Tek!

SHOP OUR STORE FOR SEEDS OF ACACIA, DESMANTHUS & MORE

*MIMOSA HOSTILIS SEEDS AVAILABLE (contact info@worldseedsupply.net)*

Posted on

World Seed Supply’s Voacanga Africana Grow Guide

    Voacanaga Africana is a tropical shrub native to West Africa where it is used medicinally and ceremonially.   Voacanga is one of the more well-known African entheogens, but its prevalence as a live plant outside of Africa is rather limited because voacanga seeds can be quite tough to germinate once they go dormant.  Germination of dormant voacanga seeds can take as long as nine months.  Such a long germination period can require patience and persistence on the part of the grower, and as with any seed that has along germination time, mold becomes an adversary.
    Almost all voacanga Africana seeds on the market have entered dormancy before they are sold.  Very fresh voacanga seeds will actually germinate quite readily, but being able to get them might very well just be a matter of luck. Since voacanga seeds are also sold for entheogenic use, many vendors are not specifically concerned with viability. In order to get a better price, botanical vendors may purchase large amounts at once, and selling these amounts can take some time.  But there are other logistical reasons involved in what amounts to a race against time.
    Even if voacanga seeds are freshly harvested, dried and shipped from a grower, shipping from Africa can often take several weeks.  If your vendor purchased their voacanga seeds from a domestic wholesaler, which is quite likely, then that’s one other factor against time.  You then have to consider the time it takes for the seeds to be sold to you, shipped to you and the time it takes for you to begin growing them. Needless to say, it is best to plant to sow voacanga seeds upon arrival rather than storing them. If you do need to store them, do so in an air-tight container, and place that in the fridge.
    As time passes, voacanga’s germination time increases, and the rate decreases.  This is essentially true for all seeds, but the phenomenon is a bit more underscored with voacanga africana seeds. Properly stored voacanga seed will still germinate after being several months old. As long as there is still some white waxiness to the embryo inside, the seeds are ok.   And dormant or not, the germination process is still essentially the same.  So without further delay, here are our growing instructions for voacanga africana seeds:
    Voacanga seeds come from the inside of a fruit before they are dried, and so they tend to have a lot of debris on the outside.  The first thing you want to do is break up any clumps of voacanga seeds you may have.  Try to remove any material that might still be stuck to the seed coats. This dead material is a prime target for molds and other unwanted enemies.  Once you have cleaned your voacanga seeds by hand, you should rinse them. Then place the  seeds in a strainer and run a good stream of water over them.  If your sink has a sprayer, use it to spray the seeds for a minute or two. The water will remove all fine voacanga dust from your seeds too.
    In nature, some seeds require exposure to a mild acid to help break down the seed coat and facilitate germination.  This occurs either during the decomposition of fruit or within the digestive system of birds and other animals.  To simulate this, you want to soak your voacanga seeds in distilled vinegar for 10-15 minutes. The standard dilution for distilled vinegar is 5%, which is fine for this task.  Once your voacanga seeds have been exposed to the vinegar for the appropriate time, pour off the vinegar and rinse the seeds again under your faucet.
    As an added measure against unwanted mold, soak your voacanga seeds in 3% hydrogen peroxide for an additional 20 minutes.  3% is the standard dilution right out of the bottle, so there’s no need to worry about trying to dilute to 3%.  If your bottle is diluted slightly differently, it probably won’t make a difference.  It may be best to do this in the container you will want to keep your seeds in so that the peroxide sanitizes the container as well.  A container you can see through is also ideal so you can monitor the progress of your voacanga seeds. If you are familiar with any of our other grow guides, then you may know that we often favor the small Chinese soup container for tasks such as these.
After 20 minutes, pour off any excess peroxide.  There’s no need to rinse your voacanga seeds after the peroxide soak.  When you’re done with this, you can cover the seeds.  We accomplish this by placing a bowl over the top of the container that will fit well enough to seal the top without actually having a lid that clips on.  The idea is that no dust or debris can get inside, but the container is not completely sealed so that it cannot “breath”.  This is not to say that an actual lid or a dish over the top would not work just as well. But for the sake of our own method, this has worked quite well.
    If you used a clear container for your voacanga seeds, then you should be able to see inside without removing the bowl for several weeks. You should not expect to see any seedling growth for at least a month.  Mold growth may be another story.  If at any time you see mold forming, simply use the peroxide to clean your voacanga seeds.  Pour it in, shake them up to break up the mold and pour off the excess liquid.  Then place the lid back on and resume the process.  You can continue to do this even after the sprouts have formed.
    You can count on voacanga germination to be erratic.  Even after the initial sprouts, you may continue to get new voacanga sprouts forming for a month or two afterward.  During germination, you should maintain a temperature no less than 70 degrees.  But closer to 85 degrees is ideal.  You can remove voacanga sprouts as they mature.  When the root is about 1/3”, the sprouts are ready to be removed.  Leave any unsprouted seeds in the covered container and continue treating with peroxide at any sight of mold.

Sprouts that are removed from the container are ready to begin their next phase of growth in actual dirt.  The reason we hold off until this point before introducing dirt is to maintain a more sanitary environment where you can battle mold while keeping moisture and temperature more constant.  You can still ruin your voacanga sprouts by planting them too deeply.  By waiting until the root is at the right length (1/3”) you can follow the simple rule of burying just the white root and leaving the seed at the soil level.  This gives the seedling enough of a foothold in the soil without having to risk it getting lost under any soil.

When it comes to soil type, voacanga likes a moist, rich soil.  We’ve had success with regular Scott’s brand potting soil straight from the bag. You can go as close as 2” for the initial spacing on your sprouts. Clearly, more space is better though.  Once you’ve buried the seedlings as discussed above, cover the top of your container with clear plastic wrap and place under lights.

We recommend artificial light because it is more consistent and easy to control.  However, there’s no reason good natural light would not work.  Voacanga prefers bright light.  In side-by-side comparisons, the plants given the most light put on the most visible growth with the largest leaves.  Fluorescent lighting works fine, specifically t5 fluoresents. These are the really skinny tubes, and they are known for the best and most even output of growth for plants. The only drawback is that they are a little harder to find.  In the event that you cannot use t5’s, other fluorescent lights can be substituted.

Once your voacanga seedlings have had a chance to mature, you can begin to separate them out into their own containers. At this point, they should be relatively stable and easy to manage.  It is important to maintain high humidity and bright light for your voacanga africana plants. Keep the soil consistently moist without it getting completely soggy.

Voacanaga Africana is a very rewarding plant to grow, specifically because of its rarity in ethnoboatnical plant collections.  Rarity is certainly not because of a lack of interest in the plant but rather because of the added difficulties involved with growing it. But we hope that this guide will help you overcome those obstacles so you can enjoy the satisfaction of having done so and become part of a rather limited group of collectors with this plant.


Posted on

World Seed Supply’s Guide to Psychotria Viridis & Alba Identification

Although psychotria viridis and psychotria alba do look very much alike at first glance, when you consider some key features, it should be very easy for you to distinguish the two species so that you never get caught buying the wrong one. There was a time when I too was confused because of the prevalence of so many psychotria alba plants posing as psychotria viridis.  Many times, the seller is not even aware because he or she trusted their source greatly.  Like with many misidentification cases, mistakenly identified plants become references that fuel the confusion.  So it becomes hard to even research the right answer.  Well, this guide is intended as a resource for all those who are still in confusion about psychotria identification.

Psychotria Viridis from seed (above)


The first thing you want to consider is the leaf margins. The plant in this photo is young, but you can see one of the key ID features of alba vs. viridis showing even at this early age. The leaf margins extend all the way down on both sides of the petiole to meet the stem.  In simpler terms, the stem or central leaf vein that connects the leaf to the main plant stem has little pieces of leaf (leaf margins) on both sides that follow all the way down on both sides.   Sometimes alba leaf margins will come down close.  But you want to make sure they come down all the way on both sides.  This seems very simple, but it is actually a very consistent feature of psychotria viridis.

Psychotria Alba (above)


With psychotria alba, the leaf margin ends up further on the petiole (leaf stem).  Normally, you might not think to pay attention to this type of detail. But if you do, it will almost certainly allow you to tell the difference between the two species.  Variance can occur even among leaves on the same plant. So it is important to stick to these features and not be misled by paying attention to other types of similarities or differences. If you are shopping for a plant, this is most likely the feature you will have to base your ID on because it is the feature that reveals itself in all stages of growth without having the plant growing in front of you. If you understand the concept, it should eventually become quite obvious.  Don’t let your imagination stretch. Most “viridis” plants are really alba.

A second difference that will help you ID whether your psychtoria is alba or viridis is growth speed. Unfortunately, you will not be able to use this feature to ID a plant until you already have the plant growing in front of you. Growth speed is also a more subjective feature than the leaf margin. But it can be used in conjunction with the other features to create a well-rounded identification of your psychotria plant.  So getting to the point, psychotria alba is known to grow at a faster rate than psychotria viridis. If your plant is putting on growth fairly quickly, it might be a sign that you have an alba growing. But you also have to consider the role that conditions play in growth speed.  Many times, even alba will grow rather slowly, especially in cooler temperatures.  But you can consider growth speed a good way to back up what you’ve found out about the leaf margins on your plant.

A third feature to consider in your psychotira ID is flower color.  While flower color is perhaps the most easily distinguishable feature, it requires that your plant be in bloom.  It is rare that you’ll find a plant for sale that is in bloom. But like growth speed, it can often provide more insight about a plant you’ve been growing. When it comes to flower color, alba, as the name suggests, has white flowers. On the other hand, viridis will most often have greenish flowers with white stamens.  So if you see green flowers, it’s a pretty good affirmation that you’re growing psychotria viridis.

A fourth feature to consider in your psychotria ID is leaf waviness.  It is important to use this as a secondary feature in your identification because it is less consistent.  It is more of a way to rule out viridis than to confirm alba.  Psychotria alba leaves tend to have wavy or rippled edges whereas those of psychotria viridis will not.  You can see from the psychotria alba picture above that waviness is not always a feature of alba.  Some clones of the same plant did show wavy leaves though. What is important to remember is that wavy edges arefrequently associated with alba, but not always. So if you do see them, it is a good piece of information to use in conjunction with your other findings to suggest that you are dealing with alba.  You might see certain curling of viridis leaves due to humidity or health conditions. So it is important to note that we are specifically referring to rippling on theedges of the leaves.  This feature usually does not appear as some type of deformity, but rather as a natural feature of the leaf itself.  But to reiterate, leaf waviness is a variable feature of psychotria alba.  So do not let the lack of waviness on its own trick you into thinking you are dealing with psychotria viridis.  It seems that this is one area where many people are steered wrong.

One last feature to consider in your psychotria ID is the undersides of the leaf.  It has been noted that the undersides of psychotria viridis leaves tend to have what look like little “spines” coming off the central leaf vein.  The following link shows an example of these types of so-called spines http://entheopedia.org/pics/Entheopedia.Org/pvirisid.jpg This feature is not normally associated with psychotria alba, and it can be another part of a well-rounded psychotria identification.

Aside from these five features, there are certain other tendencies of viridis compared to psychotria alba. However, to avoid the risk of causing confusion we will keep our ID guide to these more reliable characteristics.   Using the information described above, there should be quite enough information for you to make an informed identification.  Although at first glance, the two species are seemingly undistinguishable, we now see that there are actually a number of obvious differences that surface when you focus on the details.  It is important to value the more consistent features, such as the leaf margins extending down to the stem, over the variable features, such as the wavy leaf edges.  But you also want to take into account as many features as you can.  And when all is considered it should be quite clear what you are dealing with.

Also, be sure to check out our guide, “Growing Psychotria Viridis from Seed and Cuttings”


Posted on

Propagation and Cloning of Phalaris Grass

Growing phalaris grass is easy enough for any grower to do successfully. Occasionally, people will have trouble getting grass seed to germinate right away, but here are some tips for getting the most phalaris grass growing as quickly as possible.

You can grow phalaris in clumps or in patches. For clumps, you will want to choose a large, deep pot. For patches, aluminum roasting pans work well. With each pan, you will be able to start a patch of phalaris grass larger then the area of the pan by creating plugs.

Phalaris basically only needs steady moisture to get going. While phalaris seeds can be germinated outdoors, you should be able to speed things up by starting indoors. Some outdoor grows seem to be halted because moisture control is tougher to accomplish. Diligent watering is required, which can be offset by strong sun or wind. Wind also has a tendency to blow your seeds away.

Start out by moistening all of your soil. Then press it flat without any significant compacting. Sow your phalaris seeds on the surface of the soil and press them into the moist soil so they can soak in the moisture more easily. You may cover your seeds with a thin dusting of soil, although we typically do not. We do recommend covering your soil with clear plastic wrap because it allows for better moisture control, which, as mentioned before, is the key to the quickest germination. In a side by side, comparison with phalaris brachystachys seeds, we found that a pot that we covered with clear plastic germinated 1-2 days more rapidly with a higher percentage than seeds in the pot that was not covered.

Once your phalaris seedlings begin growing, you should then sprinkle some loose soil in between each blade to provide support. You no longer need the plastic cover once you are sure most of your phalaris seeds have germinated. Allow your phalaris clumps or pans of seedlings to fill in thoroughly under artificial lights. You may also keep them outdoors in a shady area, but you must take care not to let the soil dry out. You will also have to worry about other seeds getting into the soil. In some cases, a screen may be helpful to keep them out. When growing phalaris grass, it is important to develop a good root system before any transplanting into the ground. While they are indoors your phalaris seedlings do not have to worry about competitors, and it is a good idea to give them a good foothold before introducing them to an environment where invaders exist.

When you are sure that your root system is well-developed, it is time to start your phalaris patch. If you only want clumps, your job is pretty much done by putting them in the ground. For patches, it is best to till the soil to loosen it and remove any competing weeds. Then, go ahead and divide up your tray in to a number of smaller clumps. A 4”x 4” clump should be suitable. Now, plant your phalaris plugs in your prepared area using a spacing approximately half the thickness of the clump. So, a four inch clump will be given two inches of space. Keep the area well-watered, being sure to remove any weeds or other grass species. The spaces in between your phalaris plugs will eventually fill in as the roots spread out, and you will have a large phalaris grass patch. You may then go on to separate clumps out from the patch and plant them in a similar manner to expedite the expansion of your patch even further.

This process is possible because phalaris grass rhizomes spread and send up new blades. Each phalaris seed has its own genetics, but every blade sent up from the root system of the same seed is part of the same phalaris plant. In a batch of phalaris grown from seed, you will have several different sets of genes mixed in from each of the different seeds. Now, let’s say you have a blade that grows especially fast or has unique coloration. If you isolate an individual blade, it will multiply so that every blade has the same code. You may then proceed to clone this grass by making plugs from the patch that develops using the method described above. The resulting patch will have phalaris grass blades that all have the same characteristics. The seeds of these blades may have similar genes, just like a parent has similar genes to his or her child, but they will still have some variation. Phalaris “Big Medicine” and “Yugo Red” are examples of reed canary grass specimens that have been reproduced by cloning. To have true specimens of these varieties, you must have gotten them as clones.

Nobody would say phalaris is hard to grow in the first place. But now you should be equipped to maximize your potential and create a patch that will be exactly as you want it to be, whether in terms of size shape or genetics.

SHOP OUR STORE FOR PHALARIS ARUNDINACEA & AQUATICA SEEDS

ALSO OFFERING PHALARIS “YUGO RED” & “BIG MEDICINE” CLONES

—————————————————————————————–

Posted on

Treating Pests on Houseplants: A Complete Regimen

With the onset of cool weather, it may be time to bring your non-hardy perennials indoors. Unfortunately, this is also a risky time of year for your plant collection because you run the risk of bringing pests indoors where they can infect your entire collection. Simple inspection is often not enough. In this guide, we will learn how to treat pests and keep them from ruining your houseplants as they come in for wintertime.

The presence of pests outdoors does not always manifest as a problem because they have the room to spread naturally. After all, they were designed to exist in nature. As houseplants, they are in an artificial environment. They are limited only to the plants you have in your collection. Whereas you may only get a few bugs on each plant outside, your favorite houseplant might have to support an entire population by itself. Aphids can be especially prolific, coating the entire surface of your plant. Although, we have been able to restore plants from these conditions using the methods in this guide, it is much easier to fight off the population before it explodes. This is especially true for flying insects that do not have wings until they mature.

Pests or even eggs can reside anywhere on your plant, including in the soil. They can be picked up in any environment, and nobody is immune to their wrath. It is important to know how to fight pests in all their hiding spots. Even careful inspection can fail to reveal them. But inspection is still a good place to start your battle. Many pests dwell on the undersides of leaves or in the nodes where the leaves meet the stem. Pests are especially fond of the new growth on a plant, so always focus your inspection there as well. Check up and down the stem for insects like scales. Chewed leaves are an obvious sign of some pests, such as whiteflies. Also be on the lookout for deformed leaf growth. While there are other reasons for this, it can also be a sign of insects. Remove the affected leaves as long as it is not one of the only leaves or does not apply to almost all of the leaves. Also be sure to scrape or pick off any pests you can.

Whether or not you spot pests, it is a good idea to rinse the plants thoroughly under a strong stream of water. Smaller plants can be placed under a running faucet for several minutes. Larger plants can be sprayed with a hose or put under a bathtub faucet. Be sure to concentrate on the undersides of the leaves and any crevice that could potentially house pests. This manual removal of the pests is often more effective than trying to kill them with pesticides, and it does not tend to harm the plant as long as you are careful. If you are lucky, this simple treatment may be all that is needed.

Now that your plants have been washed, and have no visual evidence of pests left, it is time to quarantine them. By keeping plants separated, it allows you to identify which ones may still be infected without any risk of a crisis among the entire population. If you only have a few plants, you can keep them in separate rooms. It is likely that flying insects would have been washed away by this point in the process so you do not have to worry about much cross contamination this way. If you have more plants than rooms, there is another approach.

Individuals in a large collection can be isolated by putting them in terrariums or humidity tents. A humidity tent is usually just a fancy way of talking about a clear plastic bag placed over the top of the plant and secured around the base of the pot with tape or a rubber band. As long as there are no gaps in the bottom or holes in the tent, it contains any infestation inside. Throughout the period that your plants are in the tent, it is important to give them regular doses of fresh air to avoid mold or fungus attacks or you will have an entirely new battle to fight.

After you have given the plants a few weeks to “incubate,” you will be able to identify which plants need further treatment. As we mentioned earlier, in a contained environment, it is more likely for a problem to escalate and reveal itself. It is ideal if you have a separate location to bring the infected plants to at this point just as an extra measure of caution. But you will be keeping them in their tents anyway until they prove safe to interact with the rest of your plant community.

Now that you have identified your problematic plants, it is necessary to provide further treatment for them. Since you have literally grown new pest specimens, you will want to go back to washing the plant. Change the humidity tent or sterilize it with rubbing alcohol and allow it to dry fully before reusing it.

There are a number of commercial pesticides, but we always recommend organic ones that will minimize damage to the plant and avoid introducing chemicals to your home environment. A sprayed solution made of cigarette tobacco soaked in water is effective in many cases. We have also had great success with Safer’s brand insecticidal soap. It works on a large range of pests. A concentrate is available, to which you add water and dilute it to a useable level. There are also various home recipes for insecticidal soap, which typically involve dish soap and canola oil. It is generally considered safe to ingest plant material that has been treated with insecticidal soap of this kind, as long as it is washed well. Insecticidal soap works by coating the bodies of insects and blocking respiration. The only drawback is that it must be applied directly to the body of the insect to be effective. This can be especially tough for plants that have numerous places to hide. Therefore, a regular schedule of washing the plant and applying the soap is usually needed until the problem disappears. You may even opt to make a bath and dip the plant inside if the battle persists. Before intermingling the plant with healthy houseplants, be sure to give it some time by itself without treatment, to see if the problem resurfaces.

A complete treatment of houseplants for pests includes treating the soil. We recommend diatomaceous earth for soil treatment. Diatomaceous earth is a highly absorbent white powder composed of the skeletons of algae-like organisms. The sharp surfaces of the particles act like glass to cut up the bodies of tiny insects. The absorbent power of the particles also sucks moisture from insect bodies. Some growers will mix diatomaceous earth in with their soil before potting. Others will water their plants with a solution of diatomaceous earth and water. However, the most common application is to put a layer of about ¼” across the top of the soil, leaving no spaces for bugs to surface without running into the diatomaceous earth. Diatomaceous earth may be sold as an organic pesticide. There is also a food grade powder, which can be used to kill parasites in the body. Diatomaceous earth is also used to filter swimming pools. Any of these will work fine. Once the diatomaceous earth has been laid across the soil, it has a tendency to absorb moisture from the soil and cake up. This is beneficial because it reduces gaps where pests might escape. It is best to water plants from the base of the pot rather than the top because you are likely to wash the layer away.

Many of us have lost prized specimens to pests. Hopefully, this winter we will all be better equipped to handle these situations. Pests can even be picked up in the house, especially as plant immune systems are reduced. It is important to provide adequate light to keep your plants in good fighting condition. Always remember to isolate and treat. Never leave a plant to be treated while it is still among healthy plants that can potentially be infected. Pests may be persistent. But if you are too, they really don’t stand a chance.

Posted on

Salvia Divinorum Cultivation Explained

New growers often worry about their salvia divinorum plants. The reality is that they probably worry too much. While salvia divinorum may seem like a finicky plant, the reality is that it is amazingly resilient. With just a little understanding about the plant, all growers can carry on without losing sleep or their plants.

Salvia Divinorum, a member of the mint family from Oaxaca, Mexico, is one of the most widely known and entheogenic plants. Salvia has a long history of shamanic use in the Sierra Madre mountains, particularly among the Mazatec tribe. These Mazatec healers were known as curanderos. In 1961, Gordon Wasson, who had developed an intimate relationship with these remote people throughout multiple journeys, was invited to experience the ritual brought on by the juice of salvia divinorum leaves. Wasson returned with his colleagues, namely Albert Hoffman, to collect specimens of this undocumented species. Wasson, along with Albert Hoffman, was the first to bring a live salvia divinorum specimen to the U.S. It is the clones of these original salvia plants that are the most widely distributed. They are known as the Hoffman and Wasson clone.

One other popular clone, known as the Blosser strain, is named after Greg Blosser. There are also several rarer clones such as the Cerro Quemado, Luna, Resilience, Julietta, Paradox and Owens. (There is one supplier in mind that carries all of these strains, but we cannot recommend them since we have ordered from them without getting everything we paid for despite numerous promises. ) The reason that so few strains of salvia divinorum exist lies in its virtual inability to produce viable seed. It may be that salvia adapted to being cloned so frequently that it no longer needed to rely on producing seed to reproduce. Following this theory, we can say that it has been domesticated.

Most often, salvia divinorum will not flower. The plant requires pure darkness at night, which is often polluted by artificial light. Flowering is also triggered by an even twelve hour light cycle. But getting saliva to flower does not mean it will produce salvia divinorum seeds. And if seeds are produced, they are hardly ever viable. Saliva divinorum is, therefore, reliant on cuttings to reproduce. This means that each clone is precious, and so it is essential to treat them with proper care.

The transition of a salvia plant from one environment to another is know as acclimation. The key to acclimation is to change all factors gradually. We read about conditions needed for salvia, but what is often unspecified is that we do not need to place it in those conditions right away. It has to be ready. That means don’t put your plant into heavy light immediately, especially if it has been in a dark box. Keep salvia at ambient room lighting and move is closer to the light source over the course of a week. This is much like the way the intensity of the sun increases as the season begins.

The biggest headache and what sets salvia divinorum apart from traditional houseplants is its relationship to humidity. Salvia plants that come in the mail will frequently arrive in a humidity tent, which is usually just a clear plastic bag placed over the plant to seal in the moisture. The same goal may be achieved with various apparatus. While a salvia plant generally has sufficient humidity while inside the tent, most growers do not want to have their salvia inside a humidity tent forever. Since it is difficult to match the conditions it has come from, you will want to change the humidity gradually.

Start out leaving the humidity tent completely on and sealed for the first five days or so. You can air it out once a day just to keep fresh air inside. For the next five days, leave the tent on top of the plant with the bottom open so fresh air can mix with the moist air under the tent. After that, take the tent off for a few hours a day, increasing the amount of time each day until you no longer need the tent. At first, be sure to replace the tent whenever you’re not around to monitor or when you see drooping. Even after that, don’t be in a rush to get it into full sun. If you’re moving outdoors, start the plant out in complete shade. As mentioned earlier, salvia is a remarkably resilient plant. Salvia can recover from a severe droop if you replace the moisture in time. If a severe droop happens, you can reduce the stress of recovery by removing larger leaves or cutting them in half.

Aside from the humidity change between environments, humidity can change between seasons and weather patterns without you realizing it. Many new growers tend to panic and overcompensate, which often does more harm. Salvia plants will often sustain themselves outdoors during the summer months. As salvia plants are brought in, they may suffer. This is somewhat natural. While your conditions may not be ideal for good leaf growth, it does not mean your salva divinorum is in danger of dying. During this time, do not worry so much about curling leaves or a few leaves falling off. It is much akin to native plants losing leaves in the winter months outdoors. Just like the suggestion to cut leaves off, plants will drop leaves on their own to reduce stress. It may be an indication that the environment is stressful, but it does not mean your plant is dying.

So what if your plant is losing a lot of leaves? Before you panic, make sure your roots are healthy. As long as the roots remain healthy and the stem does not dry out or rot to the point that there are no viable nodes left, the plant has a chance of recovery. Even stems without leaves have been known to recover. This is why good root care is vital. A good well-draining soil, usually made up of about 50% perlite is ideal for proper drainage and airflow. This will keep the roots healthy. To keep the soil free from bacterias and molds, a small amount of hydrogen peroxide in the water will help. A layer of diatomaceous earth, which is made up of the the skeletons of algae-like organisms, will help prevent insects. Trimming any dead material from the leaves or stems will also remove places for molds to take hold.

As a general rule, salvia divinorum likes temperatures between 70-90 degrees F and likes partial shade to full sun. There is a lot of variation within these parameters. Growers tend not to understand why their salvia plant is not doing well even though they are falling within these guidelines. You will also find people reporting success with varying temperatures and lighting conditions. The important thing to understand about salvia divinorum is that light, water and temperature are all relative to each other. For example, a plant in full sun in 90 degrees will need more water than a plant in the house under artificial lighting. Adding that same amount of water indoors may cause a plant to develop root rot from standing water, whereas a plant outdoors may easily dry out if watered the same amount. It is true that evaporation in the soil plays a part here, but the plant will use more water too. Along the same lines, you may notice a plant that is burning (turning red) under lights that are less intense than the sun. This might seem odd considering salvia divinorum is from Mexico where the sun is stronger. That’s because there is no set amount of light that is always appropriate for salvia divinorum because its needs are relative to temperature and the condition of the plant. By acclimating conditions gradually, you can help assure the plant’s condition will change with its environment so that they can be more in tune with each other.

Another idea that new salvia divinorum growers struggle with is the idea of misting. Misting is an effort to increase the humidity. However, many experienced salvia growers have decided not to mist plants at all. In a situation where humidity needs to be raised, it is better to use a humidity tent draped over the top of the plant for a few days. A humidifier is more appropriate if you are willing to invest in one. Misting is really an artificial humidity, or possibly not really humidity at all. The droplets of water are much larger from a mister and have a tendency to collect on the leaves rather than absorb while suspended in the air. The collection of water can lead to rotting of the stem or leaves. It seems that regular misting causes salvia to become dependent on this moisture rather than it acclimating.

The common response to most new salvia divinorum growers is to see all signs of wilting as a lack of humidity. It is important to realize that wilting can actually be caused by too much humidity. Leaves that have become saturated will be heavy and droopy. This tends to happen to plants that are left in 100% humidity too long. This is exacerbated by lack of airflow and water collecting on the salvia leaves. Most often, this will happen to plants that are left in humidity tents too long. These leaves tend to be thinner and softer than “healthy” salvia leaves. They also tend to have a silky sheen. It is important to realize that it will be unlikely to save these leaves. Salvia produces new leaves that adapt to the new environmental conditions. You can often notice a physical difference. Old leaves, suited to tolerate past environments will tend to die off in the new environment. Therefore, if you receive a plant that has thin leaves that begin to fall off when you try to acclimate it, you should not panic. This is pretty common for plants that have been rooting in a humid environment for several weeks or months. This is normal to a large extent. Again, it is important to be sure to make sure you have healthy roots. Pay more attention to new growth than the original leaves. If you are getting a good flow of fresh growth, your salvia divinorum is doing fine.

Whether or not you think salvia divinorum is finicky, you should be better equipped to handle it now that you understand certain principles. Salvia divinorum needs to acclimate very slowly; be patient and do not panic while it goes through these changes. Keep your roots healthy; they are the lifeline of your salvia plant. The humidity tent is your friend; keep your mister for your seedling trays. Not all wilting is from lack of humidity; they can be saturated as well. New salvia leaves are suited to their current environment; old leaves are expendable as long as the roots and new growth is healthy. Lastly, give up on trying to find salvia divinorum seeds. Understand your salvia, and you’ll have all you need to grow.

SORRY, WE DO NOT ACTUALLY SELL ANY SALVIA DIVINORUM PRODUCTS

Posted on

Preparing Fast-growing Columnar Cacti for Winter Dormancy

Many cacti growers are curious about the proper way to prepare their cacti for winter. Others may not even know that they need to make any changes at all. In this guide, we will discuss the reasons for cacti dormancy and how to properly prepare your cacti for dormancy.

When an oak tree loses its leaves in the winter and ceases growing, it is dormant. Likewise, cacti also experience dormancy when certain conditions for growth do not meet the requirements needed for it. Preparing cacti for dormancy is especially important for fast-growing ornamental columnar cacti such a San Pedro Cactus or a Cereus Peruvianus. If growers do not prepare in advance, the aesthetic appeal of their cacti will suffer.

Cacti dormancy is triggered by a drop in temperatures. For some people, preparing cacti for winter is limited to bringing their collection indoors. In climates that permit cacti to be left outdoors all year round, they will experience a temperature drop and cease growth. After you bring your cacti indoors, unless you keep your house rather cool, your cacti will never receive the message that winter is here and will not completely enter dormancy. While it might seem alright to have your cacti skip dormancy and grow year round, it comes with a price.

During the winter, you may gain some height, bit it will not be they type you want. The problem is that you will not have enough light in your house. Even with the best grow lights, it is unlikely that you will match the power of the sun. And since cacti thickness is dependent on the amount of light it receives, your cacti will suffer uneven growth. While stretching may not be such a significant problem with slower-growing cacti such as ariocarpus or lophophora, a tirchocereus will respond quicker and stretch.

The process of stretching in low light conditions is called etoliation. Etiolation occurs because the cactus is trying to reach up in an effort to find light. It is recognizable by a very light green color. Severe etiolation, such as when a cactus has been in a box, can even result in white growth. Even with proper preparation, you will usually notice a bit of this color at the tip of your cacti. The key is to minimize this to keep growth uniform. As the cactus resumes growth the following season, small amounts of etiolation will be covered up. You can often tell how many seasons a cactus has been growing by the ridges formed as this cycles occurs. Some growers play around with etiolation to create oddball cacti. An etiolated cactus is not necessarily unhealthy, but it can create weak points if you plan on growing tall specimens.

So how do we prevent etiolation? The key to preventing etiolation is to keep your cacti in a very cool place until you can return it to the outdoors. Most growers accomplish this in a cool basement or garage. A temperature in the low 50’s to high 40’s is ideal. Be sure to keep your cacti out of freezing temperatures, although larger cacti can handle brief stints of temperatures on the border of 32 degrees F. It is also important to note that dormant cacti do not require light since they are asleep. This makes storage easy, allowing you to reserve your light for other plants.

While this seems easy enough, your preparation should actually begin well in advance. This is because dormant cacti will not need water during the winter. While cacti are in dormancy, their immune systems are diminished. The presence of water they are not using gives disease a chance to gain a foothold. Unless your cacti are seedlings, you should NEVER water them during the winter dormancy period. Seedlings should not be put into dormancy because they would not normally begin growing so close to winter. It is not natural for them. Furthermore, artificial lights can accommodate the full requirements for seedling growth.

Despite that you may not be actively watering your cacti, they may still be at risk. Your cacti may be in large pots with lots of soil that can hold lots of water. Therefore, it is a good idea to ensure that your soil is dried out before the temperature drop. Begin by moving your plants to a covered location, such as an awning, sometime in September or October at the latest. This will allow the plants to dry without the rain interfering. By the time you bring your plants in, they should be dry enough. Use the natural cooling of the weather to induce dormancy naturally, then maintain that coolness.

While the concept of dormancy may seem complicated to some, the solution is anything but. Keep your plants cool and dry. Let the soil begin drying out in advance. The amount of light you provide is insignificant. So you might as well let them sleep in the dark.

SHOP OUR STORE FOR A VARIETY OF TRICHOCEREUS CACTUS CUTTINGS & OTHER LIVE CACTI

Posted on

Germination of Theobroma Cacao (Cocoa/ Chocolate)

Theobroma Cacao, the Aztec’s Food of the Gods, is one of the trickier plants to grow. Cacao plants are quite rare in the United States, and viable seeds are even rarer. This is because the seeds have an extremely short viability. Only seeds obtained in the fruit or those that have been recently removed are suitable for growing. Dried cocoa beans are often sold for edible and aromatic applications, but do not be fooled into thinking you will be able to grow these. More importantly, beware of vendors selling these seeds for growing. If the beans are dry when you get them, they are no good.

So you’ll need to find a fresh fruit. It is important to slice around the perimeter of the fruit so that you do not damage the cocoa seeds in the center. It is a good idea to squeeze the sliced cacao pod to break it fully apart rather than slicing too deep. Once you have the two halves, you will seed a conglomeration of about 20-40 cocoa beans (depending on variety) stuck together with each individual seed coated by a white fruity material. This material is one of the things that makes growing cacao tricky.

The white fleshy material on the outside of the cacao seeds is problematic because it is an ideal place to harbor molds and disease that could harm the seed during germination. You may want to suck off the white fruit pulp as it can be extremely delicious. Afterwards, a tooth or sharp kitchen knife can be used to scratch the outer skin covering of the seed. That’s what you want to remove since it attaches to the pulp. Once, the skin has been breached in one area, you should be able to peel off the entire skin, revealing just the dark purple/brown seed inside. While one seed was being worked on, the other seeds should be put in water to keep from drying out and to keep any of the remaining fruit material workable. Leave them to soak overnight.

The following day you will want to wipe each seed dry and clean with a paper towel. Often, you will be wiping off pieces of clear inner skin and other pieces of outer skin you may have missed when peeling the seeds.  Be sure to thoroughly clean off anything you can without breaking the seed. Especially when they’ve been soaking,cocoa seeds can be soft. You also want to make sure not to damage any roots that may have already begun to emerge. if you break off the root, then it will not be able to grow. If you break the dark part of the seed, it should still be able to grow as long as the root inside was not broken in any way.

Once the seeds have been cleaned, place them in a bed of moist spagnum moss or in a damp paper towel. If you use moss, use the long-fiber kind sold in craft stores and used for hanging baskets. This should not be confused with peat moss that is used as a soil component.  We usually recommend very lightly moist paper towels because they harbor less mold/ bacteria. Keep the seeds in this medium until the tap roots are significantly developed. It is better to wait than to rush them into soil since soil is a dirtier environment. Clean each seed every day or two by wiping them down and changing the medium. If you’ve bought seeds from us, then you’ll likely have gotten them somewhere in this stage.

Eventually, you want to move them into a light airy mix, such as jiffy mix.  Ideally, you want the root to be at least half an inch before sowing. This way, you can put the seed itself just above the soil line.  By minimizing contact between the seed ans soil you minimize the risk of a mold outbreak. Place some moist spagnum moss around the top to keep the seed head from drying out.  This acts almost like a little layer of mulch. But make sure it does not develop mold. Place the planted seed directly under a grow light. If you see mold, be sure to wipe the seed down with water or a mild peroxide solution and dry the surface of the seed out for a day or two.  That doesn’t mean taking the seed out of the soil. But if you can remove the layer of spagnum moss and do not mist. A fan may be helpful in this case too. Mold is acceptable as long as it does not get out of hand or attack the root. It is common that you would see some mold in growing these seeds, but you must also be diligent in managing it. Once the seed heads arise above the jiffy mix, be sure to spray it regularly so it can open. Otherwise, it could prevent the leaves from ever popping out. These seeds may sprout slowly, so be patient.

If you’re growing indoors and looking for a good grow light system for you plant collection, we recommend Electric Sky.

Posted on

Cacti Seedling Care: World Seed Supply’s Venting Technique

The following information is an extension of our original germination guide. This is a technique pertaining to the maintenance of your seedlings once they have sprouted.

The Humidity Tent

In our original guide, we mention that we prefer to use small Chinese soup containers to germinate cactus seedlings. It turns out that the Chinese soup container is assistive to this technique. As many guides suggest, the seeds should be covered with clear plastic after sowing. Newly sown seeds need a combination of light, moisture and air. While clear plastic wrap works well, the opening of a quart-size zipper seal bag fits perfectly over top of the Chinese container. This gives you a perfect seal to lock moisture in while creating a pocket of air, so the seedlings have a little extra air to breath than with clear wrap pulled flatly over the top of the growing container. The pocket offers the added benefit of limiting the amount of condensation that forms. If you are already using a different type of container, the same type of scenario could be set up with a different bag, although it seems that the Chinese container and quart-sized bag were made for each other.

Lighting Progression

A simple compact fluorescent bulb is suitable for starting cacti seedlings for the first few months. But they key it to keep it right on top of the seedling containers. A small desk lamp with a bendable neck is ideal for directing the light at your seedlings at this close range. Eventually, you will want to move your seedling to stronger lights such as four-foot fluorescents or even HPS. These days though, LED lighting has become the lighting type of choice.  A goo setup can be expensive, but most serious cacti growers have a lot invested into their collections, and a good lighting system is the basis of their hobby.  We have had great results with Electric Sky LED Grow Lights. If you do not have enough light, your seedlings will be too thin, and they may not be able to support their growth at a certain point. Even if you have to let them turn reddish purple for a little bit when they’re young, it is vital to have thick growth over fast growth. It is also important to have a light system with good output. Electric Sky gears their lights specifically to output the most needed spectrums for plants.  In our own tests, we found that they run cooler than fluorescents, so we got better germination since the soil didn’t dry out as easily.

If possible, you should look towards eventually moving your seedlings outdoors, if not just for the warmer months. But you should not do this too early because smaller plants can burn, unless you start the seed sin a greenhouse to begin with.   It is important to realize that outdoor light is drastically stronger than even the best indoor lights, so you will have to start your seedlings out in complete shade and gradually expose them to more light. If the seedlings begin to turn red or purple, it is a sign that they are getting too much light. This can pass, but you will need to make sure you’re providing enough water, and you’ll want to monitor them closely to make sure they do not totally fry.

Venting 

Cactus seedlings enjoy water, and you should look to give them as much as possible without them rotting. So to avoid this you need to create a good enough supply of fresh air. You can accomplish this by venting. Venting does not occur continuously. It is part of a cycle. So you would start the cycle by having the humidity tent locked on tightly for a few days. Keep in mind that you should be keeping the soil moist. It should not be saturated, but moist like the tip of a new marker where the moisture is readily available but not ready to come out on its own. Now, if you were to leave the humidity tent on consistently, the air would stagnate and lead to mold. So this is where venting comes in. Venting simply means that you pull off one side of the opening of the bag. Due to the ideal fit between the Chinese container and the quart-sized bag, the opening is able to be a small slit such that you are literally able to create a vent while still having the tent largely in tact overhead. You can leave the tent in the vented position until the very top starts to dry out. After that, simply spray your soil back to its original moisture, put the tent back on tight and the cycle begins again!

*Maintain this cycle, transplanting at about 1 inch in height.

Humidity tent in the vented position

*TIP: As the seedlings grow, it is a good idea to put some loose cactus soil in between the seedlings to support them. Usually there will be about a centimeter or less of smooth growth at the base of the seedlings before the spines start forming. Sift out any larger particles in your soil, so it will fit between the seedlings easily, and sprinkle it between them until the soil level  is about where the spines start to form. Always leave the tips above the soil of course. But once the spines start forming, you can bury the growth below to give extra support as the plant develops more. As the spines form start to reduce water and increase light so you get nice thick seedlings.

Posted on

Germination of Cacti Such as San Pedro Cactus, Peruvian Torch and Other Spiny Friends

You see them in your office or local hardware store, maybe even your local Mexican restaurant. But many people never stop to think that cacti actually start out as seeds. I mean it makes sense being a plant and all. But I get the same reaction all the time when I tell people I sell cacti seeds. “Cacti grow from seeds?!?”

The reality is that cacti do grow from seeds, and anyone can grow them. It’s not that difficult and is more than rewarding in the end. I warn you though, the hobby of cacti growing and collecting can be nothing short of addicting, and there is a growing community of cacti growers, particularly the Sacred species, which includes San Pedro Cactus, Peruvian Torch, Dona Ana, certain Ariocarpus species and even Peyote, which is illegal in the United States but it extremely coveted and legal to grow elsewhere around the world.

With a growing interest in starting cacti from seed, I see many people asking about how to begin. This method will not work for every species of cactus, but is ideal for those of the trichocereus, carnegiea, astrophytum, obregonia, lophophora and ariocarpus genus. It will work for other cacti seeds as well. The first consideration to make is soil mix. While you can make your own cactus soil mixtures, this is not really worth it for the new grower. Unless your making a large volume of soil mix, it will be more expensive to buy the multiple materials needed when you could easily buy a commercial cactus potting mix. When it comes to commercial cactus soil, I prefer Shultz’s and am not a fan of Miracle Grow. If it is the only option, it will serve the purpose. Some growers will add perlite (up to 50%), which is a white, porous volcanic glass that is used for drainage. Its nooks and crannies provide an enormous amount of surface area to hold water without letting the soil get soggy. If I am going to add perlite, I find that it is beneficial to use a mixture such as this for the bottom layer. For the top layer, strain out the larger debris so you end up with only the finer particles.

Your next consideration is the pot. This is not a hard choice. I prefer small Chinese soup containers and other take-out containers. Fill your pot with either cactus soil or the soil/perlite mix so that you leave at least an inch of room left. Use a mister to moisten your soil without it getting soggy. Put about half an inch of the finer (strained) soil above that. The finer layer serves to keep the seeds from landing on any debris that they will have a hard time anchoring their root into. Then mist the top layer before you add your cacti seeds. While the seeds of astrophytum are a little larger, those of trichocereus, ariocarpus and especially obregonia are particularly small. When you look at a san pedro cactus or a peruvian torch, you wouldn’t expect that they come from such small seeds. Misting before applying the seeds keeps them from being sprayed away so that they become unevenly distributed. After misting, take your seeds and press them into the surface of the soil. You can crowd them because you will be able to separate them later. Do not cover them at all with soil because cactus seeds need light to germinate.

Cover the whole container with clear plastic wrap. If using a take-out container, you can simply keep the lid on loosely so that air will still get in. Keep your soil temperature at about 70-75 degrees F and provide window light until the seeds sprout. Eventually you can put them under fluorescent lights. The seedlings will not have to be transplanted for at least six months. For continued growing support, please check out World Seed Supply’s venting technique.

SHOP OUR STORE FOR A HUGE SELECTION OF TRICHOCEREUS, ASTROPHYTUM, GIANT SAGUARO & OTHER CACTI SEEDS.

Posted on

Germination Instructions for Ginkgo Biloba

Ginkgo Biloba is a tree whose leaves increase circulation in the brain. It is a popular herb in Chinese medicine and has been linked to improving memory and cognitive functions. The unique fan-shaped leaves of the ginkgo tree make it a popular ornamental as well. It is even grown as a bonsai.

The germination of ginkgo is a little tricky, but there are a few tips that will increase your success. Freshly picked seeds are covered in a malodorous fruit. The ginkgo fruit contains small levels of urushiol, a skin irritant that is found in poison ivy and poison oak. To avoid this, obtaining cleaned seeds from a seed company is recommended.

Ginkgo biloba seeds have a long germination period and a tendency to pick up mold on the outer shell. The presence of mold on the outer shell does not automatically indicate that the seed is dead. It will be fine so long as the mold does not reach the embryo. To ward off mold while waiting for germination, sterilize the ginkgo seeds in a mild bleach solution (1:8, Bleach: Water) for a few minutes and rinse well. It might seem counterproductive to introduce bleach to a living seed. However, the solution is diluted, and the seeds should only be soaked long enough that the bleach soaks into the outer shell and not beyond.

The next goal is to allow moisture and air to reach past the shell. Nick the sides of the shell along the rim or that goes around the circumference of the seed. Do not damage the embryo. (There’s a very thin brown membrane around the embryo too, which does not have to be penetrated).

Ginkgo trees grow in areas where freezing is normal. Ginko seeds are, therefore, used to these temperatures and have adapted to respond to seasonal changes. The change from cool to warm temperatures after the winter lets the seed know it can begin growing. If you are not planting your seeds outside during the cooler weather, you will have to artificially create this experience for the seed. The process is known a moist cold stratification. Cold stratification is easily accomplished by storing the seeds in the fridge for a month. If your seeds have not been pre-stratified, you should do this before exposing them to the warm temperatures needed for sprouting. This can be done before or after nicking.

Assuming your gingko biloba seeds have been cold stratified, they are now ready for germination. Place the nicked seeds in moist, preferably sterile sand and place them in a zipper baggie. Situate them so that the seeds just barely stick up through the sand. Adding a small amount of hydrogen peroxide to the water used to moisten the sand is another option to prevent mold.


Keep the planted ginkgo seeds at temps of about 70-75 degrees. When the seeds sprout you will see the green stems press up against the bag. When you see leaf development, transplant your ginkgo seedlings to a mix of more sand than soil. Keep the soil moisture equal to that of the sand in the bag and keep out of direct sun and heavy water.

Posted on

How to Germinate Banisteriopsis Caapi Seeds

Banisteriopsis caapi is a perennial vine native to the Amazon rainforest known for its role in South American ayahuasca ceremonies. These spiritual ceremonies have gone on for hundreds of years in the Amazonian Basin and still exist today to some degree. Today, banisteriopsis caapi is one of the most sought after plants by collectors of entheogenic plants. Its allure is fueled not just by a fascination to grow a plant, but to cultivate a powerful symbol, to possess something that harnesses the spirit of an ancient tradition and the mysticism of the rainforest.

In the recent decade, cuttings of banisteriopsis caapi have become somewhat readily available from specialty plant vendors. They can be grown indoors or out, and the right environment can allow established caapi vines to grow a foot per week. But for many growers the real experience, the real sense of accomplishment, involves creating a plant from scratch. Germination of banisteriopsis caapi is something that should be on every serious growers to-do list, but that only a small percent get to succeed in.

The real limitation, and what many new growers are not aware of, is that banisteriopsis caapi seeds have a low germination rate, which decreases to none in just a few months. By February I would expect the caapi seeds to be non-viable. Vendors who sell seed year-round are feeding on this naivety, and so it may seem to many growers that germination of banisteriopsis caapi is difficult or that it requires some special trick. The real trick is getting fresh seed. Banisteriopsis caapi seed harvest generally occurs in October or November. It can range a bit depending on yearly climate. It is wisest to plan your growing around those months to ensure you start with good seed, and it is worth paying more money for fresh seed. Since you are growing in the fall, it is likely that you will need to use grow lights, although nothing fancy is required. We typically arrange ahead of time for our caapi seeds to be shipped as soon as they are harvested. The freshest banisteriopsis caapi seeds are still green, although brown seeds will still germinate. In fact, even green seeds will turn brown in between planting and germination.

Once you have obtained your fresh banisteriopsis seed, it is time for sowing. Prepare a well-draining soil mixture. We have had success germinating banisteriopsis caapi with several different soil compositions, but we recommend using potting soil mixed with about 25% perlite. Avoid using seed starting mixes or soils heavy in peat because you want something richer that would resemble forest soil. In forests, the rainforest especially, there is vast supply of plant material to enrich the soil. As mentioned before, it is also important to have a well-draining soil because banisteriopsis caapi seeds are somewhat prone to fungus attacks. By removing excess moisture, it reduces that risk. Fungus attacks that do occur can be treated with chamomile tea, or you may even choose to use it to water your plants initially. Chamomile has natural antifungal properties. It is a good choice because it is organic.

We like to start many of our seeds in aluminum baking trays. Banisteriopsis caapi is no different. We like aluminum trays because they allow us to plant a good amount of seeds in one container, but any pot will do. Banisteriopsis caapi seeds resemble maple tree seeds both in texture and because they have a wing. Attached to one end of the wing is the actual seed. Side-by-side, the heads of the two seed types are obviously different. Even if the wing is bent or broken, it should not affect your ability to germinate banisteriopsis caapi seeds. It is this seed end that you want to press into the soil, leaving the wing in the air. There is no need to bury the seed too deeply. Just the thickness of the seed head itself is a perfect depth.

Once we have planted all our banisteriopsis caapi seeds in that way, we usually cover our tray with clear plastic wrap. Do not keep the wrap on tightly because restricting airflow is a bad way to avoid fungus. We have had success germinating banisteriopsis caapi with or without plastic over the top, but the plastic allows for better moisture control. You want to maintain constant moisture while germinating banisteriopsis caapi seeds, but you should be ready to remove the plastic any time the soil starts to look wet. As the moisture evaporates from the soil and condenses on the plastic, it rains back down into the soil. This can cause too much moisture to gather at the surface, which you want to avoid. By removing the plastic before the water builds up, you can dry the soil out before it affects the seeds. It should be about two weeks before you see anything. Be patient, and do not give up. You may get new banisteriopsis caapi seeds germinating days or weeks after your initial sprouts.

WE OFFER YELLOW BANISTERIOPSIS CAAPI &  OTHER YAGE SEEDS IN LATE SUMMER TO EARLY WINTER!

BLACK YAGE SEEDS

RED YAGE SEEDS

WHITE YAGE SEEDS

Posted on

How to Grow Calea Zacatechichi from Seeds and Cuttings

Calea zacatechichi is the most well-known of several dreaming herbs that make up the class known as oneirogens. Other dreaming herbs include Silene Capensis (African Dream Root), Entada Rheedii and Artemisia Vulgaris (Mugwort). Dream herbs are used to induce lucid dreaming, which, most accurately is described as an awareness that you are dreaming to the point that you can control dreams. But, on a more basic level, dream herbs also seem to be linked to increased dream recall or simply an awareness that you are dreaming even if you cannot control the dream. There are also a number of other herbs, particularly sedative herbs, which seem to cause increased dream activity in various users without them being specifically labeled as dream herbs. Mad Dog Skullcap, California Poppy, Lavender, German Chamomile and Agrimony are among these. The following guide is intended to explain the various growing techniques for calea zacatechichi.

Classic Mexican calea zacatchichi leaf is quite bitter. There is also a calea that is not. To distinguish the difference between the two, we label calea as either the bitter variety or the non-bitter variety. Dreaming herbs have variable effects from user to user, and they seem to become more effective with regular use. But collective information from various users includes enough reports to suggest that both the bitter and non-bitter caleas are active as oneirogens. The non-bitter variety happens to be that variety that most collectors have in cultivation even though most commercially available calea herb is the bitter variety. The non-bitter variety has more triangular-shaped leaves that are not as thick as those of the bitter strain. But distinguishing the two plants can be complicated by the fact that calea leaves can vary in appearance, even on the same plant. Both types of calea also have yellow flowers. But normally, it is pretty easy to tell the difference even without tasting the leaves.

As mentioned before, almost all collectors have the non-bitter variety of calea, so that is what the techniques covered in this guide will be based on. But it is probable that they will work just as well for either type. Calea is reproduced primarily through cuttings, and it seems that most of the genetic pool in the U.S. and Canada is made up of clones of one another and seeds produced from those clones. That is likely why that bitter variety is so difficult to find.

Cloning Calea Zacatechichi

Calea is one of the easiest plants to grow once established. But many times it does not produce seeds. Seeds are not readily available for sale, and many of them are non-viable or have poor viability. On the other hand, cuttings are very easy to root. So that explains why cuttings are the most popular choice for reproduction. But again, this habitual cloning limits the genetic pool.

Calea clones can be rooted in any medium that is used for rooting. We typically root calea cuttings in water since it is easy and inexpensive. Rooting hormone is not required for rooting calea cuttings, but we have done tests that have shown cuttings rooted with rooting hormone will root slightly quicker and have a much better-developed root system. So you can avoid the rooting hormone if cost or availability is an issue. But if time is a concern, you’ll want to use it.

Rooting hormone is available in either gel or powder form and can be found in most garden centers or online. The gel is preferable to the powder because it will stick to the stem better, but the powder seems to be more readily available. The active ingredient in most rooting hormone products is usually indole-3-butyric acid. But you can also make your own natural rooting solution by boiling a couple grams of white willow bark (salix alba) and using the tea to root your cuttings. White willow bark is the same bark that is used as an herbal pain reliever and contains the precursor to acetylsalicylic acid (Aspirin).

When rooting many plants, it is important to select your cutting right below a node on the mother plant. A node is the part of the stem where the leaves come out of. The mother plant is the larger plant from which you are taking your cutting. The nodes already tend to have higher levels of growth hormones that make rooting easier. But since calea roots so easily, selection at the node is less important than with other plants. You can be more liberal in your selection without fear of failure.

Once you’ve selected a part of the mother plant to make your cutting, you can prepare to make the cut. It is usually a good idea to water your plant well about an hour prior to making the cut so that the cutting is well-hydrated. For cuttings that take a long time to root, it is usually a good idea to sterilize or sanitize your cutting tool. But we’ve never had any problems using an unsanitized scissor to make calea cuttings.

Once the calea cutting is made, you need to apply the rooting hormone (if you’re using it). The gel will go on easily. But the powder requires that you to wet the stem of your calea plant first. We also usually mix some powdered rooting hormone in the water we’re using to root the calea cutting in. We do this so that the water becomes saturated with hormone. Otherwise, the powder has a tendency to wash off into the water anyway. To minimize washing off, we also try to gently put the dream herb cutting into water without too much movement so that the powder stays clumped on the calea stem. If you’re using the gel, washing off becomes less of an issue. Also, if you’re using a different rooting medium such as perlite, the powder will usually stay on easier as long as you don’t rub it off when sticking the cutting into it.

We usually place our calea cuttings in about 1-2 inches of water. When using other rooting mediums we’ll usually put a little bit more than 2 inches of medium since other mediums hold more air and less moisture than pure water. Once the dream herb cutting has been situated in the rooting medium, you want to cover the top of the cutting and the container with a clear plastic bag, such as a food storage bag. This is called a humidity tent. You can even use the produce bags that come free with your fruits and vegetables from the grocery store. The humidity tent keeps the air inside humid so that the dream herb plant does not dry out before it grows roots. Once the bag is laid overtop, secure the bottom with a rubber band and place the calea cutting in a well-lit area at about 70 degrees Fahrenheit. The advantage of using water is that you can see the calea roots forming. For other rooting mediums, you can test the root formation by tugging gently on the cutting. When it becomes restricted from moving, that means your calea roots are forming. But be sure not to pull too hard and damage the roots. You can begin seeing roots on calea cuttings in as little as six days, but it may take a few weeks, especially at cooler temperatures.

Transplanting and Growing Calea Zacatechichi Cuttings

Once your calea plant’s root system is formed, you can transplant your dream herb cutting to soil. It is best to wait until the root system is well-developed just to minimize any chance of failure. But you can technically transplant calea at any point once the roots have begun forming. Calea will grow in most commercially available soils from seed starter soil to potting soil to compost to cactus soil. Calea zacatechichi has a very low nutrient requirement. As a demonstration of this fact, we’ve even left calea cuttings rooting in perlite, which offers no nutritional value, for approximately a year. But like many plants that can handle low-nutrient environments, fertile soil will benefit the growth and leaf quality.

To transplant your calea cutting, simply place a few inches of soil into your container. Hold the calea cutting in the pot at the level you want it to be situated once it is planted. Be sure to let the roots hang down or spread out. Letting the roots spread will help them occupy more areas of the pot than letting them clump up in one spot. This will give them access to more nutrients than if you have them share one spot where they’ll be forced to compete for nutrients. While calea does not require more nutrients, providing more nutrients will mean faster root growth. Faster root growth decreases the time your plant needs to adapt to soil and increases the chance of success.

It is important to add the soil to the pot without damaging your new calea roots. After every little bit of soil you add, spray it down to maintain even soil moisture. You want to make sure there is moisture everywhere in the pot that it needs to be. Your other option would be to saturate the soil afterwards. But spraying as you add the soil allows for a more even mix of air, soil and moisture throughout your pot. Once the pot is filled, you should pack the soil down lightly to help keep the calea cutting supported. But you do not want to pack the soil too hard because you can damage the roots or remove all the air form the soil. Air in the soil will help the root formation and reduce the chance for mold and bacteria growth in the soil. You can even add a little bit of hydrogen peroxide in the water to help the roots along and ward off these unwanted organisms.
Once you’ve transplanted the calea to soil, it is usually a good idea to put it back in the humidity tent. Especially if the cutting was rooted in water where moisture was plentiful or if it does not have a well-developed root system, your calea may benefit from a little assistance. Keeping your calea in the humidity tent will take the burden off the plant that evaporation from the leaves causes. Usually after the first few days, the plant is ready to be removed from the humidity tent. When you first remove the calea plant from the humidity tent, just keep an eye on it over the first few hours to make sure it is adjusting well. If your calea plant wilts, you can just drape the humidity tent back over the top. The plant can stay in the tent as long as you want. But you must realize that an extended period in a humidity tent can make a plant dependent on the humidity tent, and it can require extra work to eventually acclimate it out of the tent. This goes for any plant, not just calea zacatechichi.

Calea zacatechichi can be grown in relatively low-light conditions, which makes it very easy to care for. It will do fine in most window lighting. It also does well outdoors or under fluorescents. Usually more light will give you darker and thicker leaves. But too much light will cause calea to turn purple or red. Just like human skin, calea leaves can sunburn. Sunburn will usually not kill the plant, but it is a sign that the plant is under stress.

Growing Calea Zacatechichi from Seed

Although growing calea from cuttings is easier and quicker, growing calea from seed is rewarding. Calea seeds are not widely offered, and many seeds are not viable or have very poor viability. Even “good” calea seed will usually have a low viability rate compared to most seeds of other species. Ideally, you want to procure your calea seeds while they are still in the in the pod. There are about 20 seeds per pod on average. In the pod, your calea seeds will be better protected from the air. They should also be stored in the fridge until use to help maximize preservation.

You should always start your calea seeds indoors where you can keep the conditions mild. Outdoors, you can have to deal with all sorts of conditions such as wind, animals, rain or too much heat that can wipe out your entire project in one moment. Calea seeds contain a skinny stick-like seed with a feathery tip connected to the top. Calea seeds should be germinated on the surface of the soil either on their sides or with the points of the seeds facing down into the soil, which is how they would end up if they were carried away by the wind after being released from the seed pods. It is important that the soil you are using to germinate dream herb seeds is lightly moist but not too wet because the seeds can develop mold very easily. A well-draining sandy soil will best help you achieve the proper soil moisture.

Once you’ve sown your seeds, you want to cover the top of the container with a humidity tent and keep them at about 70 degrees Fahrenheit. A desk lamp with a compact fluorescent light is enough to start your calea seeds. Since your calea seeds will be on the surface, the first part of the soil to dry out, the humidity tent will help keep the seeds from drying out at any point until they germinate. But in order to minimize the chance of mold growing on your dream herb seeds, it is important to regularly air out the humidity tent over the course of the germination process. Calea seeds are small, so just a little mold can do harm.

Calea zacatechichi seeds can take several weeks before they begin sprouting, and they will germinate irregularly. You can end up with new sprouts several weeks after your first sprouts have popped up. The young calea seedlings are extremely small because of the thin seed they come from. This makes them extremely vulnerable until they mature. To help them grow up quickly, good fresh air exchange will give you an advantage. Be sure to air out your humidity tent as much as possible. Once your calea seedlings are about ¼”, you can take the tent off and begin blowing them lightly with a fan. This will also help strengthen the stems of an otherwise fragile plant.

Water your calea seedlings only by spraying the soil because pouring water into your pot can uproot and wash away your tiny calea seedlings. The roots of young dream herb seedlings are generally pretty shallow because the root system begins at the soil surface instead of down in the soil. But adding a small amount of rooting hormone to the water you’re using to water your seedlings can help the roots mature a little quicker.
Your container may still have calea seeds that are willing to germinate. Some of them can still germinate with the humidity tent off. But you want to make sure to keep the soil and the surrounding air moist. Another option is to separate the dream herb seedlings out into a different container so they can get some more air while keeping the unsprouted calea seeds inside the tent. But it is imperative that you avoid damaging the roots of the young calea seedlings. The advantage of the situation is that young calea roots are shallow, which means it is easy to get underneath them and pull up all the dirt around them without ever touching the roots themselves. It’s a little bit of a gamble in transplanting, but if you are careful, it should be fairly beneficial. Transplanting will also give you a chance to support the seedlings properly. With the shallow root system, calea seedlings are prone to falling over. But resupporting your calea seedlings and adding the fan is the perfect combo to develop good stem support in the early stages of growth.

By the time your calea plants are about three to four inches, they should be in the clear. You can go on to treat them according to the same instructions as you would a rooted calea cutting. More importantly, you will have one of the more genetically diverse calea plants.

SHOP OUR STORE FOR CALEA SEED PODS & LIVE CALEA ZACATECHICHI PLANTS. WE ALSO OFFER DRIED CALEA FOLIAGE.


Posted on

World Seed Supply’s Mandrake Germination Guide

Mandrake (Mandragora Officinarum) is a member of the nightshade family most notable for its use in witchcraft and its mention in the Harry Potter novel series. Mandrake has a rich folklore that dates back to biblical times. Like other nightshades such as belladonna, brugmansia, datura and henbane, mandrake contains highly toxic tropane alkaloids that can cause complete delirium, vomiting and death. Mandrake is an interesting plant that enjoys the cold weather and forms a huge taproot. Fresh roots sell for impressive amounts of money, although dried roots are fairly inexpensive. Mandrake seeds have a reputation for being stubborn germinators. In general, nightshade plants frequently have this trait. When it comes to Mandrake germination, the process is entirely predicated on temperature fluctuations. The seasonal temperature fluctuations trigger the seeds to germinate. It is common for species of the Northern Hemisphere to germinate based on a rise from cool temps to warmer temps. This has led to a germination technique that is called stratification. Stratification works by placing the seeds in the fridge for a period of several weeks to several months in an attempt to simulate winter. To stratify your mandrake seeds, take a ziplock or other container of moist sand and place your mandrake seeds inside before placing the container in the fridge. You can use moist paper towels instead of sand, but paper has a higher tendency to grow mold. Mold can usually be wiped off without killing the seed, but it is obviously something you want to avoid when possible. Even moist soil will work for this process, but sand has the lowest tendency for mold. After about a month in the fridge, move your mandrake seeds to a warmer location and plant in a loose, fertile well-draining soil. Compost works very well. The subsequent act of planting the seeds in a warmer temperature acts as a seasonal change that triggers the plant’s temperature response, causing the seed to germinate. But what is interesting about mandrake is that the temperature fluctuation seems to work in the opposite way as well. We’ve noticed a trend of mandrake seeds planted in the early spring germinating in the following fall if they failed to sprout that spring. Occasionally, they will even wait until the spring of the following year to germinate. So it is important not to discard or reuse the soil if you didn’t get 100% germination because it will still contain seeds with the potential for germination. Another method for triggering temperature responsive germination in seeds is what we callwinter sowing. Winter sowing simply involves sowing the seeds outdoors during the cooler weather and allowing the natural temperature fluctuation to trigger the seed’s temperature response. In that case, you can plant the seeds in the ground or in the soil that they will ultimately grow in. Preferably, you want a location with full sun to partial shade. There is no need to harden the plants off when you winter sow, and the roots will not be disturbed by transplantation. Since winter sowing relies on cool temperatures, growers in the warmer zones must resort to stratification. But otherwise, this is our preferred method with mandrake. It was in our trials with winter sowing mandrake seeds that we noticed the tendency of the seeds to germinate in subsequent temperature fluctuations aside from just the initial one. This phenomenon likely works as a species preservation mechanism. In the event that a plant does not reach maturity or set seed, it still has backup genetics on deck that are ready to sprout. You will find that mandrake generally does better in the cool or at least mild weather. Personal experience and conversations with other mandrake growers have both dictated that warmer temperatures can sometimes correlate with the plant suffering. In several instances, we’ve had plants lose their leaves. But what is important to know about mandrake is that the root is the life of the plant. As long as the root is living, the leaves have a good chance of returning. We have had plants that we thought died during summer return to life in the fall when the weather cooled down a bit. What actually took place was that the leaves had died back while the root stayed alive below the soil. Although it appeared that the plants were gone, the living taproot held enough life to allow the foliage to return. In another instance, we had some indoor plants that lost their leaves. In this case, it seemed that the reason had to do with an improper root depth. It is important that the mandrake root not be too deeply buried, or the stems of the leaves will be in greater contact with the soil. If you get any standing moisture, they can easily rot at the stem, causing the entire leaf to die. As mentioned earlier, a well-draining soil is imperative. It may be beneficial to put a layer of gravel or perlite at the top in order to improve the drainage specifically where the leaf stems are while allowing the majority of the taproot below to have access to a soil medium that holds a bit more moisture. Lighting also plays a factor because plants grown in lower lighting conditions will have thinner stems that could rot or snap more easily. But an ideal planting depth is one where the top of the taproot is about even with the soil. The taproot may sit slightly above the soil line as well, but you do not want it too far above because it can put extra tension on the stems, which is more of a problem with thinner leaf stems. As you can imagine, there are numerous factors that could lead to leaf loss. But in all cases we’ve experienced, new foliage was able to grow from a healthy taproot, even when all prior leaves had fallen off. So again, it is important to know that the root truly is the life of the plant when it comes to mandrake. Indoor temperatures are usually fine for mandrake since they are mild. You can grow mandrake fairly easily indoors as long as you use artificial lighting. Window lighting is probably insufficient and will lead to thin leaf stems. But a fixture containing two T5 fluorescents is sufficient to support mandrake plants over the winter. However, you should also remember that mandrake is frost hardy. So if you have ground space, there is no need to bring them in for the winter. Depending on your living situation, this may just be a good plant if your indoor growing real estate is already occupied. And while mandrake may seem like a challenging species to grow, it is important to remember that there is leeway…both in the way that you can still expect germination even from seeds that did not originally sprout and in the way you can still squeeze life from a root that may otherwise seem tapped out.

Posted on

World Seed Supply’s Guide to Perfect Poppies

Poppies are some of the most beautiful flowers, and they come in a variety of shapes and colors from black to red to double flowered to peony. They are almost always grown from seed. But growing nice-sized healthy poppy plants is highly dependent upon growing conditions. Temperature, planting depth, spacing and soil can all affect your poppy plants negatively. In some cases, stressful conditions can signal to a poppy that it is at risk of dying. In response, your poppies will flower early in an effort to quickly spread some seeds. This results in little runts that are hardly impressive. But by adhering to a few simple guidelines, you can end up with that lovely display of poppy blooms that will brighten up your landscape this summer.

Starting Inside vs Outside

Poppies can be grown indoors under lights, but the majority of growers grow them outside. In general, the poppy is considered an outdoor plant. So that is what this guide will focus on. It is common practice with many plant varieties to start seeds indoors as a method of getting a head start on the growing season. The idea behind this is that you can use the warmth of your house to begin the growing process when outdoor temperatures are otherwise unsuitable. However, poppies actually tolerate more cold than other plants. In fact, poppies prefer the cool weather. In some cases, they may evenrequire cool temperatures to germinate. While most of the time poppies will germinate throughout the summer, we have also encountered many cases where growers could not get poppy seeds to germinate until temperatures were reduced. So if you are starting your poppy seeds later in the season, you may actually want to try the reverse practice of getting a head start. In other words, you may actually try rewinding the clock back to the cooler months by starting your poppy seeds in the fridge. This will give your poppies a chance to experience that cool period they like even after the time has passed for it to happen naturally.

The drawback of starting poppy seeds indoors is that they can easily etiolate (stretch) if not given adequate light. Etiolation is a plant’s response to low light. It stretches in height hoping to reach up out of a crevice or over competing plants in search of more light. Many newbie growers will be excited that their plants are rapidly gaining height when this happens, but the quick growth comes at a price. In order to output more height, the plant has to sacrifice thickness. This ultimately results in an unstable foundation for the plant to stand on. Poppies grow as rosettes of lettuce-like foliage. But if there is etiolation early on, that big mass of foliage will only be connected to the ground by a thin tap root, which can easily snap and cut off the supply of water and nutrients. Etiolation is especially common indoors, particularly in a dark fridge. So, other than for the sake of providing cooler temperatures later in the season, it is recommended that growers sow their poppies outdoors.

When to Sow Outside

Outdoor sowing time for poppies depends on your location. In areas where the winters are relatively mild (zones 7 or warmer), it is best to sow your poppy seeds in the fall or winter. This will allow the seeds to sprout as soon as the temperatures turn warm enough for poppies to do their thing. The ideal poppy germination temperature is about 55 degrees Fahrenheit. Poppy seeds and even poppy seedlings can handle frost, but most information recommends sowing poppy seeds in the early spring for growers in northern locations. Fall planting is recommended when possible so that you have the seeds in place, but growers in warmer locations can still sow in the spring with plenty of time before conditions turn ideal. The idea is you want to try to get in as soon as the ground is workable so that you have the longest season possible. The exposure to cold may also aid germination. But if you missed fall sowing, don’t let it discourage you from aiming for the spring no matter where you live.

Sunlight

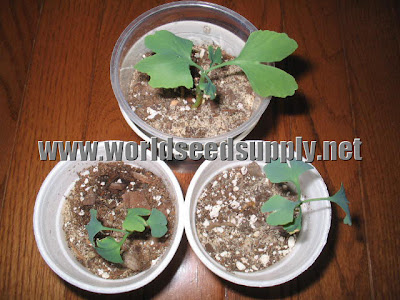
Mature poppies enjoy full sun, meaning at least six hours of direct sun per day. You can still get flowers in partial sun, but they will be smaller. But early on, a bit of shade may actually be beneficial. According to one traditional method, poppies were planted between rows of corn so that they could be shaded by the stalks. Starting poppy plants in containers allows you to keep the seedlings in a shaded area early on while providing full sun later in the growth cycle. But if you’re direct sowing, you can always shade your poppy seedlings with other crops, potted plants or even with something like a lawn chair. Anything that will cast a shadow will help mimic the shade that young plants might experience in the wild. When you eventually increase the sun exposure for your mature poppy plants, it is best to do it gradually. Any sudden increases in light exposure always have the chance of shocking a plant. And if you chose to start your poppy seedlings in containers, be sure to get them used to the full sun environment they will be in before you attempt to transplant. The combination of transplanting and light increase is a recipe for shock. If it does not kill your poppies, it could cause serious setbacks.

Direct Sowing vs. Containers

Most information suggests that poppies do not transplant well. This is true for mature plants, especially because the stems and roots can be somewhat brittle. But poppy seedlings transplant perfectly fine if you do so properly. Considering this, you have the choice between direct sowing or sowing in containers and then transplanting. If you’ve started your poppies indoors, then you’ll obviously be transplanting. But you can also choose to start poppy seeds in containers outside and transplant those seedlings to the ground.

You might wonder what the point of sowing outdoors in containers instead of direct sowing is. There are several advantages actually. Transplanting works better for organization. You can arrange your poppy plants specifically where you want them whereas direct sowing can give you a more erratic pattern. The only way around it with direct sowing is if you really sow a lot of poppy seeds and then thin out to exactly where you want each poppy positioned. But ultimately you will waste more seed doing it that way. If you have plenty of seed to work with or you do not care about arrangement, then direct sowing is the way to go. Otherwise, the increased ability to organize is useful. This is especially apparent if you’re dealing with multiple poppy varieties or other flowers that you want to arrange in a certain pattern.

Transplanting also offers you a chance to escape insects and weather. If you’re starting your poppies in a container you have the option of keeping the seedlings out of harm’s way, whether the threat is too much sun, a rain storm or a windy day. Ants, other insects and birds are known to carry away poppy seeds too. Just like humans, animals enjoy eating poppy seeds. While containers can still be occupied by ants, the ground is more likely to house a colony that will walk away with your crop before it ever sprouts. It is much easier to keep a container out of harm’s way.

Just like insects, wind or rain can ruin your direct sowing job. Even though the seeds are very tiny, wind usually won’t be too much of a problem unless there are unusual gusts. But rain is very likely to wash poppy seeds away. Poppy seeds float easily. And even your normal watering can cause seeds to pool together and sprout in the depressions of your ground space. So even if the seeds don’t get completely washed away, you end up having to thin out more than you intended. Containers give you the option to make adjustments that direct sowing does not. For one, you can move the containers into a protected area when you’re anticipating bad weather. Also, transplanting allows you to correct any type of pooling that might occur.

Choosing Soil and Preparing Your Poppy Bed

Now that you’ve considered when and where you want to plant your poppy seeds, it’s time to consider soil. You want a soil that is very fertile with plenty of organic material. But it is also essential that it be loose and well-draining. Poppy seedlings are prone to rot when they are young, so a well-draining mix will be beneficial to prevent that. A good loamy soil such as compost mixed with sand is ideal. Some types of poppy naturally grow in dry gravelly soils, but even they will benefit from this more fertile alternative.

It is important that your soil be loose when you’re growing poppies. Poppies have a taproot that needs to drive downward, and a compact soil will make this tougher to do. So prior to sowing, it is important that you prepare your poppy bed. Even if you’re starting your poppy seeds in containers, you still want to prepare your ground. Till the soil 8” deep over your entire bed to loosen it up and remove any weed roots that may be present. Otherwise, if you’re starting a new bed, you can till the ground below and add a thick layer of fresh soil over the top. Either way, you want to aim for 8” of cultivated soil for your poppy roots to grow in.

Direct Sowing

Direct sow your seeds by scattering them over the surface of your prepared poppy bed. Aim to broadcast them so that they do not all land too closely together, or you will end up having to thin out seedlings anyway. Poppy seeds are extremely small, so consider that a pinch contains literally hundreds of seeds. Not every poppy seed will sprout, and not every sprout will mature, but you do not have to sow as densely as you would with grass seed. Afterwards, cover your entire growing space with a thin layer of straw about 1”-2” thick as a mulch layer. We will speak more about mulching later.

Starting in Containers

If you’re starting your poppy seedlings in a container, it is best to use one that is wide. Aluminum roasting pans are ideal for starting your poppy seeds. You can fill the pan with a seed starting mix, or you can use the same soil that you’ll eventually be growing in. Lay the soil flat, but do not compress it. With your index finger, make light depressions about a half inch apart in rows with the same spacing. Then sow your poppy seeds on the surface of the soil without covering them. As mentioned earlier, poppy seeds have a tendency to float and collect in the depressions. By intentionally making the depressions yourself, you can help determine where the poppy seeds will end up and therefore create a more uniform spacing.

As an alternative to the aluminum tray method, some growers prefer to grow in biodegradable peat pots. With this method, you only plant a few seeds per pot. This allows you to transplant the entire pot to the ground so that you can avoid root damage altogether. The roots can grow through the pot after transplanting. You can aid transplantation even more if you tear off the bottom, and you can even tear away the entire pot if the roots haven’t grown into it. One of the drawbacks of using these pots over the tray is that they can dry out easier outdoors. So it is important to keep them regularly hydrated from below.

Transplanting

Your poppy seedlings will grow together like grass. Allow them to grow as a network until they are about 2”-3” in height. But before you even begin, consider the time of day. Transplanting is always best done in the late afternoon after the weather has cooled. This will give your poppy seedlings the longest time before they have to face the strong noon sun. You never want to transplant during the hot part of the day because plants already can be stressed out by the heat. Even on a day that seems cold, the sun can still have a lot of effect ton seedlings. Young plants or those with damaged roots are especially vulnerable, and they can fry quickly. Transplanting during the morning is better than transplanting at noon, but it still means they will have to face the noon sun within a few hours. But if you transplant late in the day, it gives your seedlings all night and the next morning to recuperate. Just be sure to water your poppy bed the following morning so they are well-hydrated for their first brush with the noon sun after transplantation.
This raises another point. You always want to make sure your seedlings are well-hydrated before transplanting. Just like making cuttings, transplanting offers a situation that may decrease the plant’s ability to absorb water. So you want to make sure your reserves are fully stocked ahead of time. Always be sure to fully water your poppy seedling tray about an hour before actually doing any transplanting. This will give the poppies adequate time to suck up what they need before the process begins.

We mentioned before that poppies have a reputation for being difficult to transplant. The key to transplanting properly involves doing so at a young age and not damaging the roots. In order to minimize damage to the poppy’s roots, detach a small clump of poppy seedlings from the main network that you’ll have growing in your tray. This will help you gather all the soil around one or two central plants in the middle. The plants on the outside will suffer more damage, leaving the plants in the middle relatively protected. Using an aluminum tray for germination also allows you to go all the way to the bottom so that you can gather all of the soil below the plants without damaging the lower roots.

Next, dig a hole in your prepared poppy bed that is about twice the size of your root ball and bury your clumps in small mounds that are spaced about 12”-18”. Most people plant in rows, but feel free to adapt this spacing to a particular pattern or design that you have in mind. Once the clumps have adjusted to the ground, you want to keep the soil a little on the dry side. At this point, you will also want to thin out each clump, leaving only the best poppy plants to survive.

Mulching

Whether you’re transplanting or direct sowing, it is a very good idea to mulch your bed with some straw. Mulching will help your transplants adapt because it will minimize evaporation from the soil. For a detailed explanation on the benefits of mulching, you can refer to our article, “Why Mulch?”. But to describe briefly, mulching will help maintain proper soil moisture, help shade young poppy seedlings and help keep your poppy seeds in place during watering or rain. Many people neglect this step, but it can really make a difference in your success. If aesthetics are a concern, there are various mulches you can buy. Otherwise, straw is inexpensive and works great as mulch. You simply want to cover the entire area between your poppy plants with about a 1”-2” layer of straw. Mulch right up to the stems of each poppy plant. As the poppies grow larger, you can thicken the layer. Ultimately, you should find that this small step makes a difference in your results and cuts down on the effort you will need to put into growing.

Thinning Out

Crowded poppies must compete for space and will ultimately suffer. Whether you’re direct sowing or you transplanted clumps of poppy seedlings, you ultimately want to thin out your plant population to reduce competition. Thinning involves plucking out the competitor plants and leaving only the best poppies to grow to maturity. Young poppy seedlings will appear as small rosettes that some people compare to lettuce. At about 2”-3” in height, you want to start thinning out your poppy seedlings. Early on, poppies can grow fine together, so you do not need to pluck every one right away. But that is the 2-3” mark is a good time to start the process. If you’re direct sowing, you’ll have a lot more thinning to do than if you’ve transplanted. But you will ultimately aim for a final spacing of about 12”-18”. By the time your poppy seedlings are 4”-5”, you should have a good idea of which ones to thin out and which to leave. So that is the point when you should have thinned out your bed to the target spacing. But whereas many growers tend to thin all at once, we suggest a more making-space-as-needed approach until the 4”-5” mark so that you can keep selecting from the best performing poppies.

Watering

Poppy plants are somewhat prone to rotting, so they should be allowed to dry out between waterings. Mature plants only need to be watered every several days, especially if you’re mulching. It is also recommended that you water away from the stem to keep rot to a minimum and to help the roots spread out. Consider using a soaker hose. Otherwise, if you’re manually watering, try putting the hose to the ground to soak the soil rather than spraying. Once the petals have fallen off your poppies, it is common to hold back watering unless the plant appears to be drying out. This will ensure that the plant and seeds do not rot until they can be harvested.

Fertilizing

Poppies prefer a neutral ph. Use a fertilizer with a neutral ph to ensure that the ph does not fall below 6. Most growers use organic fertilizers such as bloodmeal or an organic liquid fertilizer. Begin fertilization when the plants are about 10” tall. A fertilizer that is high in phosphorus, which is the middle number in the ratio found on fertilizer packaging, is ideal for poppies. The nitrogen level, which is the first number, should be comparatively low. Fertilize your poppies according to the instructions on the packaging of the fertilizer you’re using.

Harvesting

Each poppy pod can produce hundreds, usually thousands of poppy seeds. When the crown on the poppy pod stands up and the pod takes on a chalky texture, it is time to harvest. You can cut the poppy pods from the stems and let them dry in the sun or in a dry area such as a boiler room. When the poppy pods are dry, cut off the crowns with a pair of scissors. This will open the top so you can pour out and collect the poppy seeds. After gathering your whole poppy seed harvest, run it through a strainer to sift out all the broken pod parts. Even if you’ve harvested a few pods, you should have plenty of seed to grow again the following year. But just like you thinned out your crop to select the best plants, you should focus your poppy seed collecting on just the best plants.

SHOP OUR STORE FOR A HUGE SELECTION OF OVER 35 TYPES OF POPPY SEED. 

Posted on

World Seed Supply’s Easy Guide to Morning Glory Growing

Morning Glories are a classical favorite, and they are the first flowers many new growers start out growing. Morning glories are the ideal starting point for new growers because they are easy to grow, can withstand a wide range of environments and they have amazing coloration. The following guide will outline some basic instructions that can be used for ipomoea tricolor, ipomoea nil and ipomoea purpurea, which includes popular forms such as Heavenly Blue Morning Glory Morning Glory, Flying Saucers, Grandpa Ott’s Morning Glory, Pearly Gates and Scarlet O’Hara Morning Glory.

Morning glories can be grown in pots or in the ground. But most growers choose to grow morning glories in the ground because they can take up a lot of root space. On the other hand, growers who do not have ground space, such as urban growers, have no choice. In that case, it is important to select the largest pot possible. You want something that is large enough to grow tomatoes. A two foot diameter pot that is about 1.5 feet high is sufficient. You will also need a good amount of soil to fill this pot.

Morning Glories can grow in most soil types, even poor soils that you might not expect to be good for growing plants. In fact, morning glories actually seem to prefer average soil over very fertile soil. Average soil will give you better flower production in most cases. The soil should also be loose and well-draining. If you’re growing in containers, you want to add extra drainage because containers tend to cause soil to become more compact and less well-draining. Perlite, a type of volcanic glass that resembles little white balls of pumice, is a great additive to potted soils to keep it airy and well-draining. If you’re adding perlite, mix in about ¼ the volume of your total soil mixture. If you do not have perlite, you can also mix in about 1/3 sand. You should avoid soils that are high in clay though because they are most easily compacted.
If you’re growing in the ground, then you might want to prepare your bed in advance. Unprepared ground tends to be compact if you’ve never grown anything in that area. So you just want to till the soil with something such as a shovel or garden hoe to loosen it up a little. Four to five inches is deep enough. If you already have a flower bed or planter, your soil might be loose enough already.

Morning Glories, being a vine, require structure to climb. Morning glories can sprawl out along the ground, but if you have any other plants in the same area, the morning glories are likely to overtake them. When selecting your site, you usually want to utilize the morning glory’s climbing tendency to decorate your landscape. The mailbox is one great place to grow morning glories. Just dig out a small bed around the post of your mailbox and allow your morning glories to climb up and around your box. You may have to train the plants in the beginning to find their way up. But after the first few vines find their way up, the newer vines will use them to latch onto.

Other common structures that people use for growing morning glories include trellis, chain link fences, lattice, gutter leaders, bushes, telephone poles and even wires. If you want to assist your vines in starting up something like a wooden post, you can hammer in a few U-nails and guide the young tips of the plant through them. If you’re growing in containers, you can either place the entire pot near this type of existing structure, or you can use a tomato cage.

Aside from choosing a location that offers structure to climb, sunlight is important. Morning glories can sometimes engulf surrounding plants because they are gluttons when it comes to light. It is best to choose a location in full sun. You can still get plants to grow in less light, but they will usually have fewer blooms. Due to their high light preference, morning glories are usually not grown indoors, although they can be if you use supplemental lighting.

Although morning glories are not usually grown to maturity indoors, it is quite common to start them indoors to get an early start on the season. Morning glories transplant well, and the early start may mean quicker blooming. If you’re in a warmer climate, you are probably better off starting outdoors to keep things simple and keep your windows free for other plants with more pressing needs. However, you may just want to start the seedlings indoors for the first week or two just because it is easier to control germination conditions indoors. In the north, starting indoors will give you a head start and give you something to do while it is still cold outside. But starting indoors is not necessary to get nice morning glory blooms by summer.

Many grow guides suggest pretreatment for your morning glory seeds. Most commonly, these guides recommend nicking the seed coat and soaking the morning glory seeds in water for 24 hours prior to planting. These are techniques that are commonly employed for Hawaiian Baby Woodrose seeds as well. The two flowers are in the same family. But Hawaiian Baby Woodrose has a hard seed coat, and so these techniques are much more appropriate. The morning glory seed coat is much softer, and moisture has no problem penetrating. We have soaked morning glory seeds in water, and in many cases they sprouted within a day without any nicking. So these experiences combined with the fact that nicking is done to allow moisture to penetrate hard seed coats and the fact that morning glory seeds have a soft seed coat, there is no reason to nick the seeds.

Soaking morning glory seeds will allow the seeds to germinate right away in the water at room temperature. This is obviously beneficial for maximizing and speeding up germination. But the seedlings can sometimes be waterlogged from this method, which may lead to more seedlings rotting later on. If you germinate your morning glory seeds in a container of moist seed starting soil, you should still end up with about the same germination rate with less risk of rotting. Just sow them at a depth of ¼”. But usually a pack of morning glory seeds is enough for the average grower anyway so that it does not make much difference which way you start them. With that in mind, you might as well go with what you find easier. What’s most important to realize is that despite nicking and soaking being part of most morning glory growing instructions, these steps are entirely optional.

If you’ve decided to pre-sprout your morning glory seeds you will need to transplant them. You can sow them directly in the ground. But you might be better off letting them take hold in pots indoors. As mentioned previously, it is easier to control conditions indoors. Sometimes the surface of the soil outside might dry out causing your morning glory seedlings to die, even though they’ve sprouted already. Instead, try keeping your seedlings indoors until they develop their first set of true leaves. The first set of leaves sort of resembles dragon fly wings. The true leaves are the set that follows those. Plant your sprouted morning glory seeds with the root facing down with a spacing of about 2” apart. Keep them in a well-lit (preferably south-facing) window until they develop true leaves.

When it’s time to move your morning glories outside, don’t move them into the ground right away. Instead, move the pot outside in a shady area where the soil is not likely to dry out. Leave them there for a few days. Keep an eye on the seedlings just to make sure they are adjusting to the harsh world of the outdoors. If you see any signs of wilting, you can bring them back in until they recover. Try moving them back out again the following day, and repeat the process if necessary. Morning glories are rather hardy though, so they usually acclimate just fine. After a few days outside, transplant them to the ground once the sun has started to go down.

Morning glories are a very low maintenance plant. Once they’re in the ground, the plants will pretty much grow themselves. Morning glories do not require any fertilization. Early on, you should keep them well-watered. But usually rain water will be enough once the plants are established. That is not to say you cannot water them more often. It is just saying that you can get away without much maintenance. You may want to guide the growing tips up whatever structure you’ve provided. But otherwise, you can just sit back and enjoy.

In the fall, you can collect your morning glory seeds. After the flowers fall off, they will be replaced by a capsule, which usually contains 4-6 seeds. It is important to wait until the capsules turn brown and crispy before harvesting the seeds. Otherwise, your morning glory seeds will be immature and shrivel up upon drying. The mature seeds should basically be dry, but it may be a good idea just to place them in a dry area for a week before storing them. The seeds do not mature all at once. You can keep harvesting from the first ripening until the plant dies. But in many cases, depending on your location and the species, morning glories will reseed themselves in the area that you planted.

SHOP OUR STORE FOR A SELECTION OF MORNING GLORY SEEDS.

Posted on

World Seed Supply’s Guide to Growing Heimia Salicifolia & Myrtifolia

Heimia Salicifolia is an important Aztec herb featured on the statue of Xochipilli.  Several unique alkaloids have been isolated from these heimia species that have been reported to have tranquilizing and anti-inflammatory properties.  Heimia Salicifolia and myrtifolia are extremely similar both in appearance and active alkaloids.  In fact, reports indicate that myrtifolia may be more active than salicifolia despite the popularity and historical significance of salicifolia.  So the information in this guide can be used to grow either species. With the exception of the fact that the seedlings start out so tiny, heimia is a very easy plant to grow and is good for beginning growers. It can be grown easily indoors and will tolerate a wide range of environments.

GROWING FROM SEED
Heimia seeds are extremely small, like dust.  In nature, the wind would carry Heimia seeds, dropping them on the surface of the soil, where they would eventually sprout. No amount of burying is necessary. It is also a general cultivation rule that the size of the seeds determines how deep the seed should be buried. In the case of really tiny seeds, they should be surfaced sowed, meaning that they should simply be pressed into the surface of the soil allowing light to reach them. Before sowing the seeds, make sure the soil is misted lightly so that the seeds have available moisture to absorb.
After sowing, you want to cover the container with a piece of clear plastic to seal in the humidity. If the soil is moist enough and you mist regularly, they will grow without the plastic, but it makes life much easier. Plus, with the plastic on, you may not have to water because the evaporating water will condense on the plastic and drop back to the soil. If at any point you notice the soil is drying out, simply remove the plastic and mist the soil with a fine mister. This will occur more often if your temperature is higher. Be sure to add the correct amount of water to your soil and then remove the excess water collected on your plastic so that it doesn’t drop back into the soil and cause too much soil moisture. Although mature plants will take as much water as you can give them, I have an unconfirmed suspicion that the seeds can be drowned. A temperature of about 70 degrees F should be fine. Using florescent lights or placing in front of a sunny window will both work for germination and plant growth.
From seed until it is a few inches high, Heimia S. grows painfully slow. Let them take as long as they need. It won’t continue like this forever. In the meantime, just keep the plastic on and make sure the soil stays moist. Be sure to mist if needed. When the seedlings are about 1/2?-3/4? you can take the plastic off. Continue to keep the soil very moist. At 2 1/2? it is an ideal time to transplant.
The soil you use in the new pots should be similar to the soil you used for germinating. Have your pots set up beforehand so that you can quickly transfer the seedlings without them spending much time in the open air. When transplanting, the most important thing to consider is to disturb the roots as little as possible. You’re most likely going to have a million roots tangled together, so some disturbance will inevitably occur. Some gentle prodding with a fork might be useful to help separate the roots.
Keep the seedlings out of any intense light and heat as they are especially vulnerable after transplanting. If at any point you notice wilting, make sure to water and put a plastic baggie over them to seal in humidity. You should keep this continually moist. Heimia plants are amazingly resilient to wilting, but they enjoy as much water as you can give them.  Heimia Salicifolia, once established, will prefer partial sun. If under-watered, H. Salicifolia plants will wilt drastically, looking as if they are dead. They may also drop leaves. If you catch it within the first day of this you can almost always bring it back by saturating the soil. Any dead material should be cut back, which will result in a fuller plant.
HEIMIA CUTTINGS
Heimia plants can be reproduced by cuttings from mature plants. But since heimia tends to have woody stems, they can be a little tougher to root than other Mexican entheogens like calea zacatechichi or salvia divinorum.  To minimize the difficulty of the process, it is best to select the newest growth because it is likely to be the softest.  Soft growth roots easier than woody growth.  You also want to use a rooting hormone, which can be either a commercial rooting hormone or a natural tea made of white willow bark (salix alba).  Commercial rooting hormones typically contain indole-3-butyric acid and can be found in powder or gel form. The gel is preferred since it sticks to the stem even in water.
Another trick with rooting heimia salicifolia is to remove all but the top few leaves. This will lighten the load on the plant because it will not have to support so many leaves.  A cutting that has been cut from the support of the roots on a mother plant is like a parent that has lost his or her job.  By sending the kids off to live with grandma, or by trimming off some of the leaves in the cutting’s case, the parent has a better chance of surviving on savings and what little money he or she can scrounge without a formal income.  So in those terms, the cutting can live on stored water and what little water it can draw up through its unrooted stem.  Soft stems usually absorb water quicker, which is probably one reason why they tend to be easier to root than woody stems.
WE OFFER SEEDS AND LIVE PLANTS OF HEIMIA SALICIFOLIA AND HEIMIA MYRTIFOLIA.  WE ALSO SUPPLY HEIMIA SALICIFOLIA DRIED FOLIAGE.